How to Configure Yahoo API for Magento
In this article you will learn how to enable and configure Yahoo API, in order to do so you will need to login to Yahoo developer Network and create a Yahoo application.
Create yahoo account if you do not have one. Then, follow the step-by-step instructions below.
Step-by-Step action:
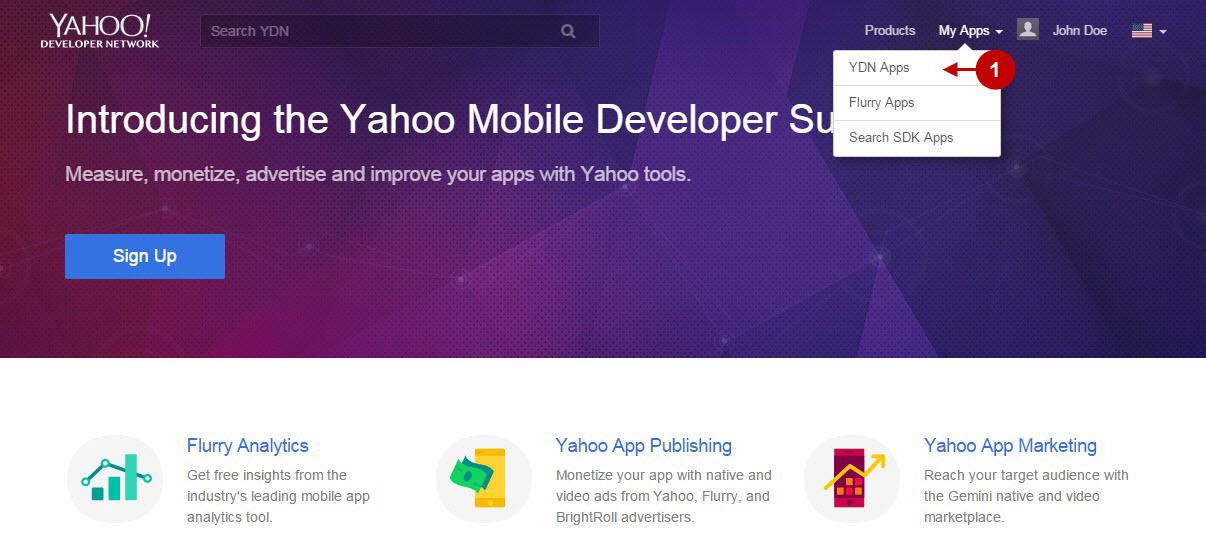
- Click on the “YDN Apps” button in the menu that will appear after you place the mouse cursor over “My Apps” section.

If you haven’t created any applications yet, then you will see a page as shown below.
Step-by-Step action:
- Click on the “Create” link to start creating your Yahoo application.
- If you have previously created applications, use the “Create an App” button to add another one.

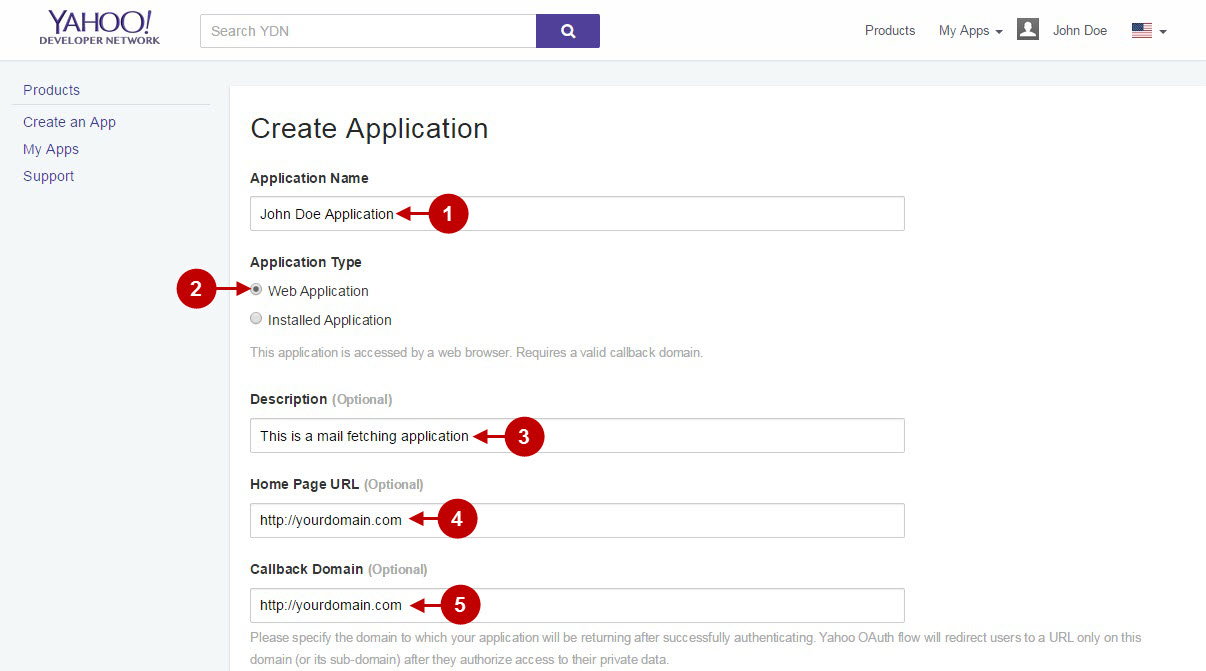
The screenshot below shows the key data to be entered if you want to create a new application. Enter data as shown below:
Step-by-Step action:
- Indicate your application name.
- Select your application type to be “Web Application”.
- Provide short description of your application.
- Enter your Home Page URL.
- Indicate your callback domain.

Step-by-Step action:
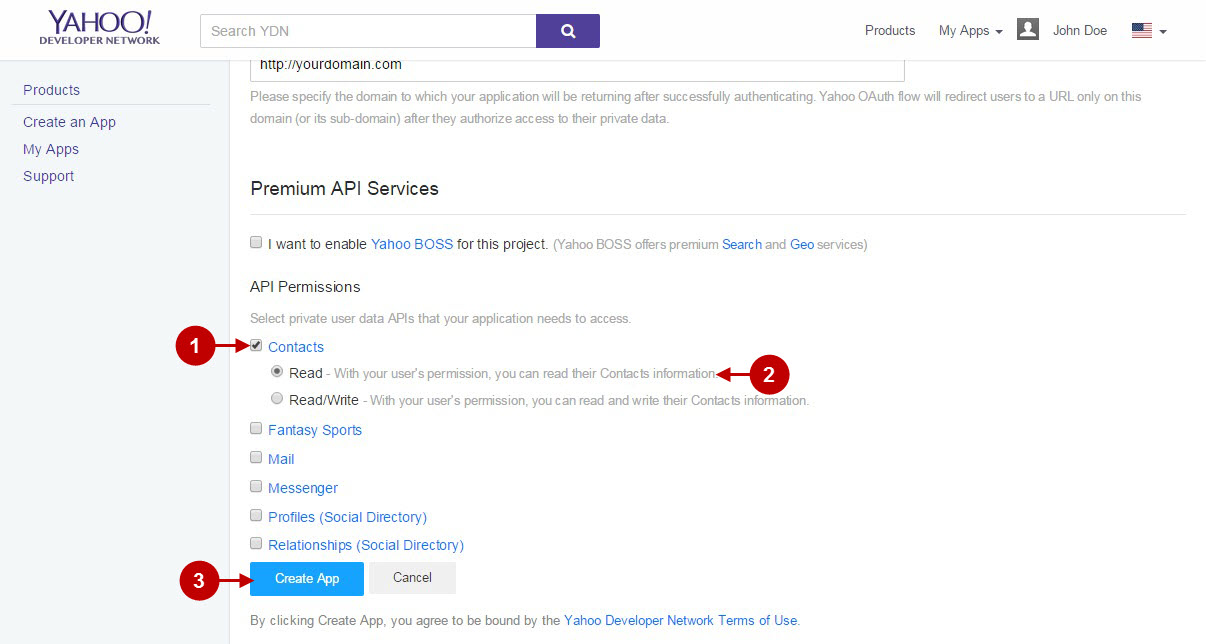
- From the API Permissions select “Contacts”.
- Click on “Read” radio button.
- Press the “Create App” button.

Step-by-Step action:
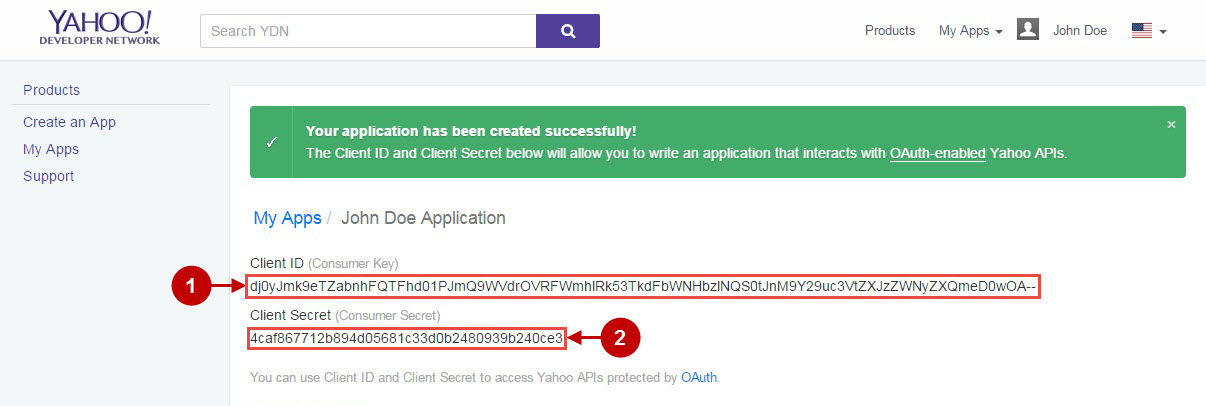
- Here you can find “Client ID” of this application, copy it to your clipboard.
- Here you can find “Client Secret” key of this application, copy it to your clipboard.

Yahoo Integration in Magento Invitations Extension
In this step you must update your Magento Invitations Extension configuration. In your magento admin panel, go to “Admin panel” -> “Plumrocket” -> “Invitations” -> “Manage Address Books” -> “Yahoo Address Book”.
Step-by-Step action:
- Paste “Client ID” to according field of your Yahoo backend tab.
- Insert “Client secret” to according field of your Yahoo backend tab.
- Press “Save” button to save your settings.

After you have made these changes – make a test of Magento Invitations extension with Yahoo Address Book.
Next Step > Return to Invitations API Reference
