Here you will learn how to correctly configure the Magento Inspiration Wall Extension.
Configuring Inspiration Wall Extension
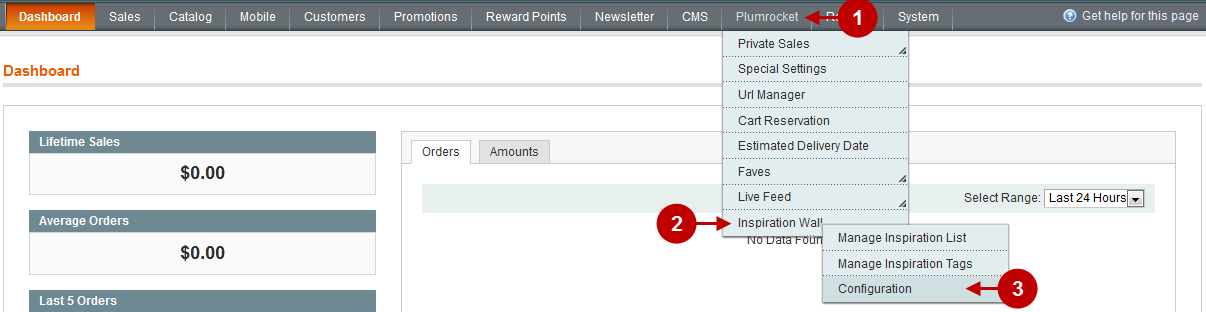
This section allows you to manage general Module settings. To access the configuration page, follow the instructions below:
Step-by-Step action:
- Press the “Plumrocket” tab in the menu.
- Select “Inspiration Wall”.
- Select “Configuration”.
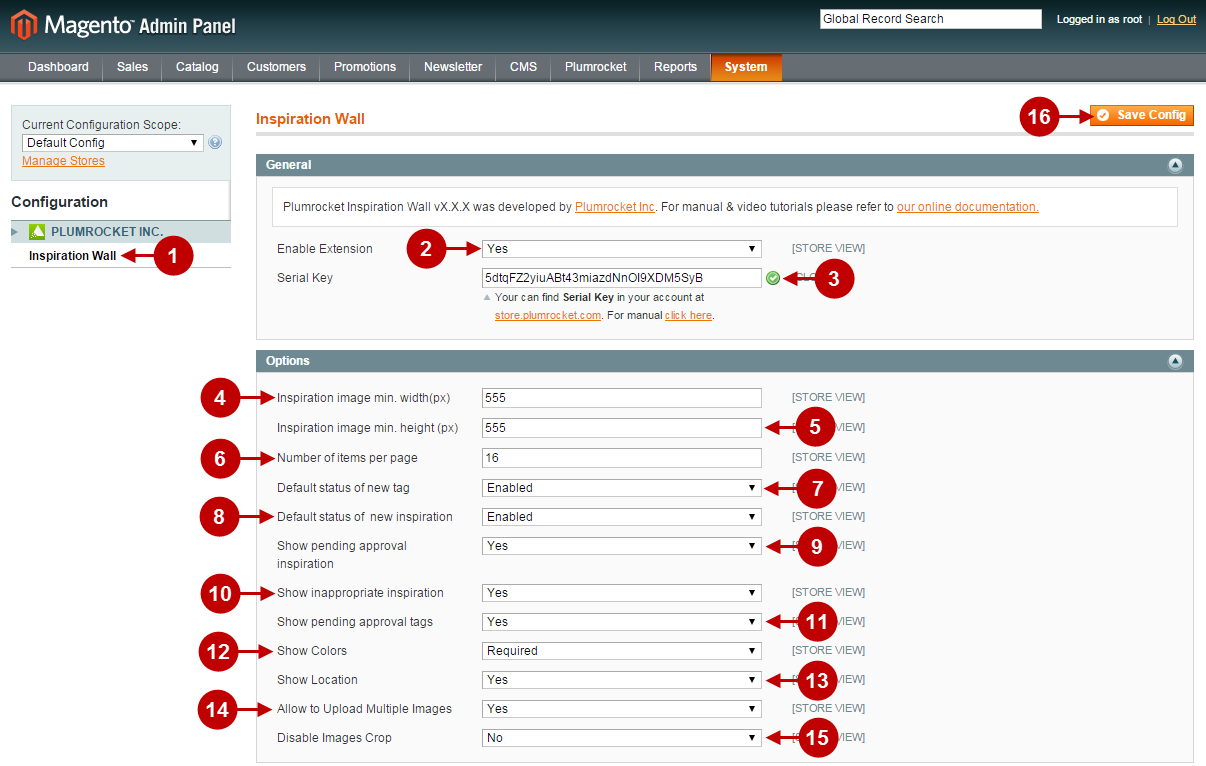
Below is the Inspiration Wall configuration page. You can see the detailed description of fields that you can edit. The changes will be enabled after you press the “Save” button.
Detailed description:
- Select the “Inspiration Wall”.
- Option “Enable Plumrocket Inspiration Wall”: Select “Yes” or “No” to enable or disable the extension.
- Option “Serial Key”: enter unique serial key provided after the purchase for legitimate and proper functioning of your extension. Note: In most cases this field will be pre-filled with serial key automatically and the green check mark will be displayed. Otherwise please read article Serial Key Activation in order to find and paste your serial key manually.
- Option “Inspiration image min. width(px)”: You can set minimal width of the Inspiration image to be displayed.
- Option “Inspiration image min. height(px)”: You can set minimal height of the Inspiration image to be displayed.
- Option “Number of items per page”: You can set number of items per page.
- Option “Default status of new tag”: You can set default status of the new tag.
- Option “Default status of new inspiration”: You can set default status of the new inspiration .
- Option “Show pending approval inspiration”: defines whether the inspiration pending approval should be displayed on the page.
- Option “Show inappropriate inspiration”: defines whether inappropriate inspirations should be displayed on the page.
- Option “Show pending approval tags”: defines whether pending approval tags should be displayed on the page.
- Option “Show Colors”: Choose whether to show colors for inspiration. (Possible options are: “no” – color is not displayed; “optional” – the color is displayed but the field is not obligatory; “required” – the color is displayed and the field is obligatory.)
- Option “Show Location”: Choose whether to show the location of inspiration
- Option “Allow to Upload Multiple Images”: Select “Yes” in order to allow uploading several images for inspiration, and “No” in order to disable this option.
- Option “Disable Images Crop” : Choose whether to allow cropping images if their size is inappropriate.
- Press “Save config” to save the configuration changes.
Manage Inspiration List
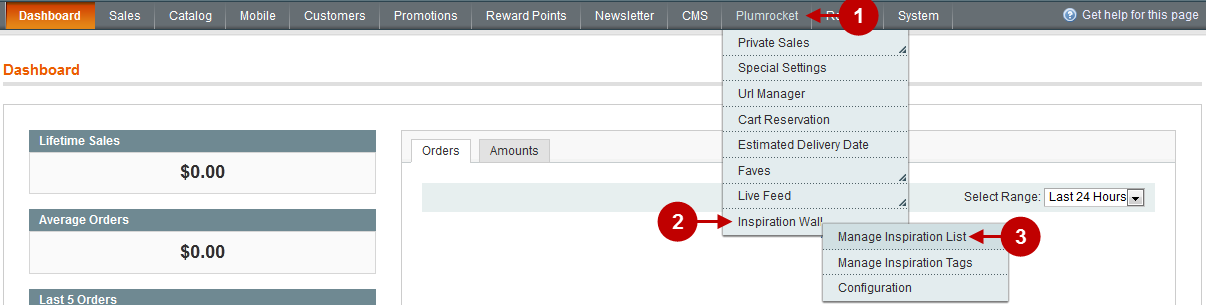
In order the access the Inspiration Wall configuration page you will have to log in first and follow these instructions:
Step-by-Step action:
- Press the “Plumrocket” tab in the menu.
- Select “Inspiration Wall”.
- Select “Manage Inspiration List”.
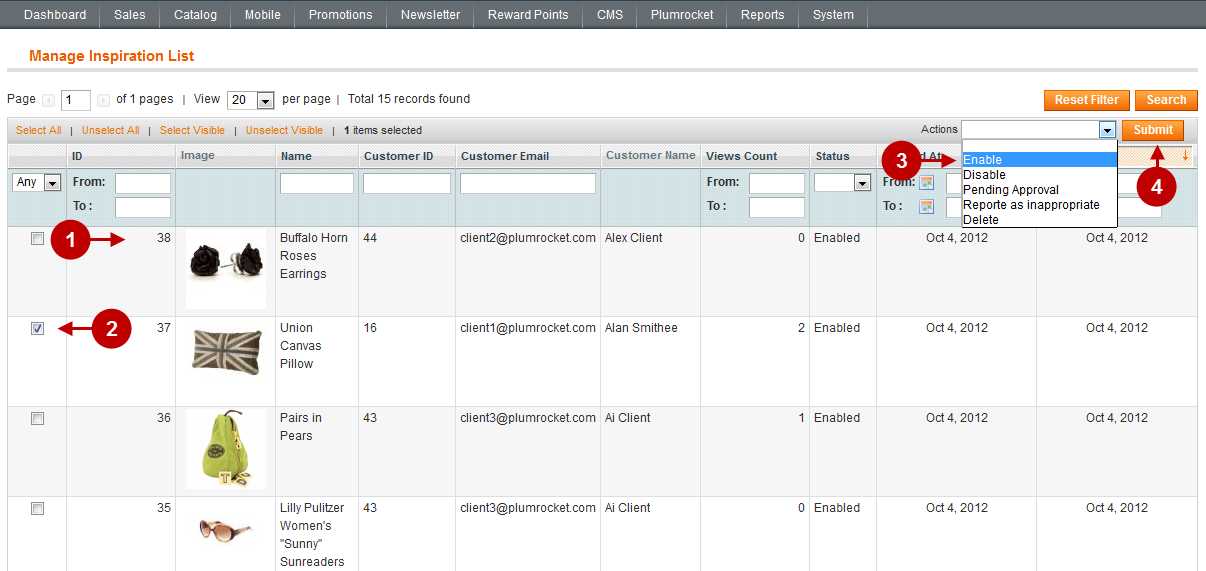
Then you will see the page where all existing Inspiration Wall elements are displayed.
Detailed description:
- Choose any element from the list to edit it.
- Tick the element you want apply the actions below to.
- Choose the action you want to apply to the selected Inspiration Wall elements from the drop-down menu list. Possible options are Enable, Disable, Pending approval, Report as inappropriate and Delete.
- Press “Submit” button to enable settings.
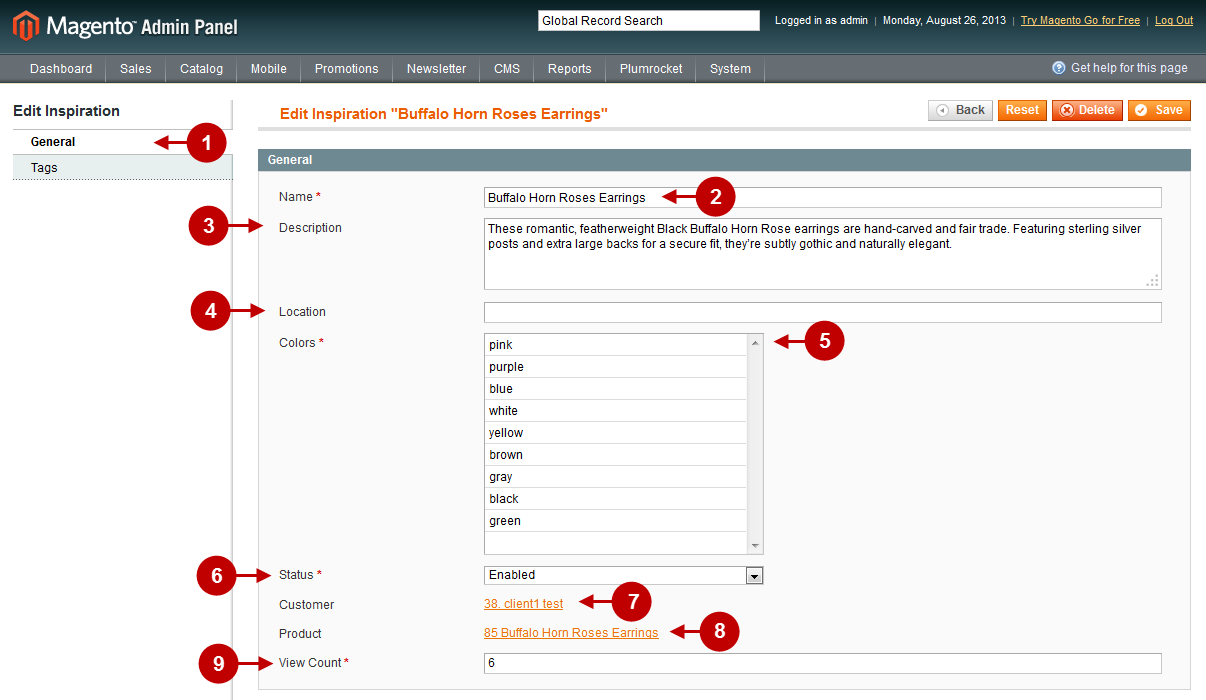
Each element can be edited via the following editing tabs: General, Image and Tags. Below is the detailed description of each tab.
Detailed description:
- Select the tab “General”.
- Name: Enter the name of Inspiration.
- Description: Enter the description of Inspiration.
- Location: You can configure the location of objects in the image here.
- Colors: Select the color for your Inspiration (You can choose several colors by holding the CTRL button).
- Status: You can select the status of Inspiration, for instance, “Enabled”, “Disabled”, “Pending approval”, or “Reported as inappropriate”.
- Customer: It indicates the customer who has created the Inspiration.
- Product: It defines the product related to Inspiration (if no product is indicated, there will be a blank space here – undefined).
- View Count: You can set the number of Inspiration page views.
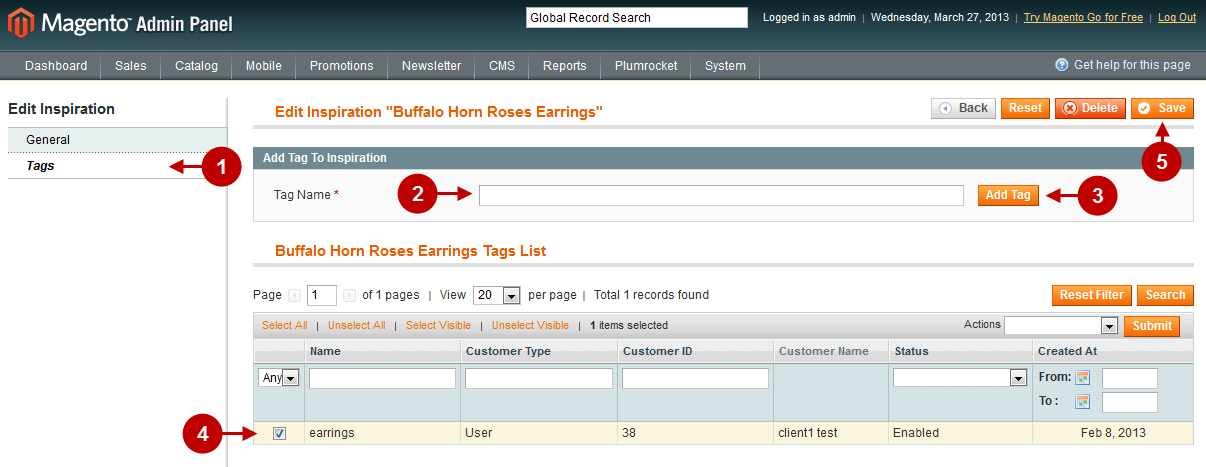
Step-by-Step action:
- Select the tab “Tags”.
- Enter the tag name here.
- Press here in order to add one more tag to the list of tags that will be used for this Inspiration.
- Select the tags from the list you want to apply for this particular Inspiration.
- Press “Save” to save the changes.
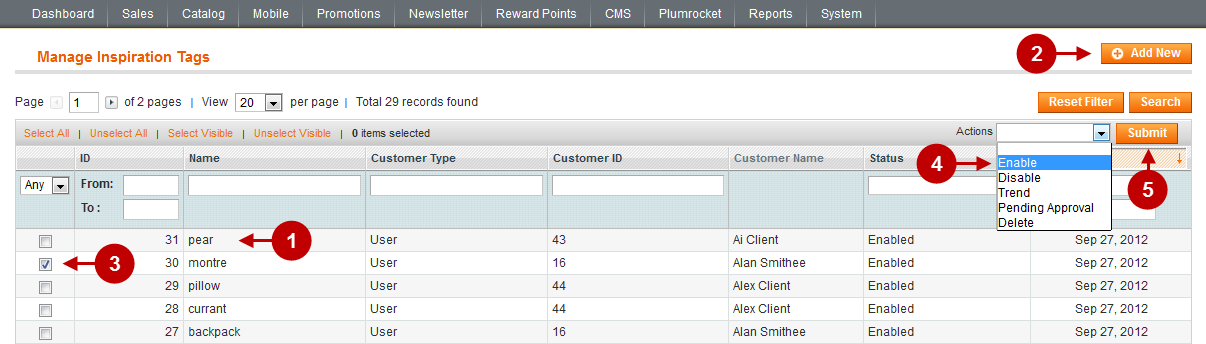
Manage Inspiration Tags
Tags are used to mark Inspiration. This page allows you to manage tags: to add, edit and delete them. To access the tags management page, follow the instructions below.
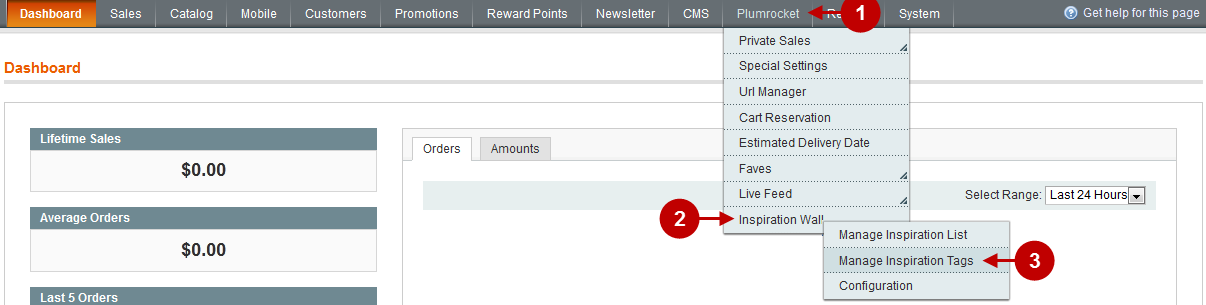
Step-by-Step action:
- Press the “Plumrocket” tab in the menu.
- Select “Inspiration Wall”.
- Select “Manage Inspiration Tags”.
Detailed description:
- Select any element from the list to edit it.
- Press “Add new” to add a new tag.
- Tick the elements you would like to apply one of the suggested actions to.
- Choose the action you need form the drop-down menu. Possible actions are: enable, disable, trend, pending approval and delete.
- Press “Submit” to enable new settings.
After you choose the element you want to edit or click on “Add new”, you will see a page like in the screenshot below.
Step-by-Step action:
- Open the tab “General”.
- Enter new name for the tag.
- Select any action from the drop-down menu to indicate the tag status. For instance, “enabled”, “disabled”, “trended” or “pending approval”.
- You can see the customer who has created this tag.
- Press “Save” to enable changes.

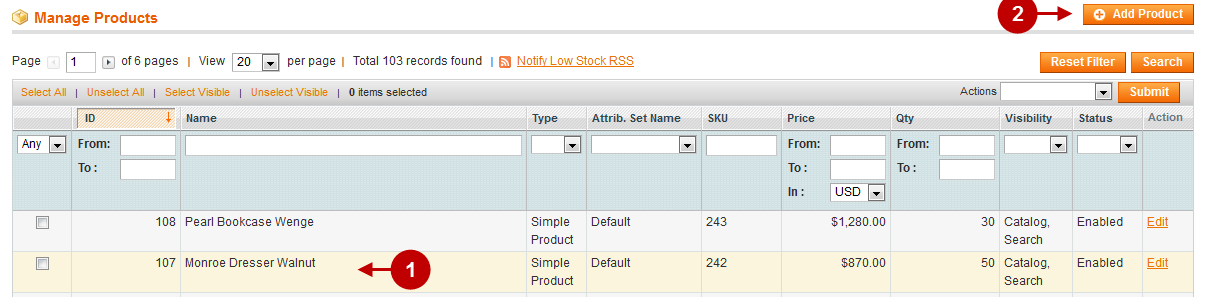
Products in Inspiration Wall
Inspiration Wall can include both images, and new products. To learn how to add products to Inspiration Wall, follow the instructions below:
Step-by-Step action:
- Select “Catalog”.
- Select “Manage Products”.

Step-by-Step action:
- Select the product from the list.
- Or click on “Add new product” and press “Continue”.
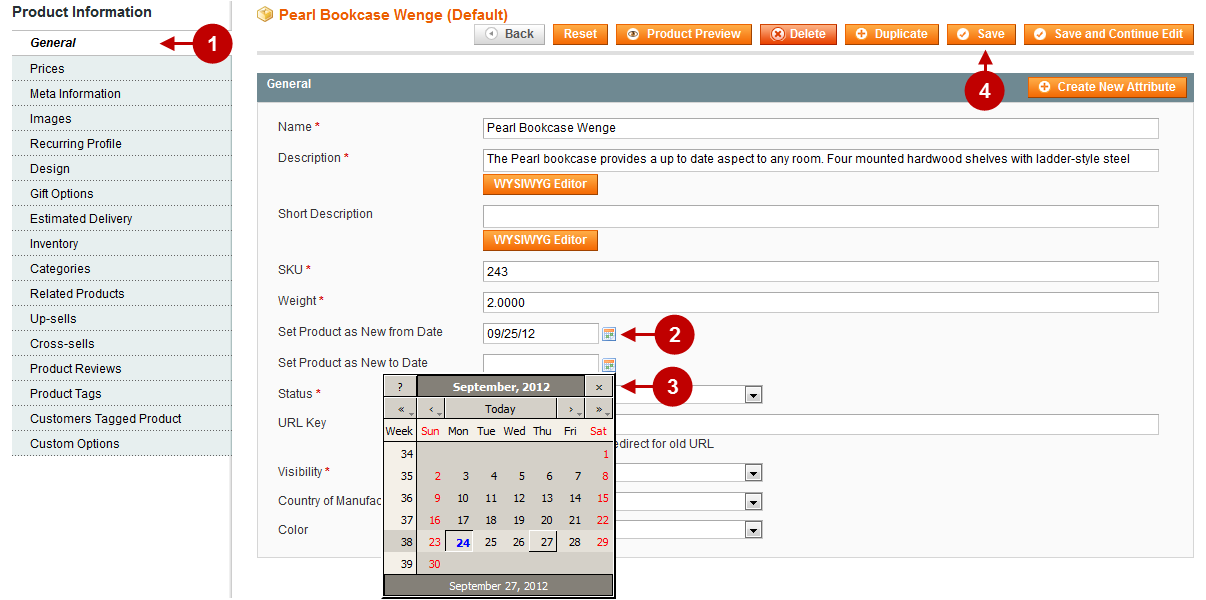
Then you will see the Product configuration page. Using the Magento Inspiration Wall Extension you will be able to set the time frame when the product will be displayed in Inspiration Wall.
Detailed description:
- Select the tab “General”.
- Option “Set Product as New from Date”: allows you to set the date when the product will first appear as new in Inspiration Wall.
- Option “Set Product as New to Date”: allows you to set the date when the product will disappear from Inspiration Wall.
- Click here to save the changes.
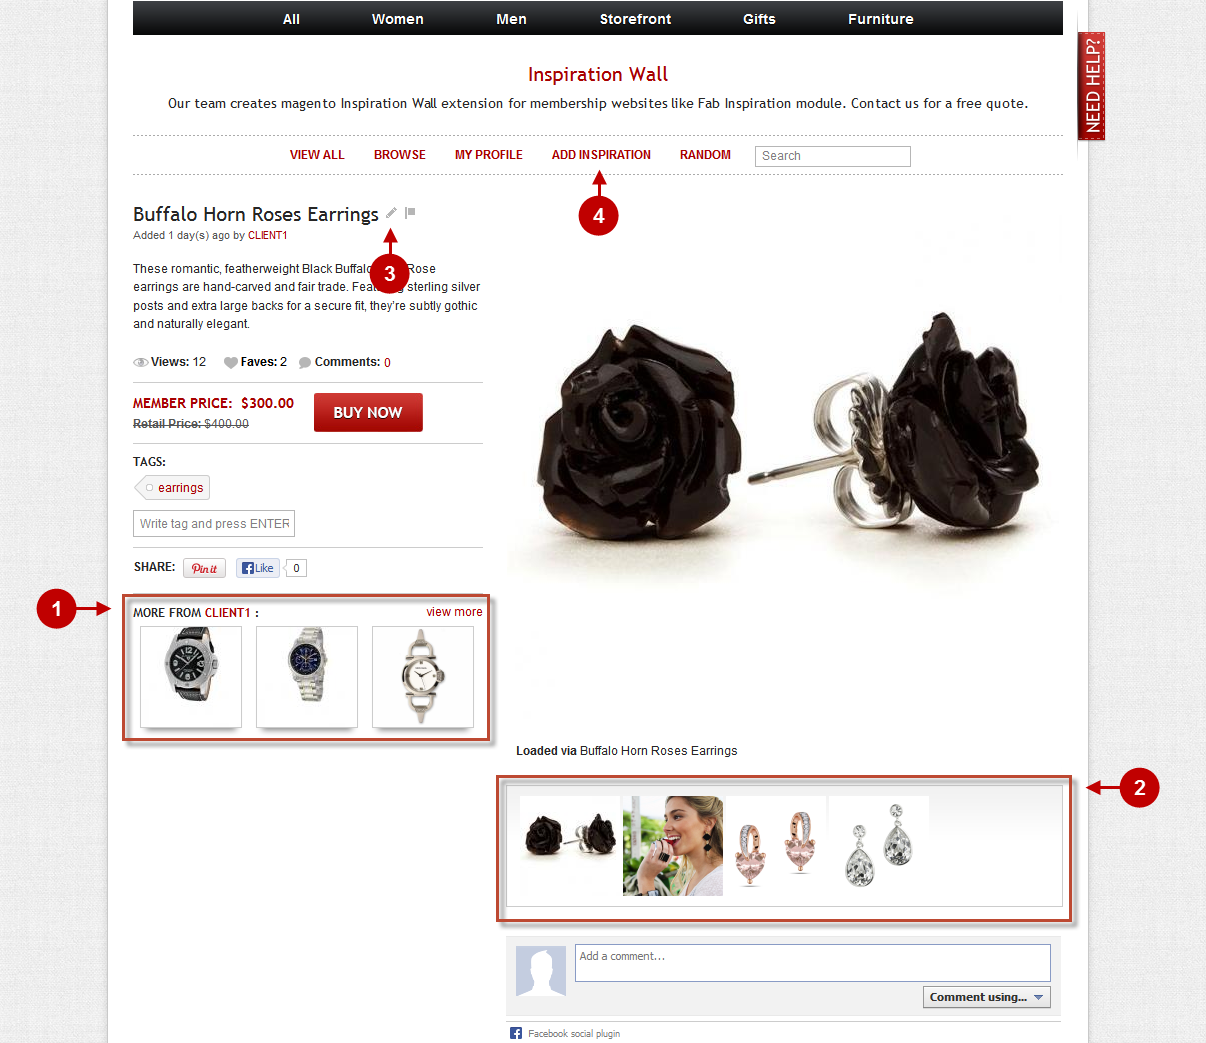
Inspiration Wall in the Front-end
Then you will see the product in the Inspiration Wall block of the front-end as shown in the screenshot below.
Detailed description:
- Other inspirations in the Inspiration Wall . This section will include three randomly selected inspirations chosen from those previously created by the user. Every time you reload the page, there inspirations will be replaced.
- Inspiration Image . It is possible to add more images to this inspiration and preview them here.
- Press here to edit the inspiration you’ve created.
- Press here to add a new inspiration.
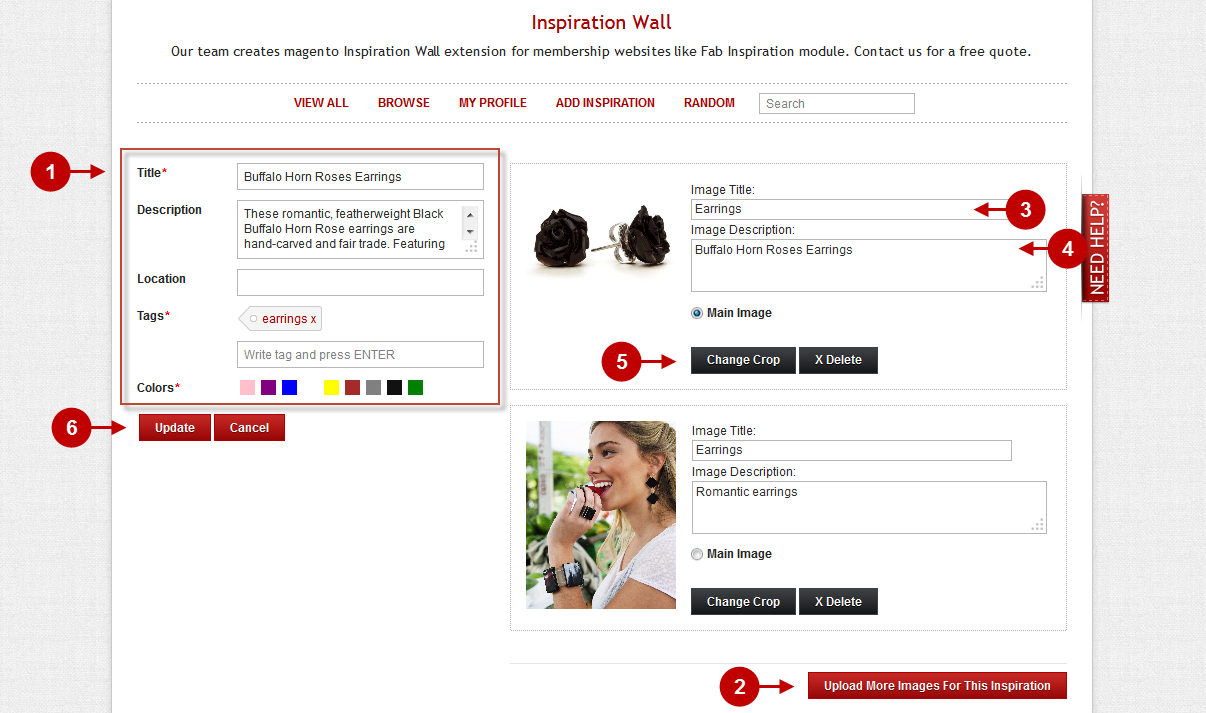
Below you will see the page that will appear after you choose to edit or create a new inspiration.
Detailed description:
- You can add or edit the inspiration info here.
- Press here to add more images to this inspiration.
- Enter the image name.
- Provide image description here.
- Press here if you want to change the image crop.
- Press here to enable the changes for the already existing inspiration or to create a new one.
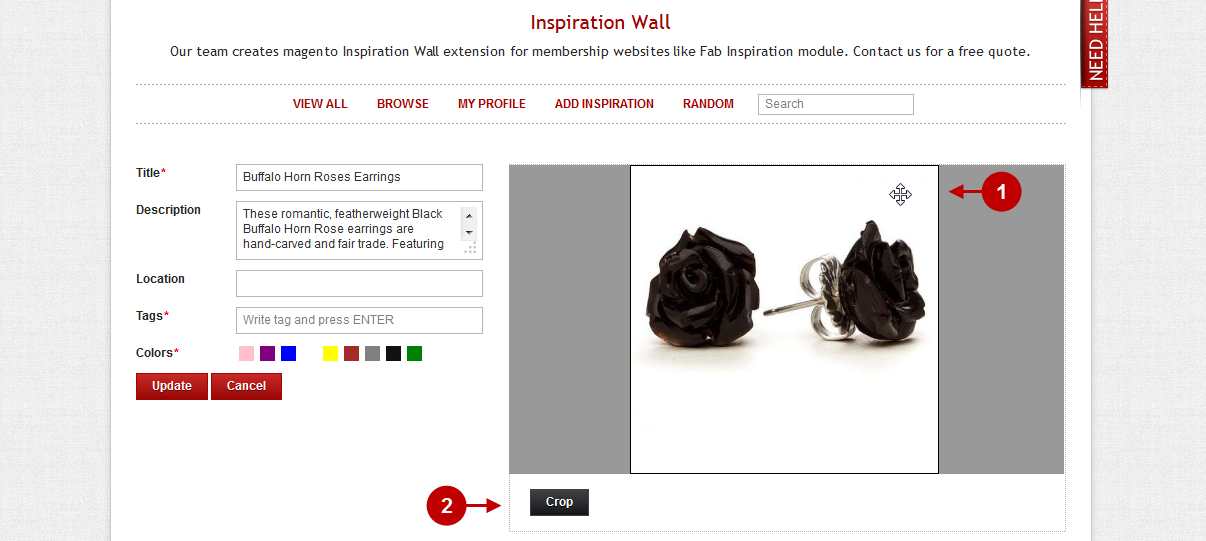
Below you will find how to crop an image:
Detailed description:
- Select the image field that has to be cropped.
- Press the Crop button to change the image.