In this article, you will learn how to perform Magento 2 inline translation.
Step 1. Create different store views for different languages
First, make sure you have different Store Views for different languages. Then, you need to enable inline translation in the Magento 2 backend and translate elements in the frontend. Please follow the quick guide below to correctly perform Magento 2 inline translation.
Step 2. Enable inline translation in the Magento 2 backend
Step-by-Step action:
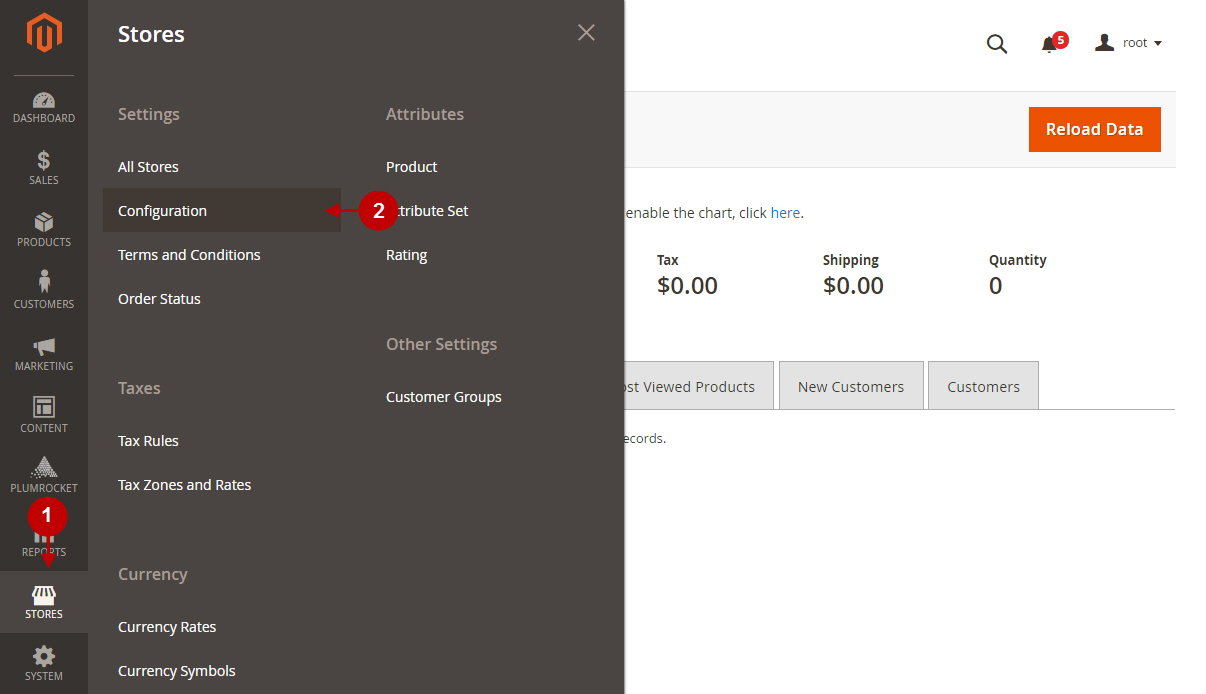
- Go to Store in your Magento 2 Admin Panel.
- Select the Configuration section in the Settings tab.

Step-by-Step action:
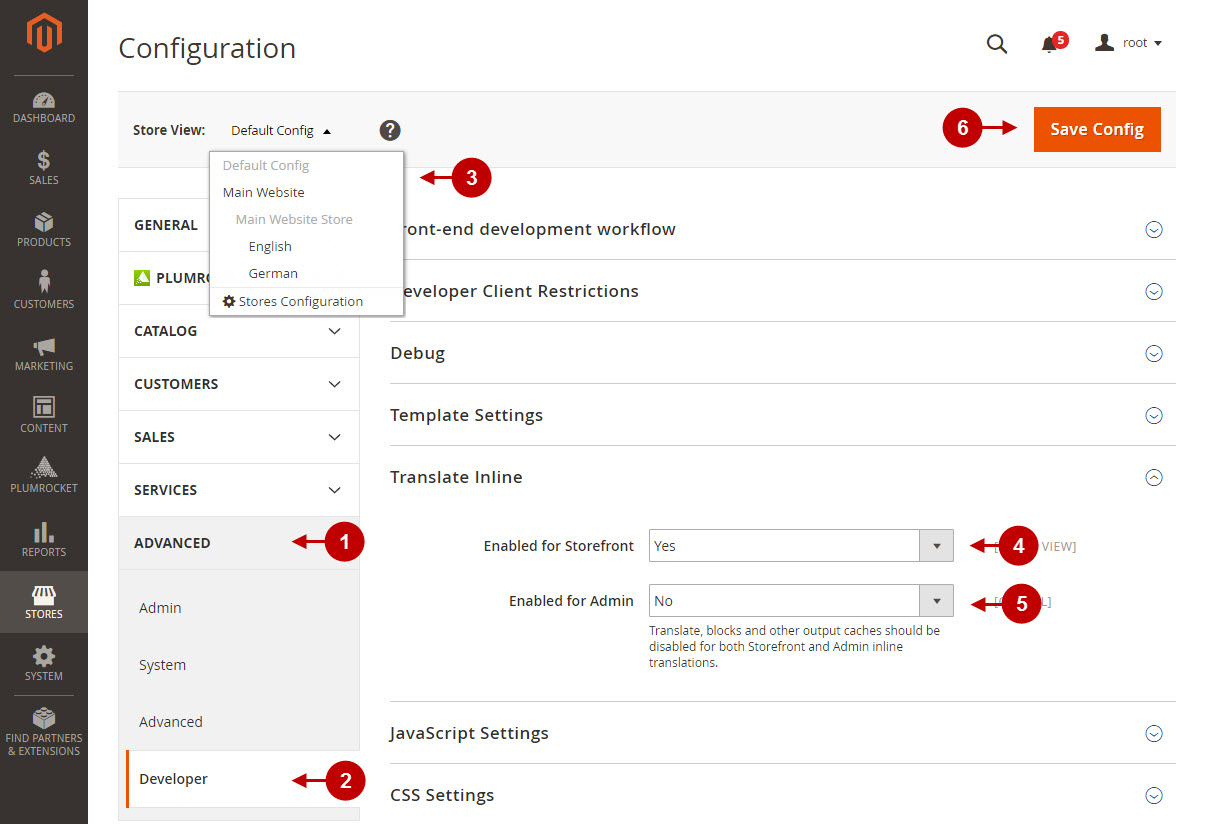
- Go to the Advanced tab.
- Select the Developer section.
- Select the Store View you need to perform your translation on.
- Enable inline translation.
- Translate, blocks and other output caches should be disabled for both Storefront and Admin inline translations.
- Press on the Save Config button to save your changes.

Step 3. Translate elements in the Magento 2 frontend
Once you set configurations in your Magento 2 backend, you can start the translation at your frontend.
Step-by-Step action:
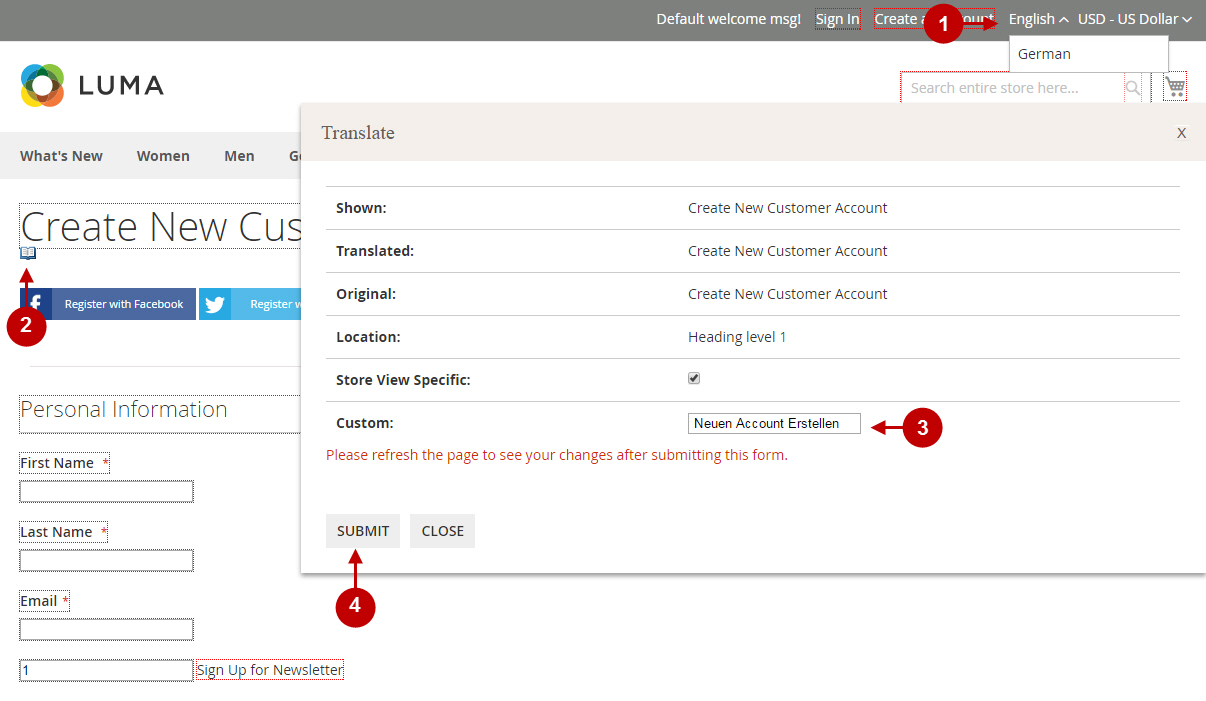
- Select the required language from the drop-down menu (e.g. German).
- Select an element on the page you need to translate and the translation form will open.
- Input the translated text into the Custom field.
- Press Submit to save the translation.

Please make sure to refresh the page after you’ve submitted your translation.
