In this article, you will find step-by-step instructions on how to properly configure the Magento 2 WebP Image Optimizer extension. Please follow this guide after installing the plugin.
In the main Magento menu, go to the Plumrocket tab > select WebP Image Optimizer > Configuration.
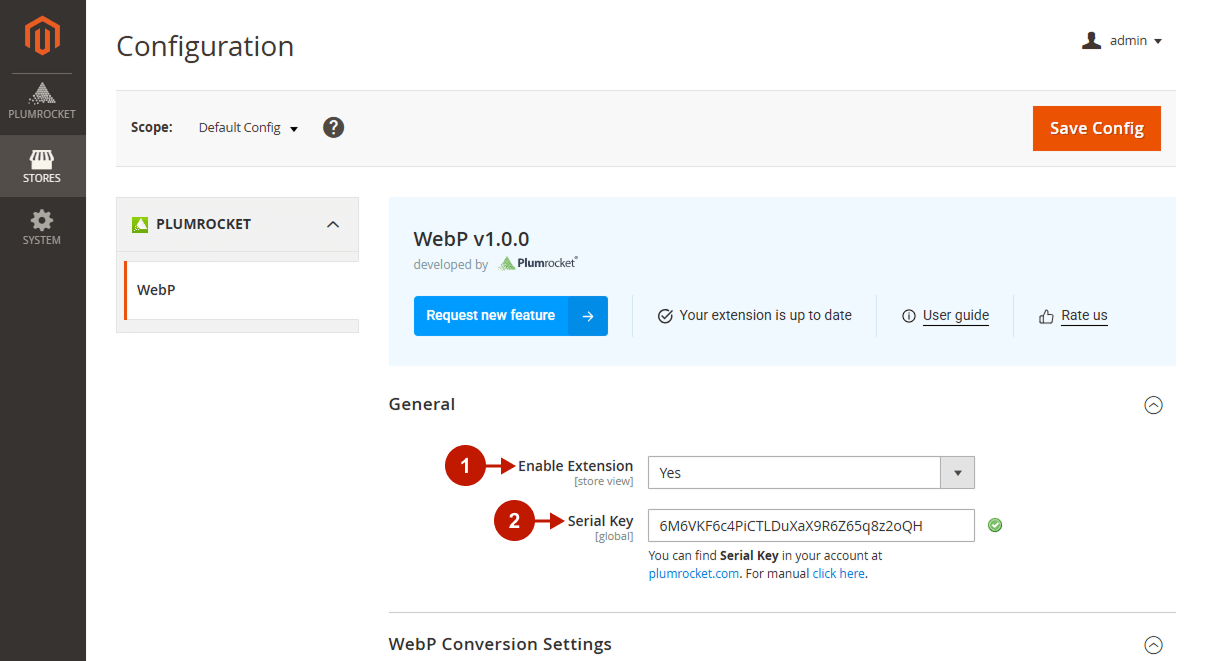
General
Step-by-step guide:
- “Enable“: set the option to Yes to enable the WebP Image Optimizer extension on your Magento 2 store.
- “Serial Key“: enter the unique serial key provided to you after purchasing the extension. Please note: in most cases, this field will be pre-filled with a serial key automatically, and the green checkmark will be displayed. To find and paste your serial key manually, read the Serial Key Activation article.
WebP Conversion Settings
Step-by-step guide:
- “Conversion Mode”: choose the conversion mode that will be used for the WebP images generation:
- On Page Load – Images convert the first time they are viewed. This may slow the first load slightly but saves resources by processing only used images and showing them instantly.
- “Conversion Engine“: select the conversion engine you would like to use:
- Cwebp – a command-line utility that provides fast conversion with good image quality. Recommended when server installation is possible.
- GD – a built-in PHP graphics library. Supported almost everywhere, but typically slower compared to other engines.
- Imagick – a PHP extension based on ImageMagick. Offers high-quality results and advanced features but requires ImageMagick to be installed on the server.
- “Image Quality”: specify the generated images quality.

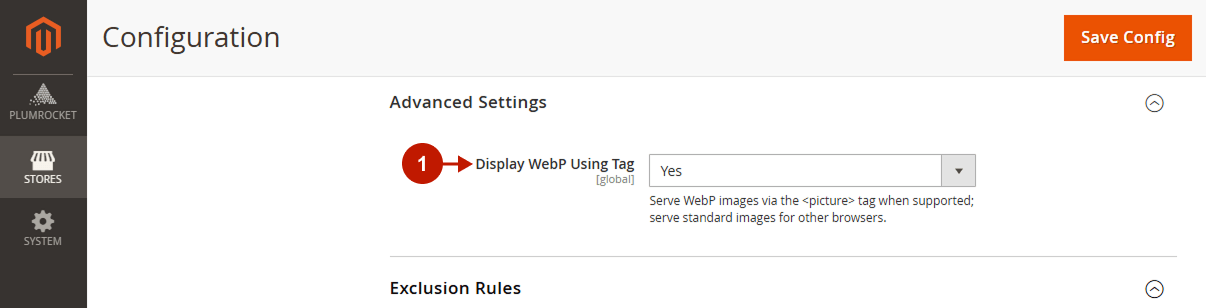
Advanced Settings
Step-by-step guide:
- “Display WebP Using Tag“: when enabled, all images processed by the module are added to the page using the HTML element. This ensures that browsers supporting WebP will load the optimized version, while others will fall back to the original image format, preserving the correct page appearance.
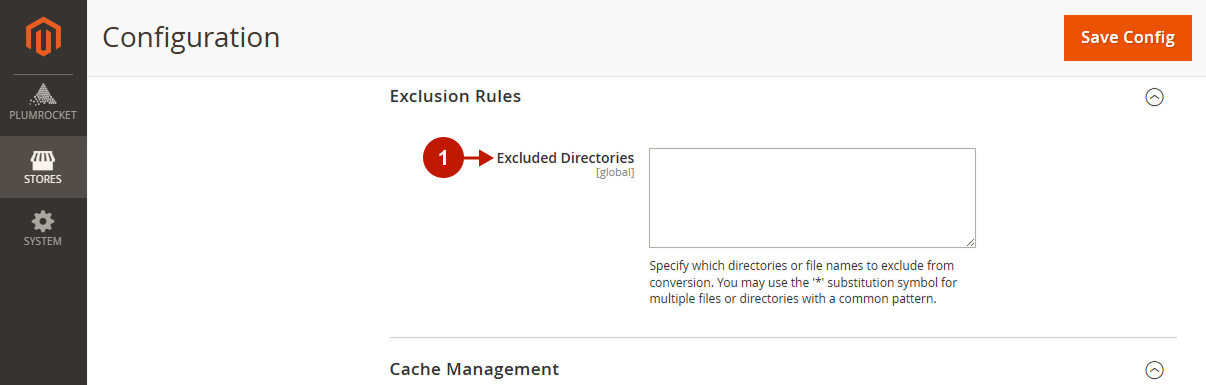
Exclusion Rules
Step-by-step guide:
- “Excluded Directories“: define directories or file names that should be skipped during conversion.
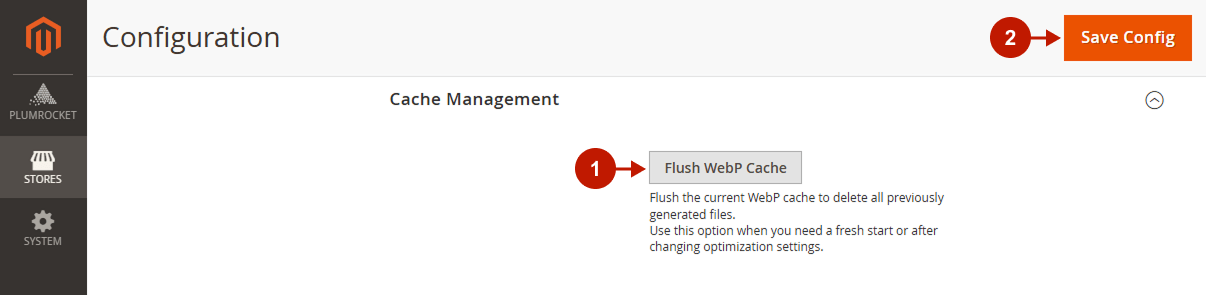
Cache Management
Step-by-step guide:
- “Flush WebP Cache“: clear all previously generated WebP files. Use this option to start fresh or after updating optimization settings.
- Save your changes.
Was this article helpful?