In this article, you will find step-by-step instructions on how to properly configure the Magento 2 Reward Points extension. Please follow this guide after installing the plugin.
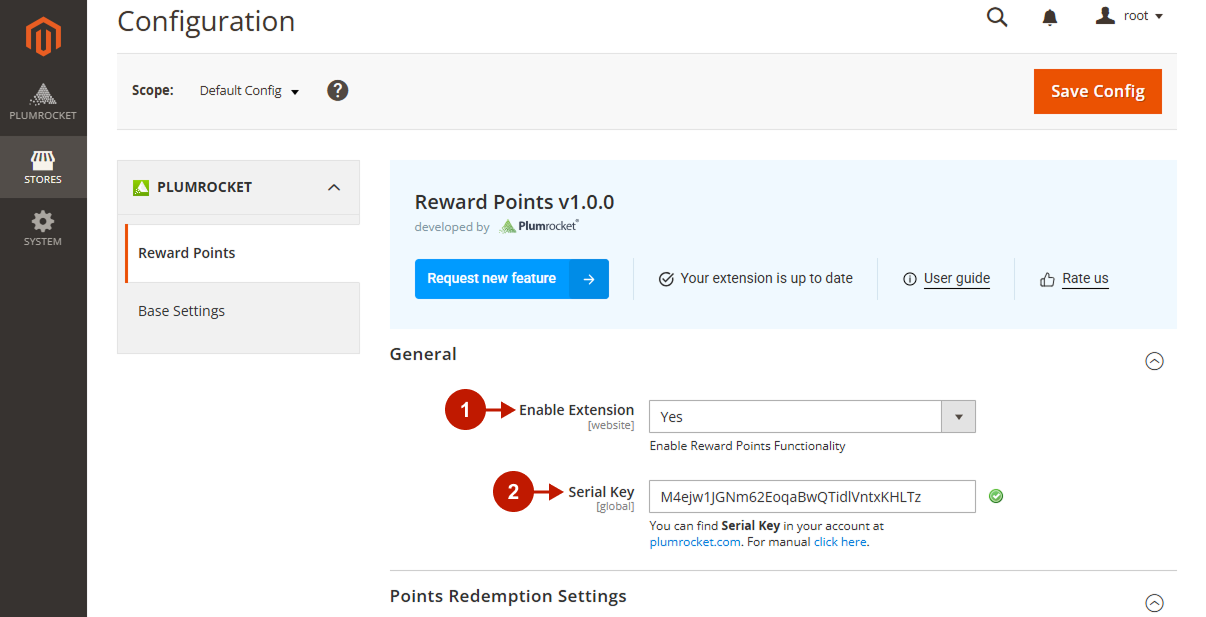
In the main Magento menu, go to the Plumrocket tab > select Reward Points > Configuration.
Configuration
General
Step-by-step guide:
- “Enable Extension”: this option allows you to enable or disable this Reward Points extension.
- “Serial Key”: enter the unique serial key provided to you after purchasing the extension. Note: In most cases, this field will be pre-filled with a serial key automatically, and the green checkmark will be displayed. To find and paste your serial key manually, read the Serial Key Activation article.
Points Redemption Settings
Step-by-step guide:
- “Points Redemption Rate”: specify the conversion rate of loyalty points to currency. For example, when set to 10, customers will receive a $1 discount for every 10 points they redeem in the shopping cart.

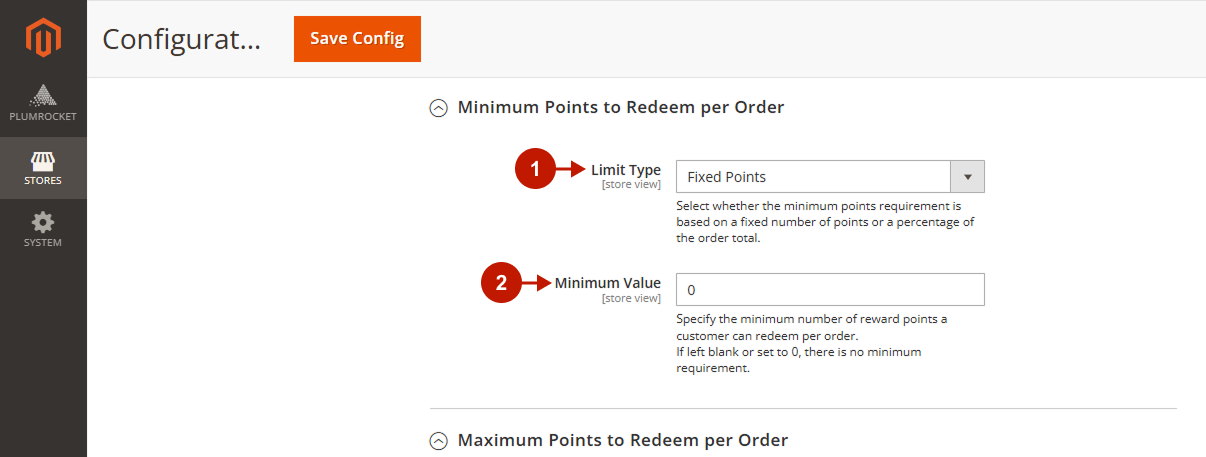
Minimum Points to Redeem per Order
Step-by-step guide:
- “Limit Type”: choose the type of the limit: Fixed Points (based on a fixed number of points) or Percentage (%) of Order Total.
- “Minimum Value”: define the minimum amount of reward points a customer can redeem in each order.
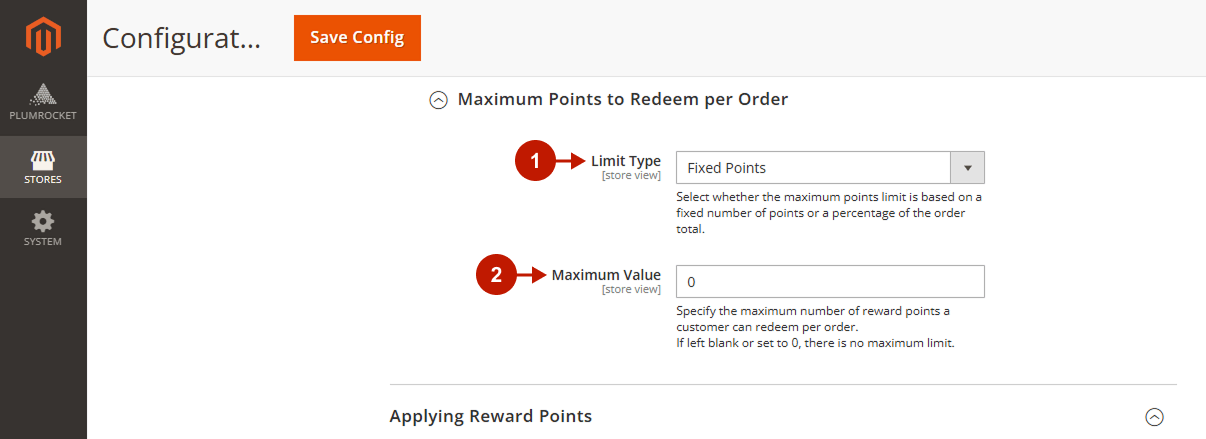
Maximum Points to Redeem per Order
Step-by-step guide:
- “Limit Type”: choose the type of the limit: Fixed Points (based on a fixed number of points) or Percentage (%) of Order Total.
- “Maximum Value”: define the maximum amount of reward points a customer can redeem in each order.
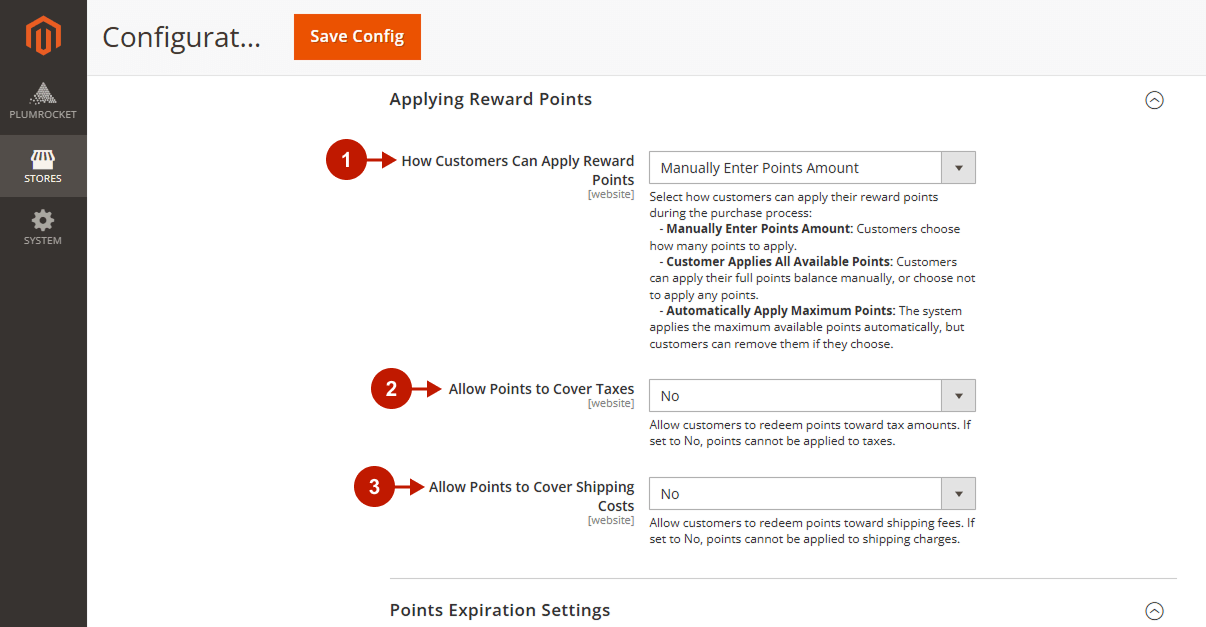
Applying Reward Points
Step-by-step guide:
- “How Customers Can Apply Reward Points“: select the way customers can redeem their reward points during the purchase process.
- “Allow Points to Cover Taxes”: choose whether the customers should be available to redeem points towards tax amounts.
- “Allow Points to Cover Shipping Costs”: choose whether the customers should be available to redeem points towards shipping fees.
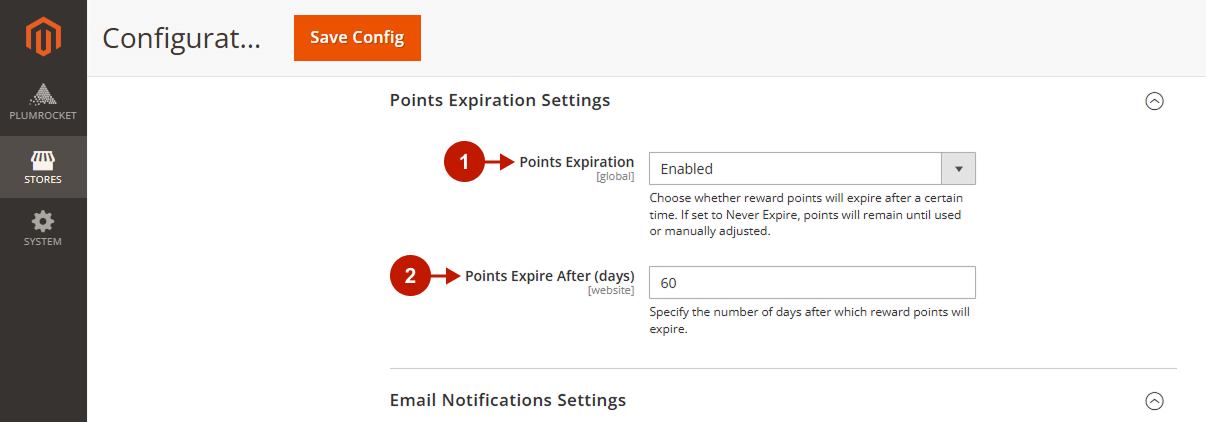
Points Expiration Settings
Step-by-step guide:
- “Points Expiration”: choose whether reward points should expire after a certain time.
- “Points Expire After (days)”: specify the number of days after which reward points should expire.
Email Notifications Settings
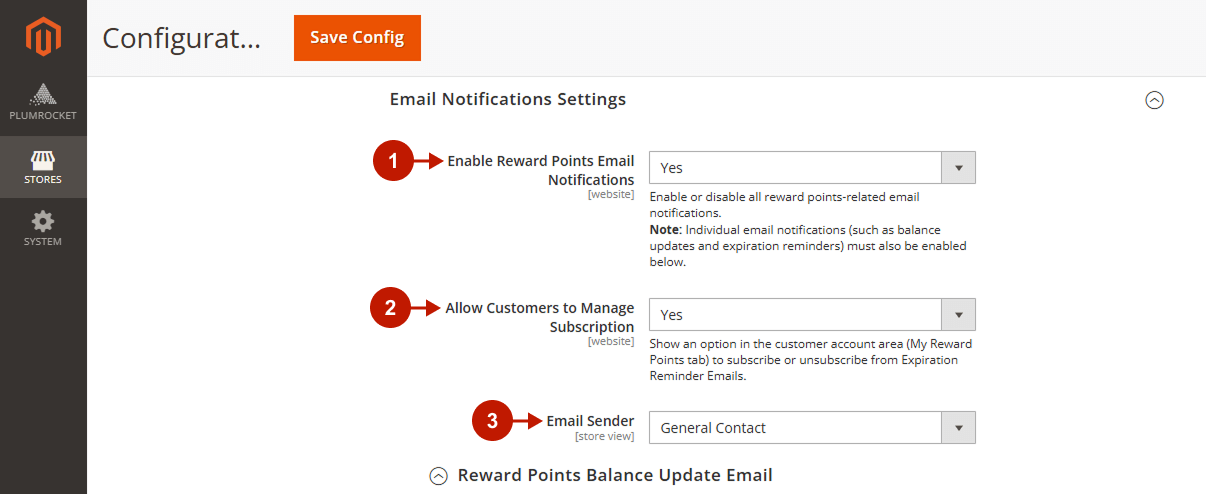
Step-by-step guide:
- “Enable Reward Points Emails Notifications”: enable or disable the reward points-related email notifications.
- “Allo Customers to Manage Subscriptions”: choose whether the customers should be able to subscribe or unsubscribe from Expiration Reminder Emails.
- “Email Sender”: choose the sender for the Reward Points Email Notifications.
Reward Points Balance Update Email
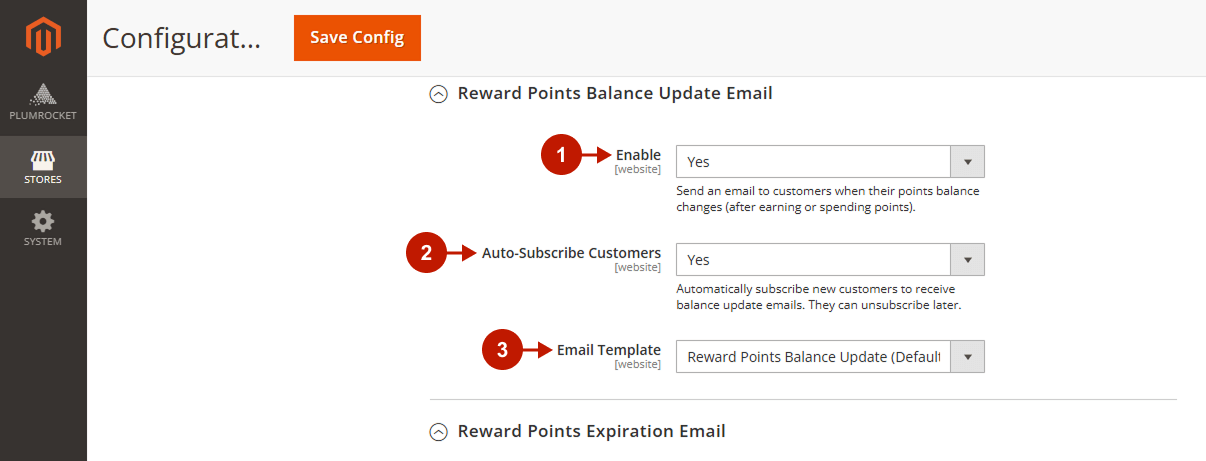
Step-by-step guide:
- “Enable“: enable or disable the email notifications on the points balance changes.
- “Auto-Subscribe Customers“: choose whether the new customers should be automatically subscribed to receive balance update emails.
- “Email Template“: choose the reward points balance update email template.
Reward Points Expiration Email
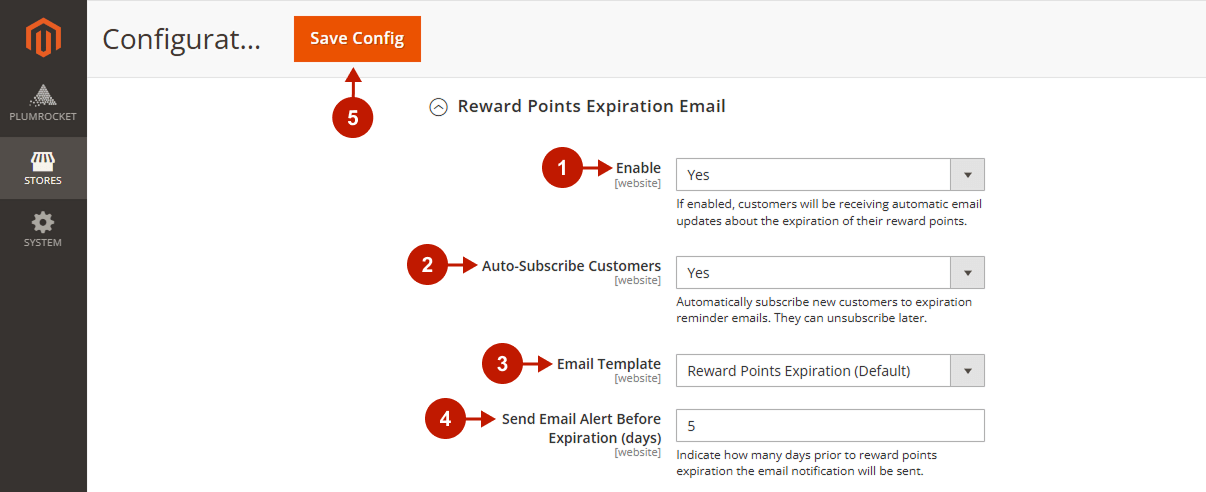
Step-by-step guide:
- “Enable“: enable or disable the email notifications on the expiration of the reward points.
- “Auto-Subscribe Customers“: choose whether the new customers should be automatically subscribed to receive expiration reminder emails.
- “Email Template“: choose the reward points expiration email template.
- “Send Email Alert Before Expiration (days)“: specify how many days before reward points expiration the email notification should be sent.
Earning Rules
Step-by-step guide:
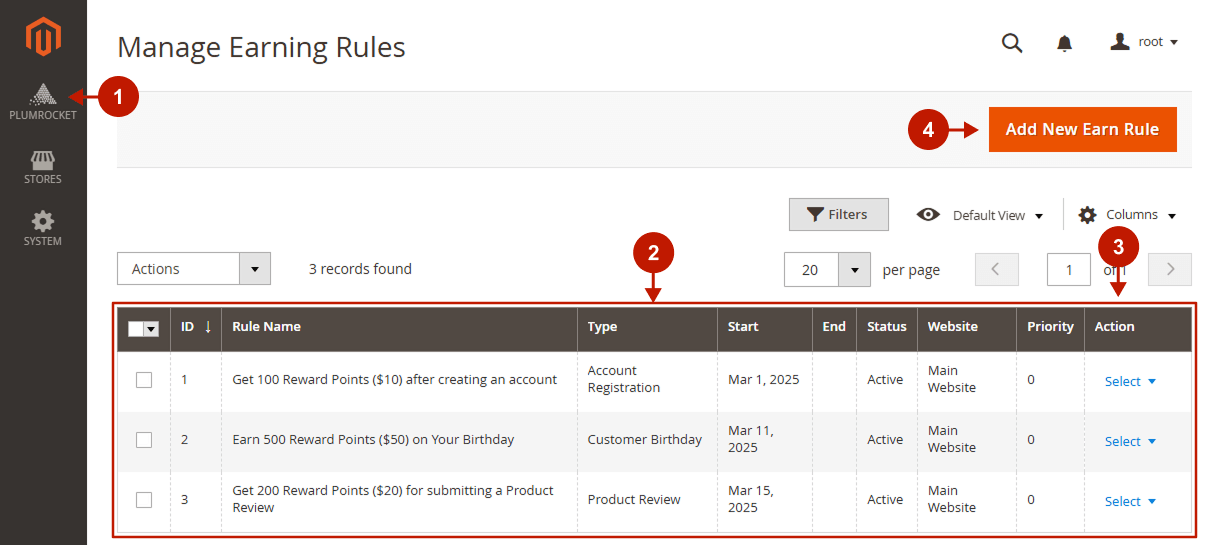
- Navigate to the Plumrocket -> Reward Points -> Earning Rules section.
- This section allows admin to view and manage Reward Points Earning Rules in one grid.
- “Action“: admin can edit or delete the existing Earning Rules using this option.
- “Add New Earn Rule“: press this button to create a new Reward Points Earning Rule. Please refer to our detailed guides for specific earning rule types.
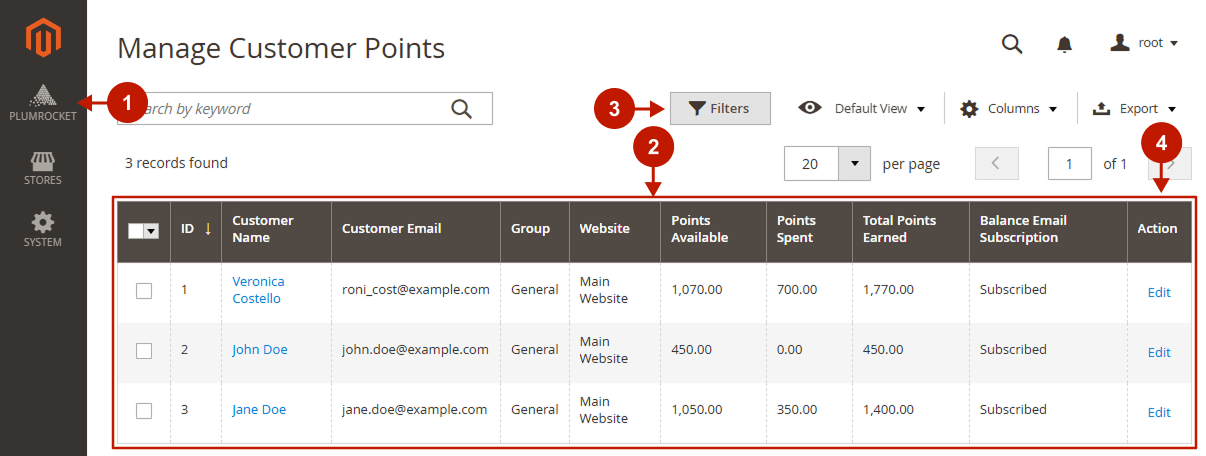
Manage Customer Points
Step-by-step guide:
- Navigate to the Plumrocket -> Reward Points -> Manage Customer Points section.
- This grid allows the admin to view and manage customers who have reward points.
- Admin can search for the required customer using the default Magento 2 filters.
- “Action“: admin can view and manage reward points of each customer using this option.
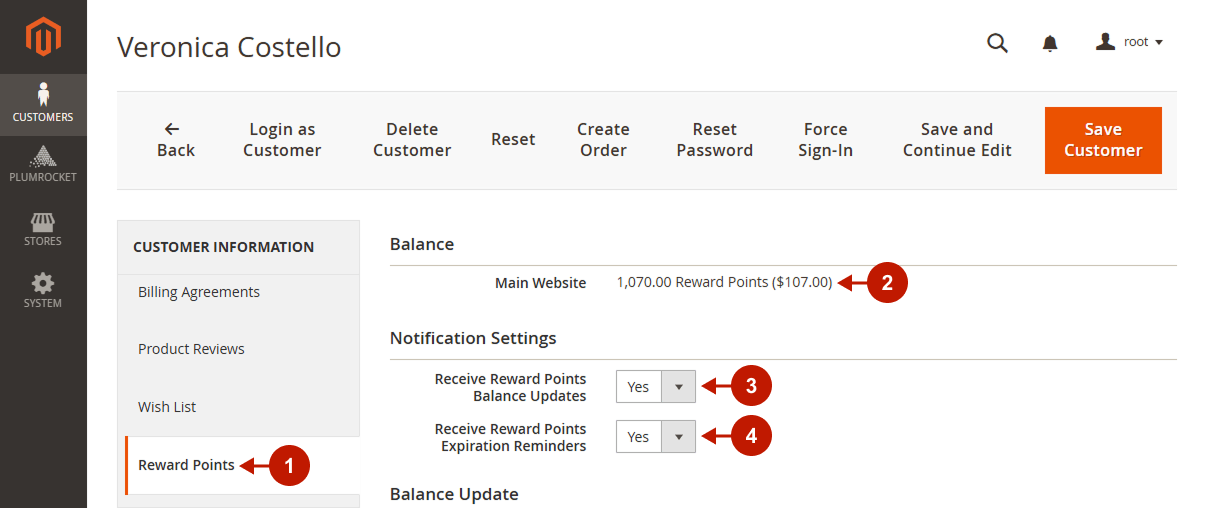
Step-by-step guide:
- Navigate to the Reward Points section in the Customer Information tab.
- “Balance“: admin can view customer’s reward points balance in this section.
- “Receive Reward Points Balance Update Emails“: this option allows admin to enable or disable Reward Points Balance Update Emails sending to each separate customer.
- “Receive Reward Points Expiration Reminders“: this option allows admin to enable or disable Reward Points Expiration Reminders Emails sending to each separate customer.
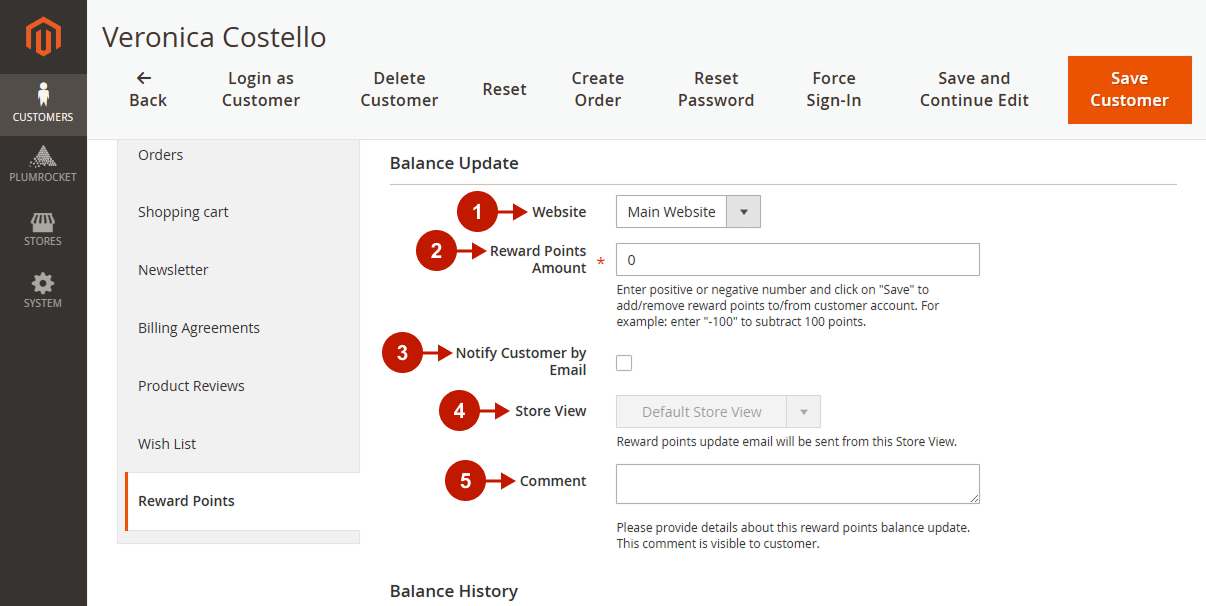
Step-by-step guide:
- “Website“: this option allows admin to choose the website the reward points balance will be updated on.
- “Credit Amount“: admin can add/remove points to/from customer account by entering positive or negative number in this field, and clicking the “Save” button.
- “Notify Customer by Email“: check this checkbox in order to notify the customer of his reward points balance updates.
- “Store View“: the reward points update email will be sent from this Store View.
- “Comment“: type the reward points balance update comment in this field. This information is visible to the customer.
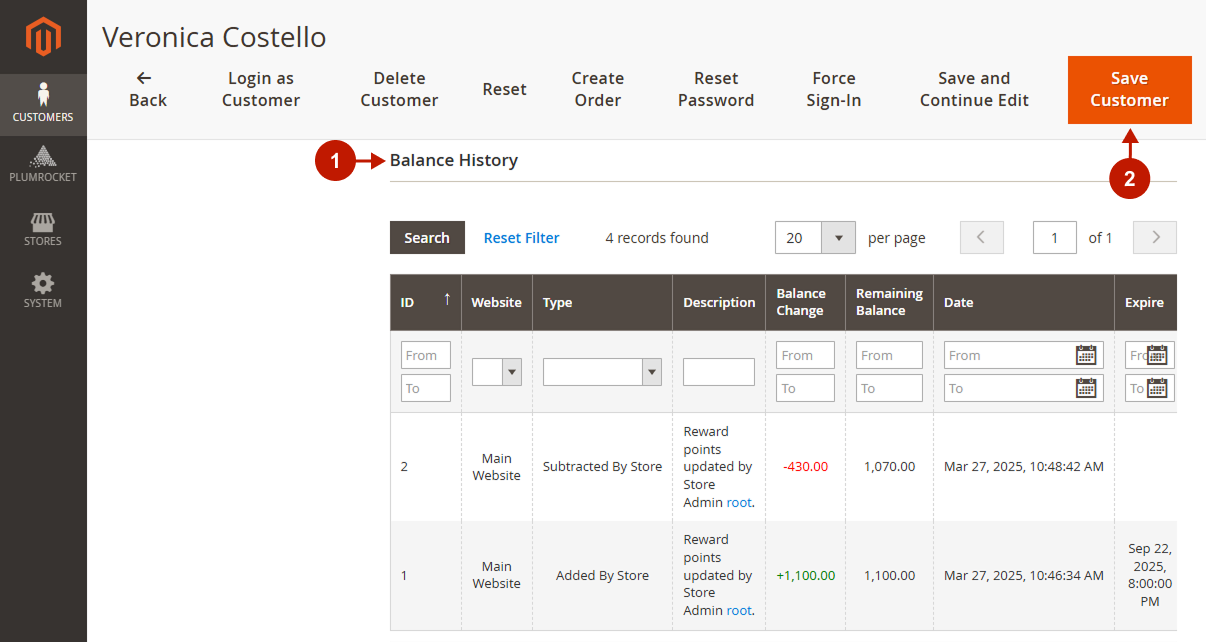
Step-by-step guide:
- “Balance History“: allows admin to track the history of all transactions made by the customer.
- Press the “Save Customer” button to save your settings.
Transaction History
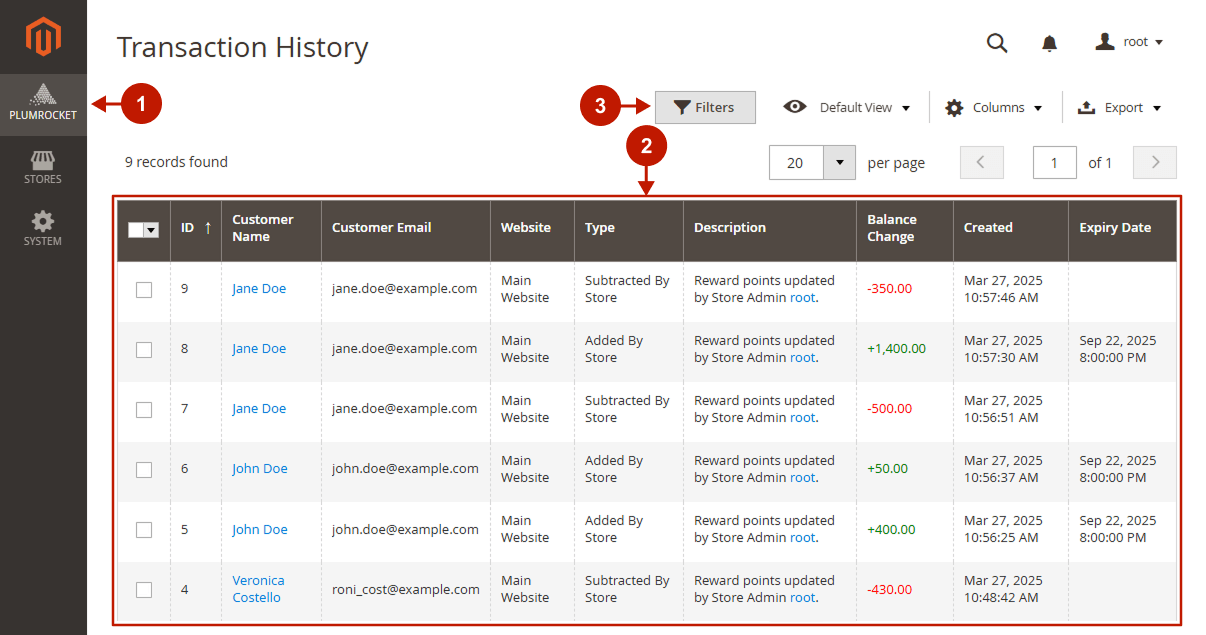
Step-by-step guide:
- Navigate to the Plumrocket -> Reward Points -> Transaction History section.
- This section allows the admin to track the transactions of all customers in one grid.
- Admin can search for the required transactions using the default Magento 2 filters.
Reward Points on Order
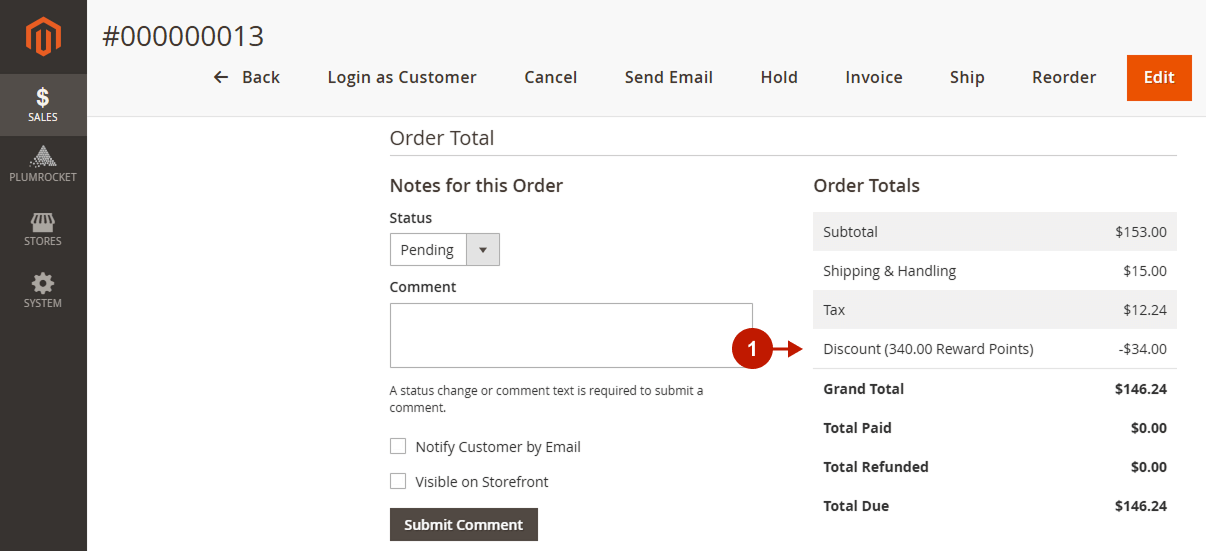
Step-by-step guide:
- Admin can check the Reward Points applied to an order on the Order View Page.
Step-by-step guide:
- Admin can use customer’s Reward Points Balance while creating an order in the Magento 2 backend.
- Enter the required amount of store credits and press the Apply button.

