In this article, you will find step-by-step instructions on how to properly configure the Magento 2 LLMs TXT Generator extension. Please follow this guide after installing the plugin.
In the main Magento menu, go to the Plumrocket tab > select LLMs.txt Generator > Configuration.
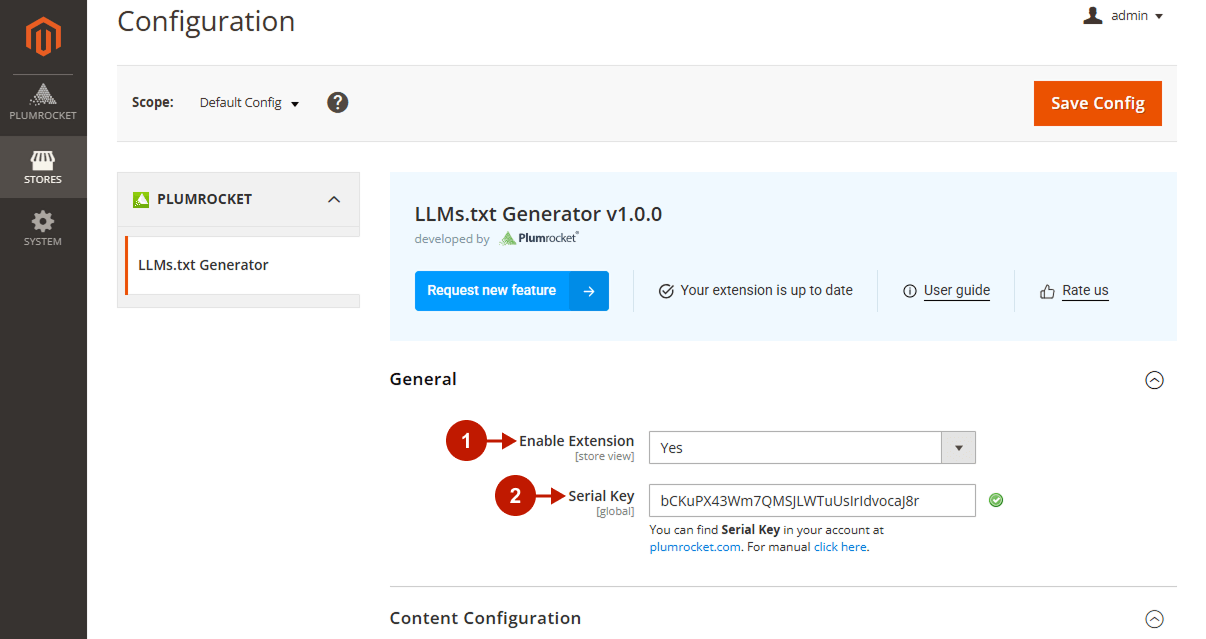
General
Step-by-step guide:
- “Enable“: set the option to Yes to enable the LLMs TXT Generator extension on your Magento 2 store.
- “Serial Key“: enter the unique serial key provided to you after purchasing the extension. Please note: in most cases, this field will be pre-filled with a serial key automatically, and the green checkmark will be displayed. To find and paste your serial key manually, read the Serial Key Activation article.
Content Configuration
Business Details
Step-by-step guide:
- “Company Name”: enter the company name that will be displayed in the generated file header.
- “Company Description“: add the description of your business.

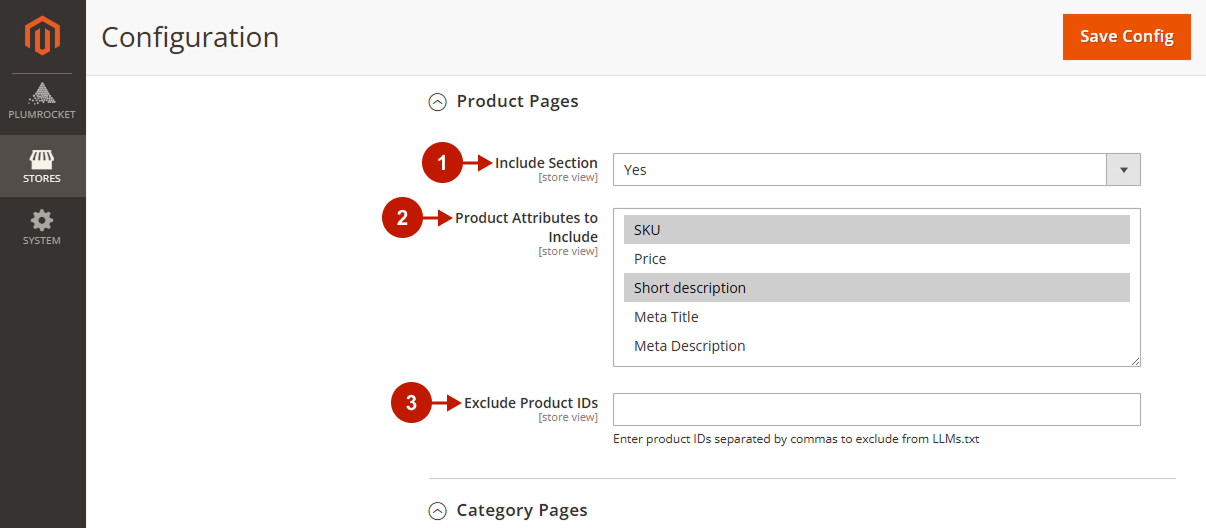
Product Pages
Step-by-step guide:
- “Include Section“: set to Yes to include this section to the generated file.
- “Product Attributes to Include“: select the product attributes that should be included to the file.
- “Exclude Product IDs“: enter separated by commas product IDs you want to exclude from the LLMs.txt file.
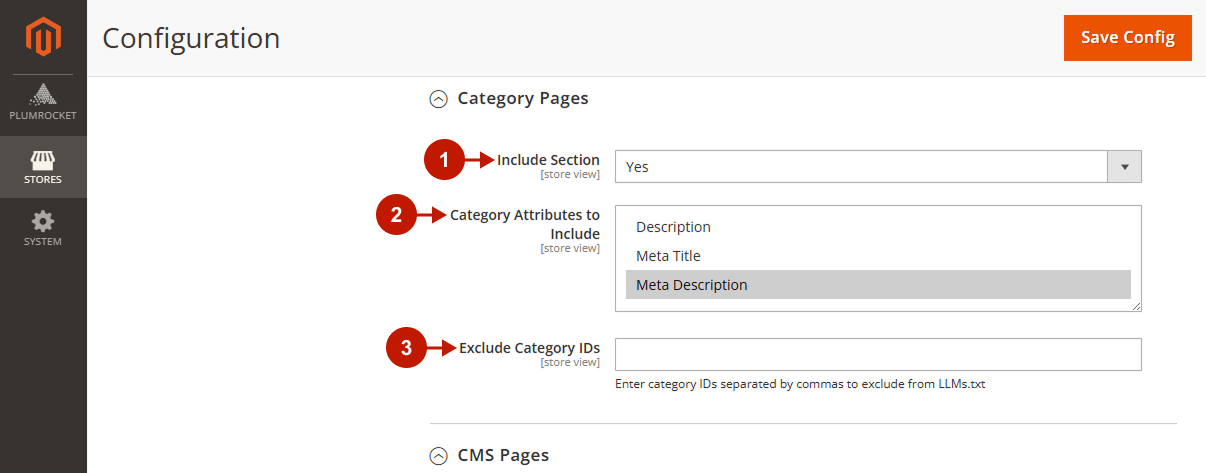
Category Pages
Step-by-step guide:
- “Include Section“: set to Yes to include this section to the generated file.
- “Category Attributes to Include“: select the category attributes that should be included to the file.
- “Exclude Category IDs“: enter separated by commas category IDs you want to exclude from the LLMs.txt file.
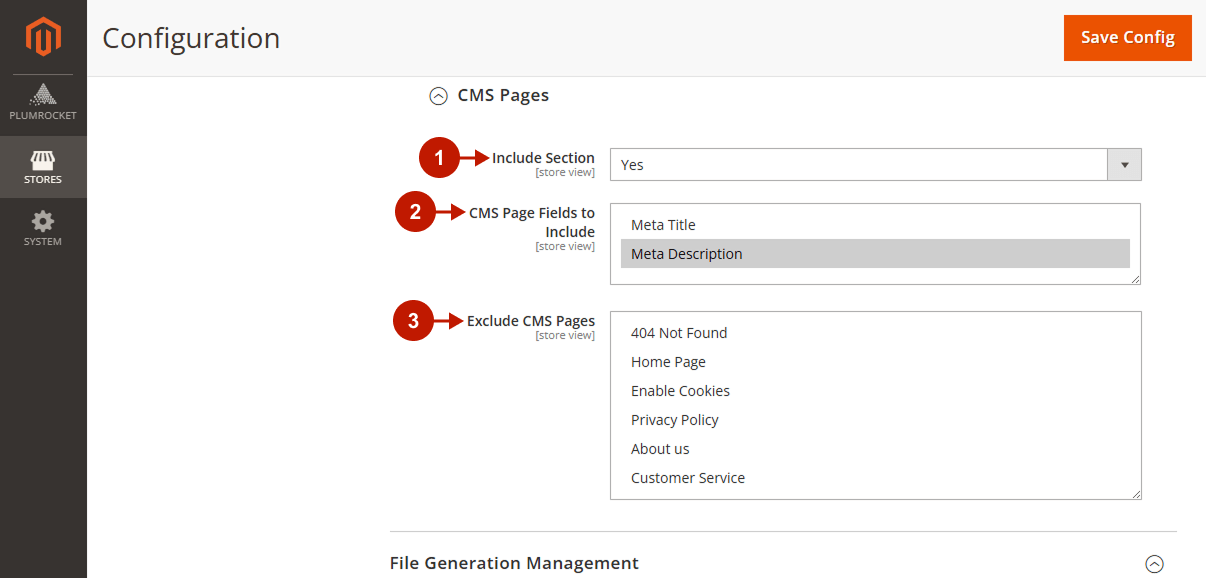
CMS Pages
Step-by-step guide:
- “Include Section“: set to Yes to include this section to the generated file.
- “CMS Page Fields to Include“: select the CMS page fields that should be included to the file.
- “Exclude CMS Pages“: select the CMS pages you want to exclude from the LLMs.txt file.
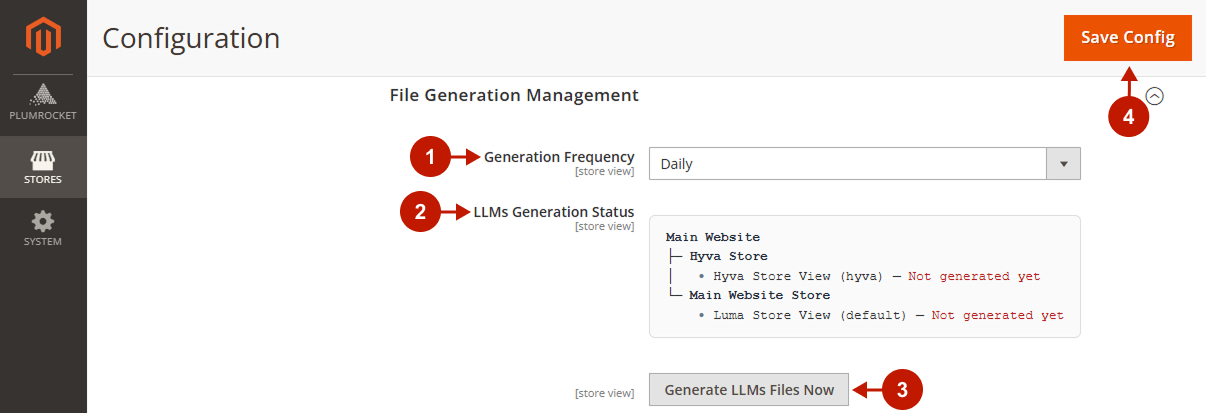
File Generation Management
Step-by-step guide:
- “Generation Frequency“: select how often you want the LLMs.txt file to be generated automatically. You can set it to run daily, weekly, or monthly.
- “LLMs Generation Status“: check the status of the file generation for each store view.
- “Generate LLMs Files Now“: press this button to manually generate the LLMs.txt file.
- Save your changes.
Was this article helpful?