In this article, you will find step-by-step instructions on how to properly configure the Magento 2 Lazy Load extension. Please follow this guide after installing the plugin.
Configuring Magento 2 Lazy Load Extension
In the main Magento menu, go to the Plumrocket tab > select Lazy Load > Configuration.
General
Step-by-step guide:
- “Enable“: set the option to Yes to enable the Lazy Load extension on your Magento 2 store.
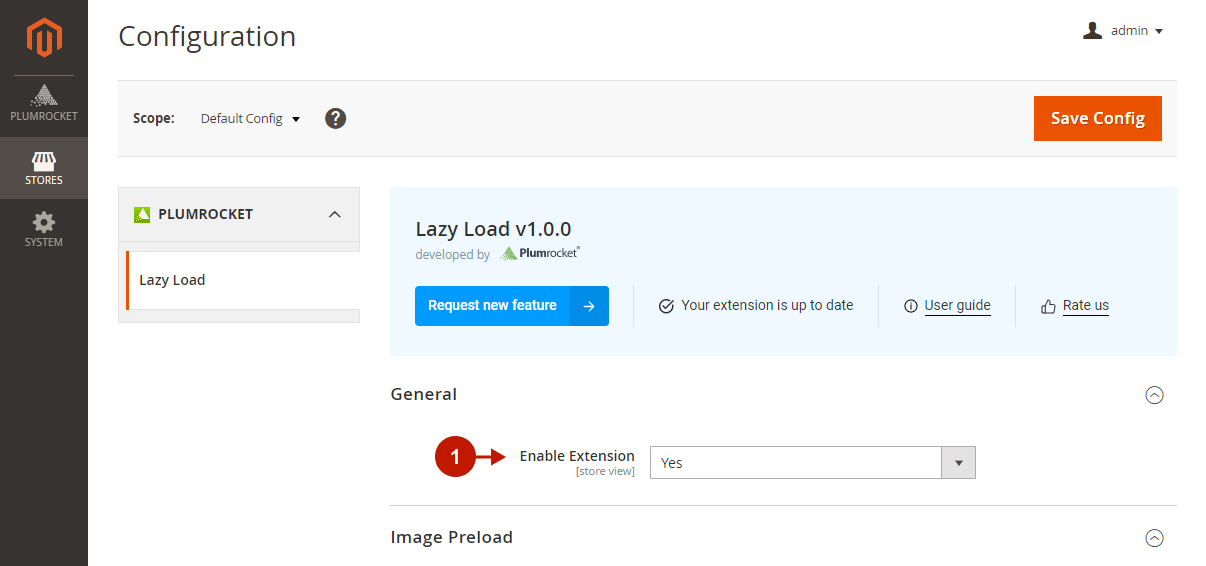
Image Preload
Step-by-step guide:
- “Enable“: set to Yes to enable image preloading on your store. This option allows you to speed up the initial page display by loading the main images on the page before any other resources.
- Please specify the number of images you want to preload on the Category Page, CMS Page, and other pages. It is recommended to preload only above-the-fold and the most important images on pages not to slow down the loading of important resources and ensure the fastest possible page rendering.
- “Minimum Image Width (px)“: ignore only small and minor images during preloading by setting minimum width and height for images in this field.
- “Preload by Image Attribute“: add a data-hero image attribute to your HTML code to manually mark images as the ones that should be preloaded first, ignoring size restrictions set in the previous option.
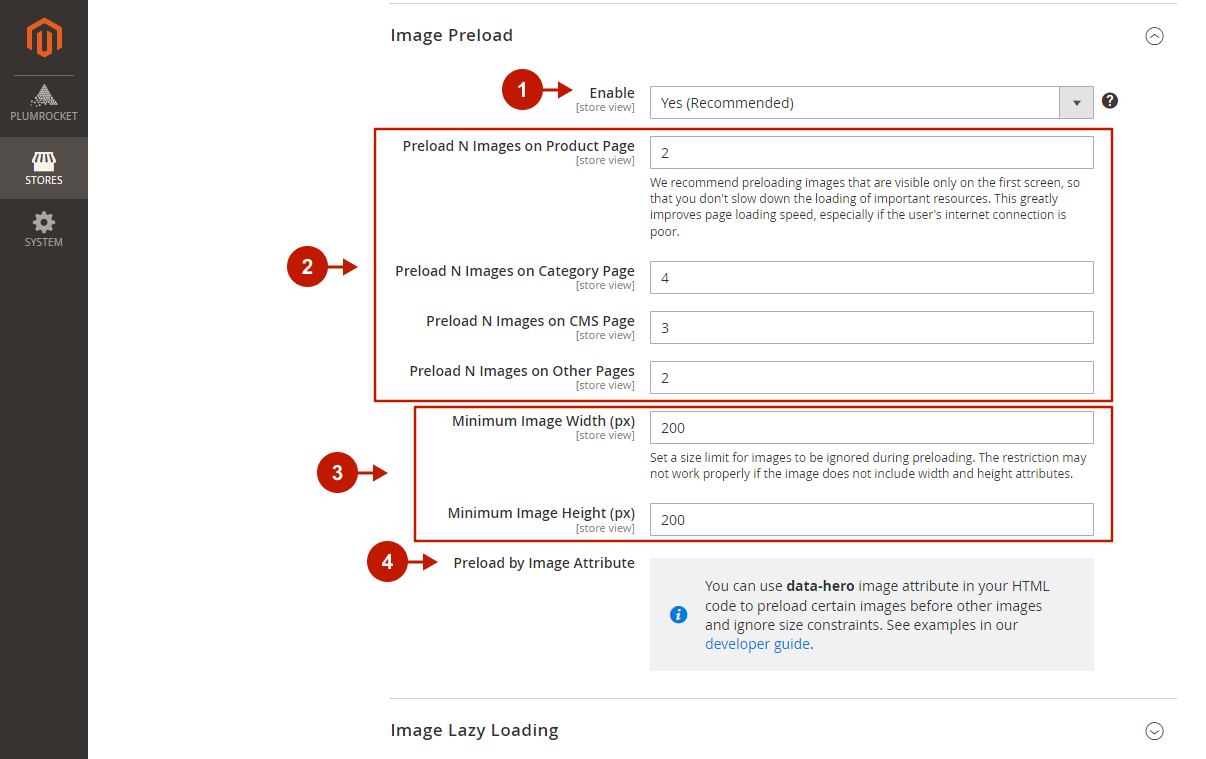
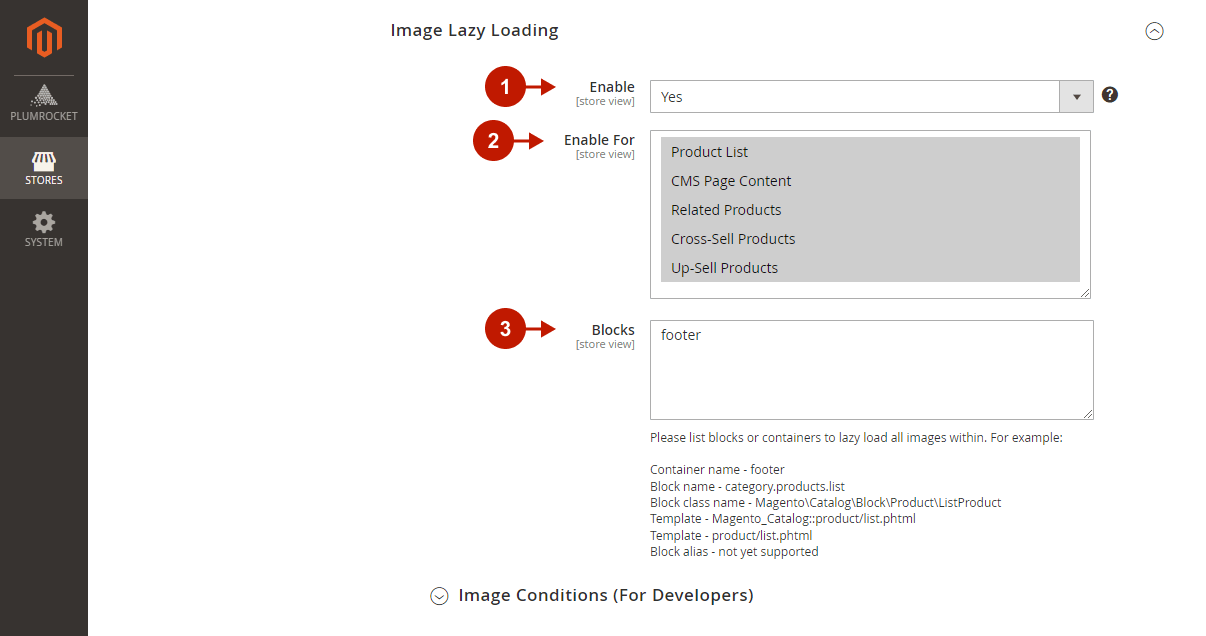
Image Lazy Loading
Step-by-step guide:
- “Enable“: set to Yes to enable image lazy loading on your store. Lazy loading defers loading of non-critical (off-screen) images at page load time until they are needed, which greatly improves LCP Core Web Vital score.
- “Enable For“: select the pages/lists you want to apply lazy loading to.
- “Blocks“: please specify the container/block to preload all images inside.
Step-by-step guide:
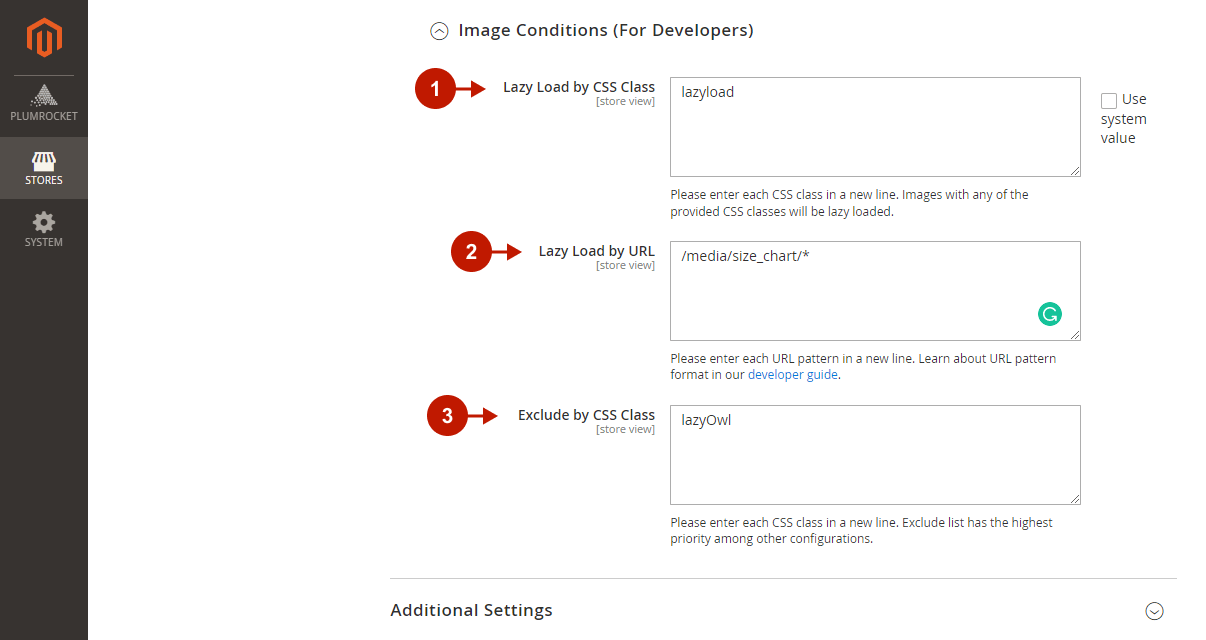
- “Lazy Load by CSS Class“: please provide CSS class(es) to lazy load all images that contain it.
- “Lazy Load by URL“: enter URL pattern(s) to lazy load all images that contain it. Learn more about URL pattern formats in our developer guide.
- “Exclude by CSS Class“: exclude some images from lazy loading by specifying their CSS class in this field. This option may be useful for carousels or any third-party elements that already have lazy loading built-in to ensure full compatibility with the extension.
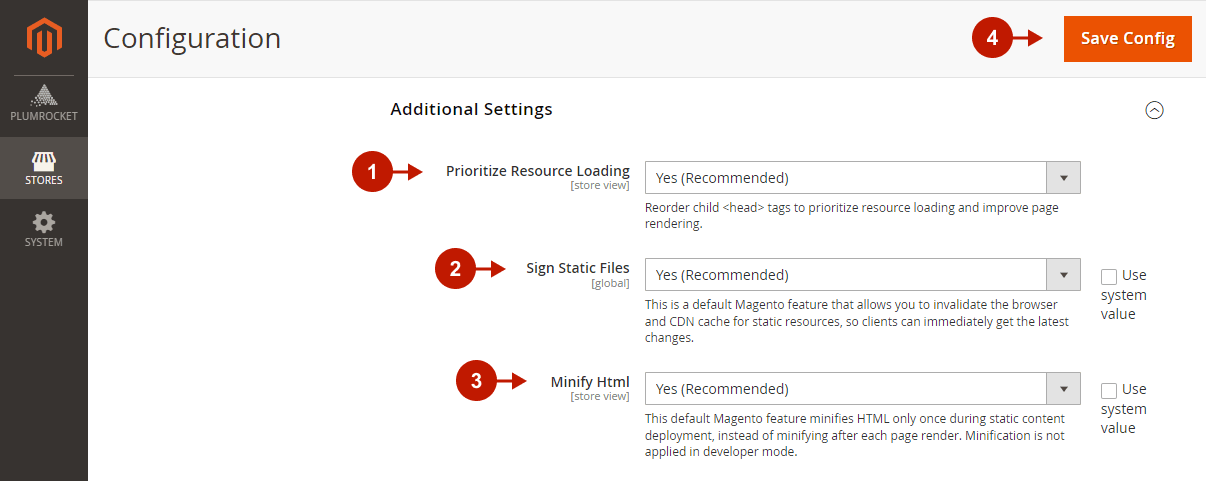
Additional Settings
Step-by-step guide:
- “Prioritize Resource Loading“: it is recommended to set this option to Yes to reorder child <head> tags and ensure that page resources are more efficiently loaded and lazy loading works properly.
- “Sign Static Files“: set to Yes to invalidate the browser and CDN cache for static resources and immediately display changes on the website. This is a default Magento feature that is recommended to be enabled to improve page speed.
- “Minify Html“: set to Yes to minify HTML only once during static content deployment, speeding up page rendering.
Was this article helpful?