Configuring Magento 2 Data Feed Generator Extension
In this article you will learn how to properly configure the generation of the data feeds with Magento 2 Data Feed Generator Extension.
Step-by-step guide:
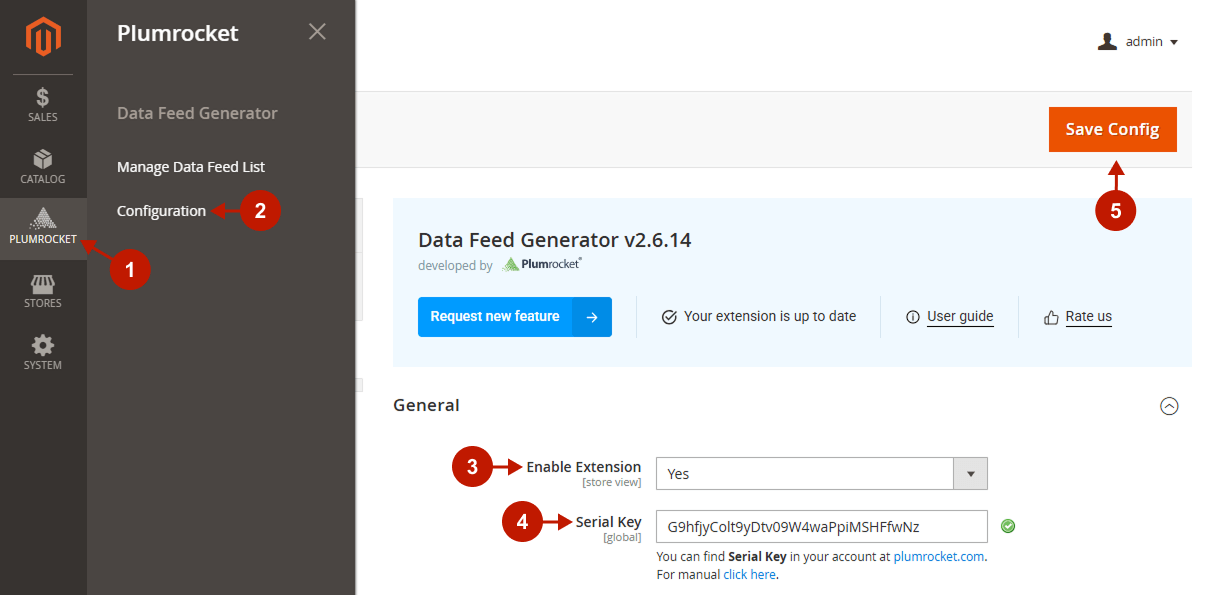
- Go to the Plumrocket tab in the main menu.
- Select Data Feed Generator -> Configuration.
- Use the Enable Extension option to enable or disable Magento 2 Data Feed Generator Extension.
- “Serial Key”: enter unique serial key provided to you after the purchase. Note: In most cases this field will be pre-filled with serial key automatically and the green check mark will be displayed. In order to find and enter your serial key manually, please read the Serial Key Activation article.
- Click on the Save Config button to save your settings.
Data Feed Management
Please, check the guide below in order to manage your data feed list.
Step-by-step guide:
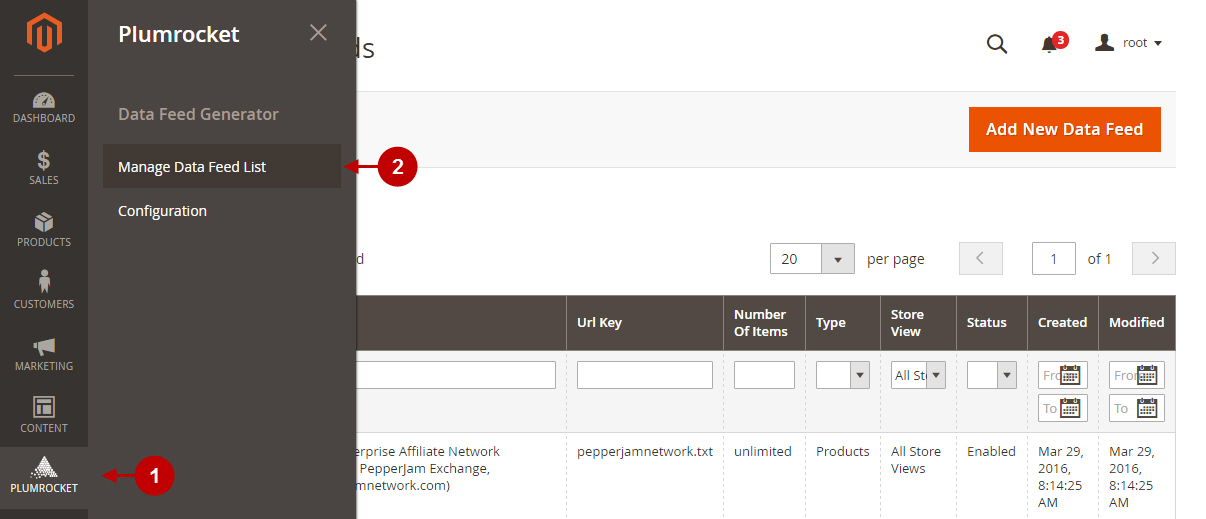
- Go to Plumrocket tab in the main menu.
- Select Manage Data Feed List section.
Step-by-step guide:
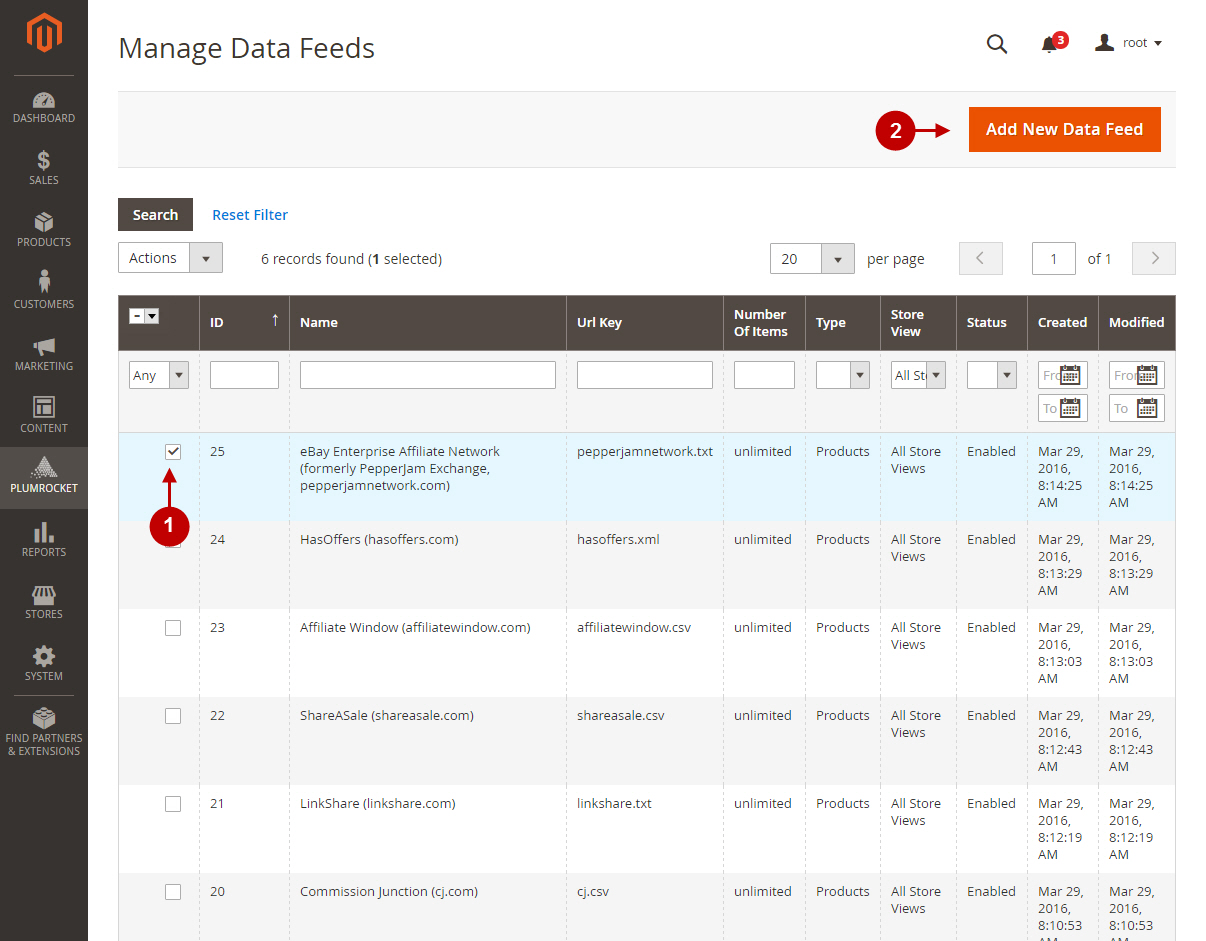
- Check the list of available data feeds and select one you need to edit.
- Press Add New Data Feed button to create new data feed.
When you choose one of the options above you will be able to manage the data feed in the Edit tab. Please, check the guide below on how to configure it correctly.
General Settings
Step-by-step guide:
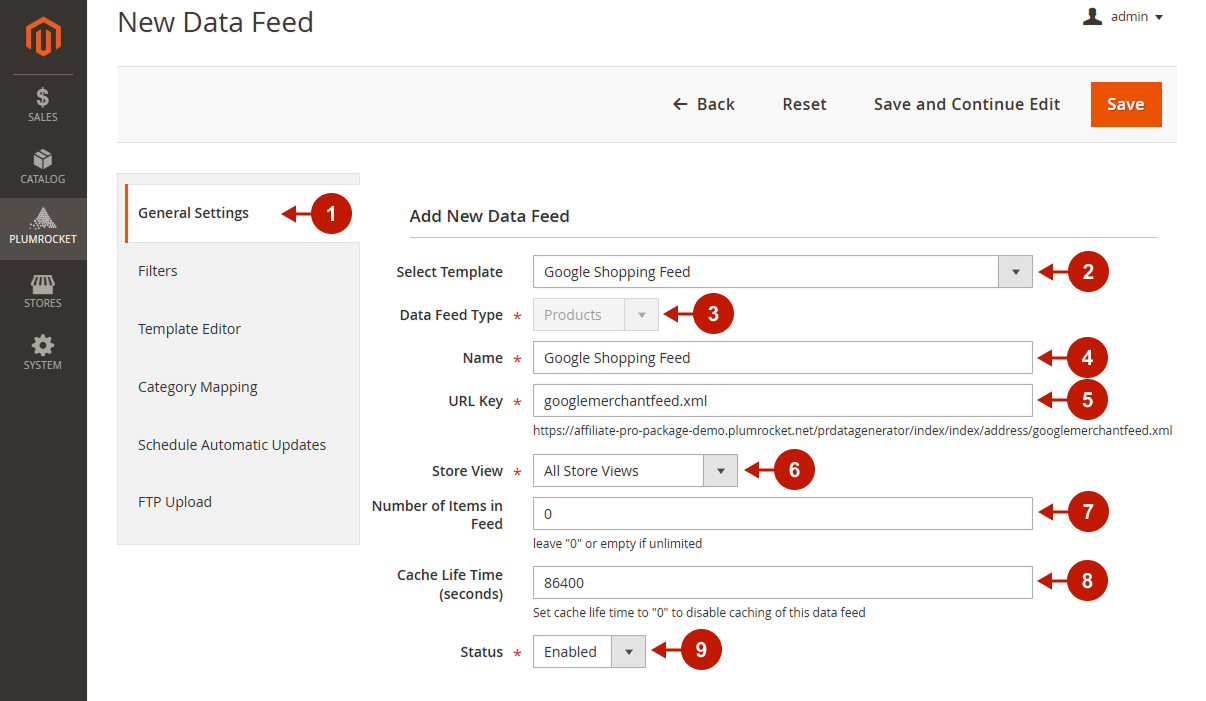
- Go to General settings tab.
- “Select Template” option allows you to select one of the available data feed templates or create your custom data feed from scratch using “blank document” template. Choose among available templates: “AvantLink Data Feed”, “Yipit Data Feed”, “HasOffers Data Feed”, “Post Affiliate Pro Data Feed”, “Commission Junction Data Feed”, “TradeDoubler Data Feed” etc.
- “Data Feed Type” field allows you to select products or categories to be included into your data feed.
- Enter name of the data feed or edit the existing one in the “Name” field.
- In the “URL key” field specify the data feed url.
- Select the store view where the data feed will be generated and used in the “Store View” field.
- In this field specify the number of items. Leave “0” or empty, if the number of items is unlimited.
- In the “Cache Life Time (seconds)” field you can set the cache life time for this particular Data feed. In order to disable caching for this data feed, set cache life time to “0”.
- In the “Status” field you may enable or disable this data feed.
Important information:
In order to use tags while configuring the template of your data feed, please, read the Data Feed Generator Tags article.
Filters
Step-by-step guide:
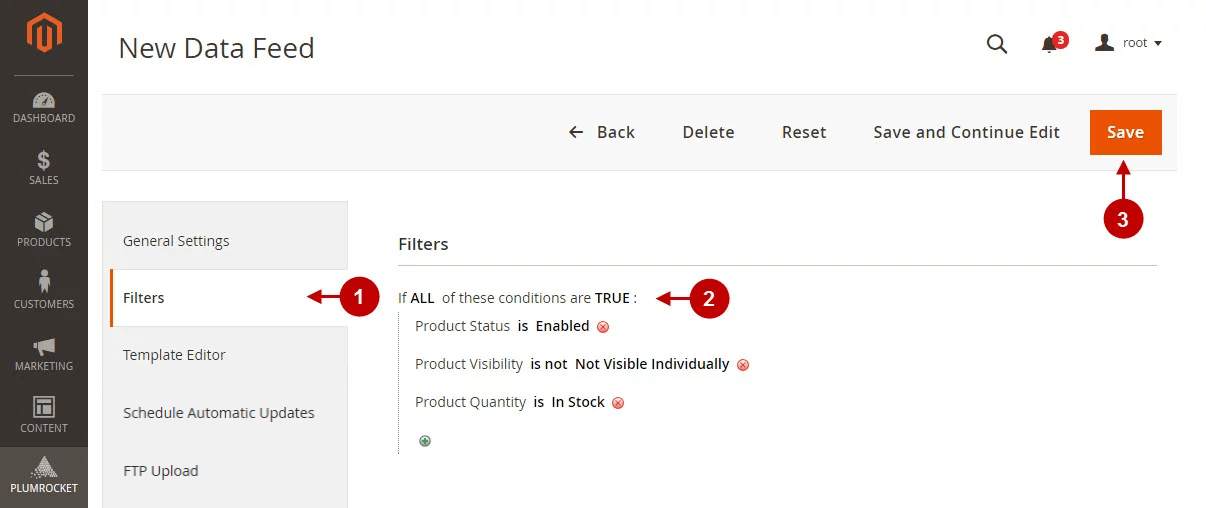
- Go to the Filters tab.
- Set the conditions of the filter rules in order to include (or exclude) specific products and categories in the data feed.
Template Editor
Now you can customize the template of your data feed.
Step-by-step guide:
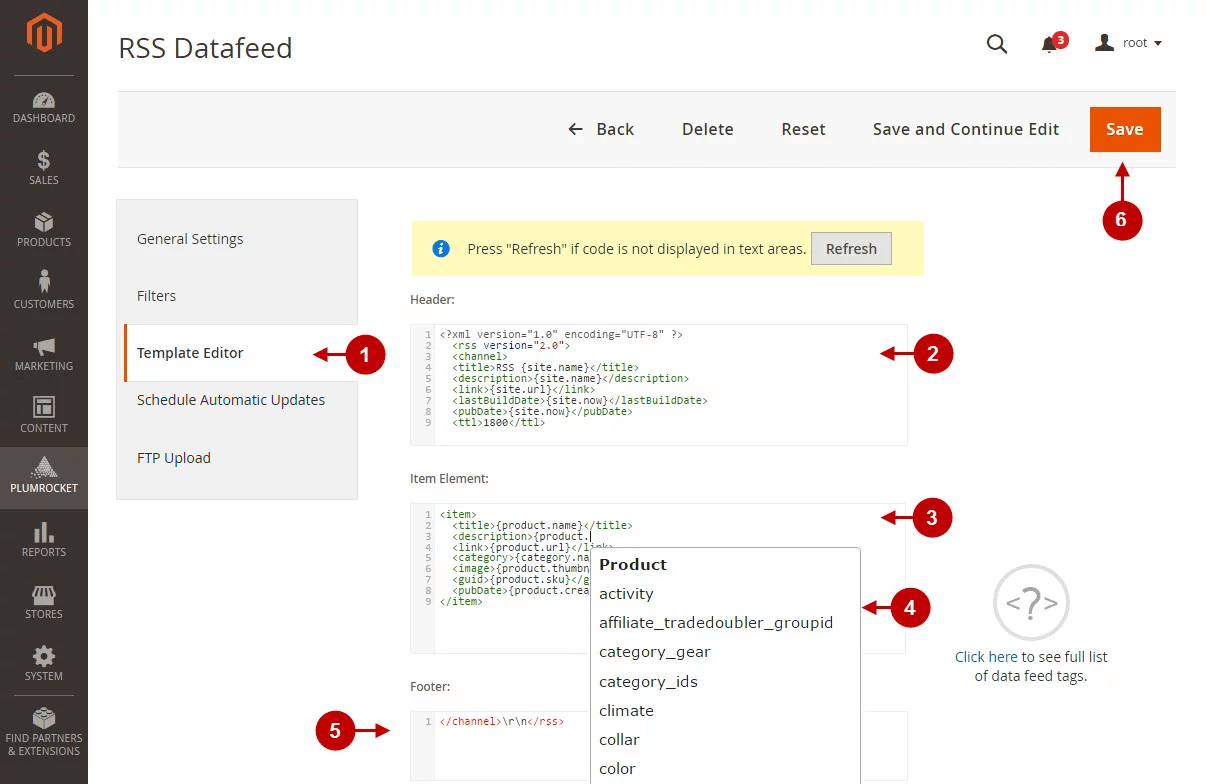
- Go to the Template Editor tab.
- In the “Header” field enter the code that will be used as a root tag for Magento xml product feed or category feed.
- In the ” Item Element” set the xml structure, based on it the item information will be displayed in the data feed.
- Use tags to speed up and simplify the process of writing the code.
- In the “Footer” field enter the closing tag of your data feed code.
- Press on the Save Data Feed button to save your changes.
Category Mapping
Step-by-step guide:
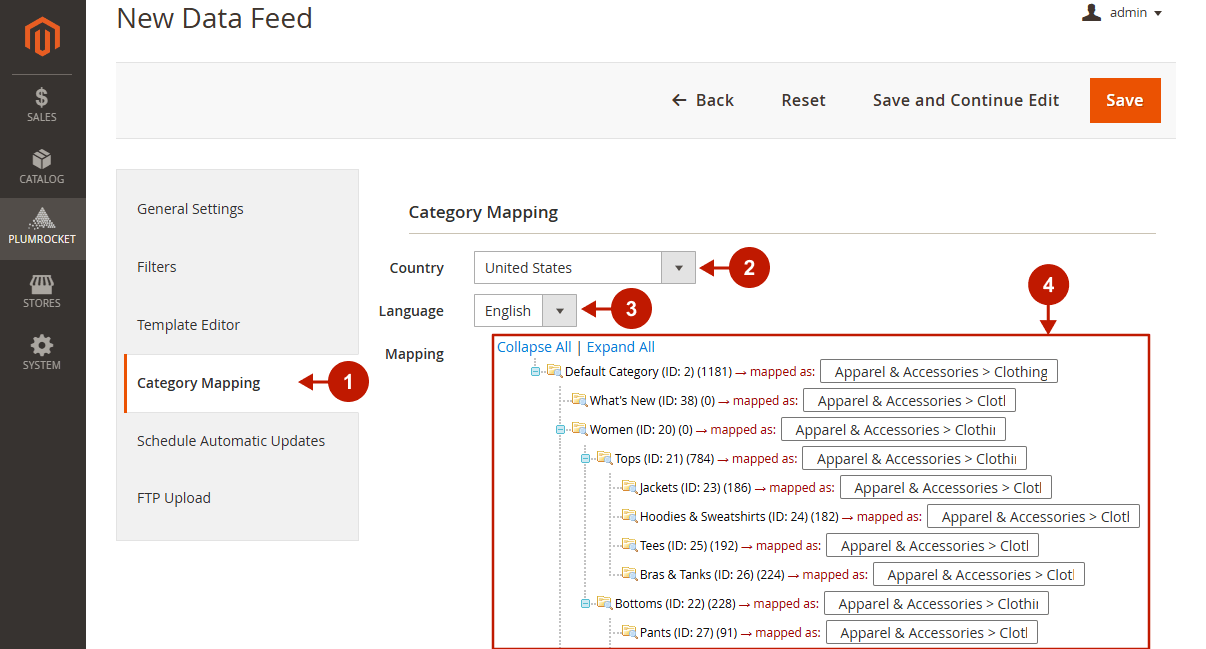
- Go to the “Category Mapping” tab.
- In the “Country” field, select the country you’re targeting.
- In the “Language” field, select the language of the product data.
- The “Mapping” section lets you assign a corresponding marketplace category to each of your store’s categories.
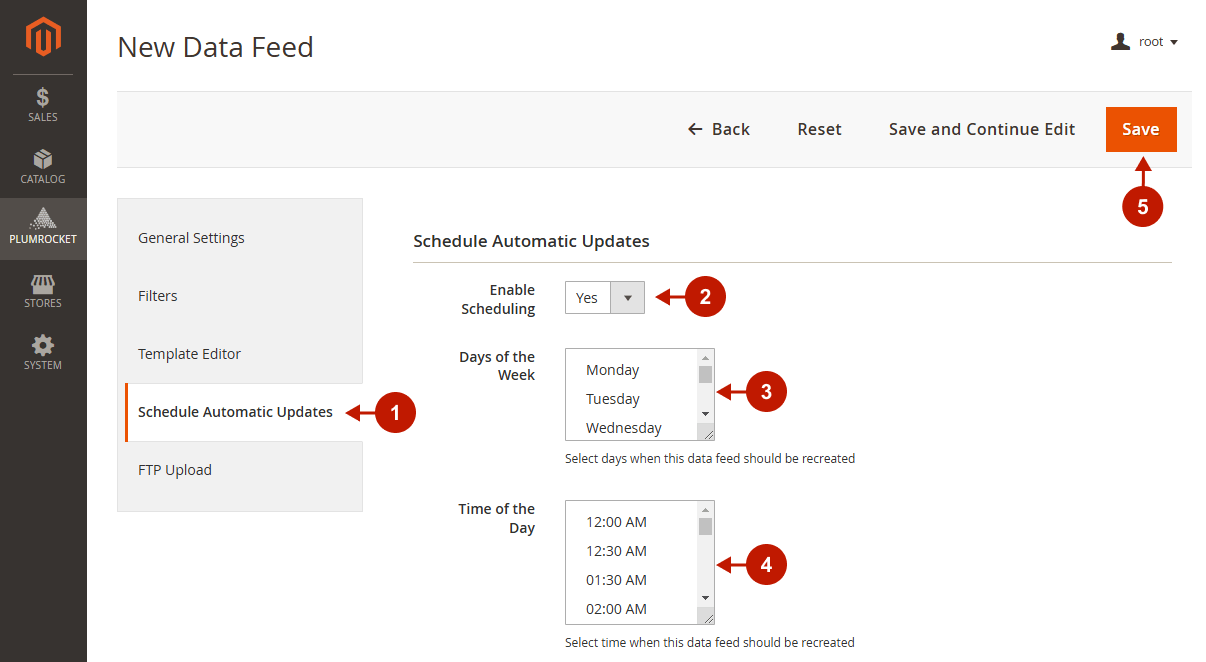
Schedule Automatic Updates
Here, you can configure the Automatic Updates of your Data feed
Step-by-step guide:
- Go to the Schedule Automatic Updates tab.
- Enable the Scheduling.
- Specify the Days of the Week when the Data Feed should be updated.
- Specify the Time of the Day when the Data Feed should be updated.
- Save the changes.
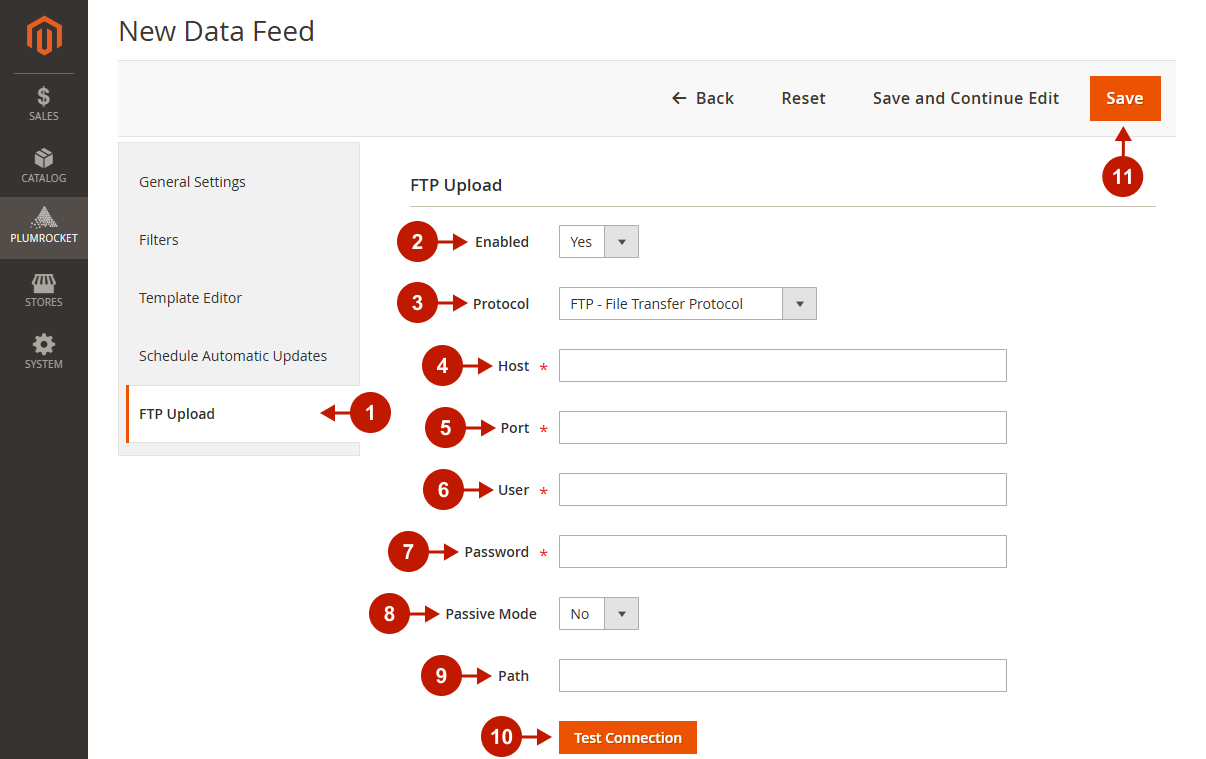
FTP Upload
Step-by-step guide:
- Go to the FTP Upload tab.
- Enable the FTP Upload. If you enable this option, the data feed will be automatically uploaded to the FTP server after each manual or scheduled data feed rebuild.
- Choose the Protocol (FTP or SFTP SSH).
- Specify your Host.
- Specify the Port.
- Enter your FTP/SFTP SSH User.
- Specify the user Password.
- Enable or disable the Passive Mode. This option is only available for the FTP protocol. If you enable it, the data connections will be initiated by the client instead of the server, which can be useful if the client is behind a firewall. Please note that Passive Mode can only be enabled after a successful login; otherwise, the operation will fail.
- Specify the Path where you would like to save the Data Feed.
- Test if the Connection works properly.
- Save your changes.
Setting Up ShareASale Data Feed & Google Product Category Mapping
Configuring the ShareASale & Google Data Feeds for Categories
Step-by-step guide:
- In the main menu navigate to the Catalog tab > go to the Categories section. In the left sidebar, select the category for which you want to set up ShareASale data feed.
- In the Commission type drop-down, select one of the following commission types for this category: Inherited from Parent Category, Percentage, or Flat amount.
- “ShareASale Comission“:
- “ShareASale Category“: in this field, you can select the subcategory for the ShareASale data feed. Its category will be automatically defined in the data feed file.
- “Google Product Category Mapping“: map the Magento and Google category to be correctly defined in Google data feed.
- Click Save to apply changes.

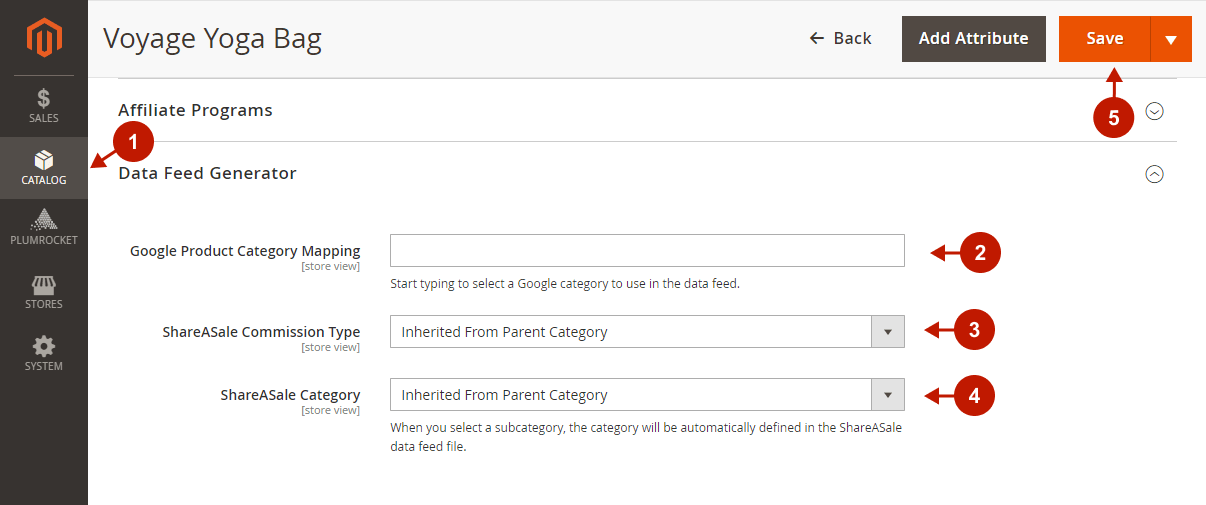
Configure the ShareASale & Google Data Feeds for Products
Step-by-step guide:
- In the main menu navigate to the Catalog tab > go to the Products section, and scroll down to the Data Feed Generator section.
- In the Google Product Category Mapping option, set the Google Category to Use in the Data Feed.
- In the ShareASale Commission Type drop-down, select one of the following commission types for this product: Inherited from Parent Category, Percentage, Flat amount.
- In this field you can select the ShareASale Category.
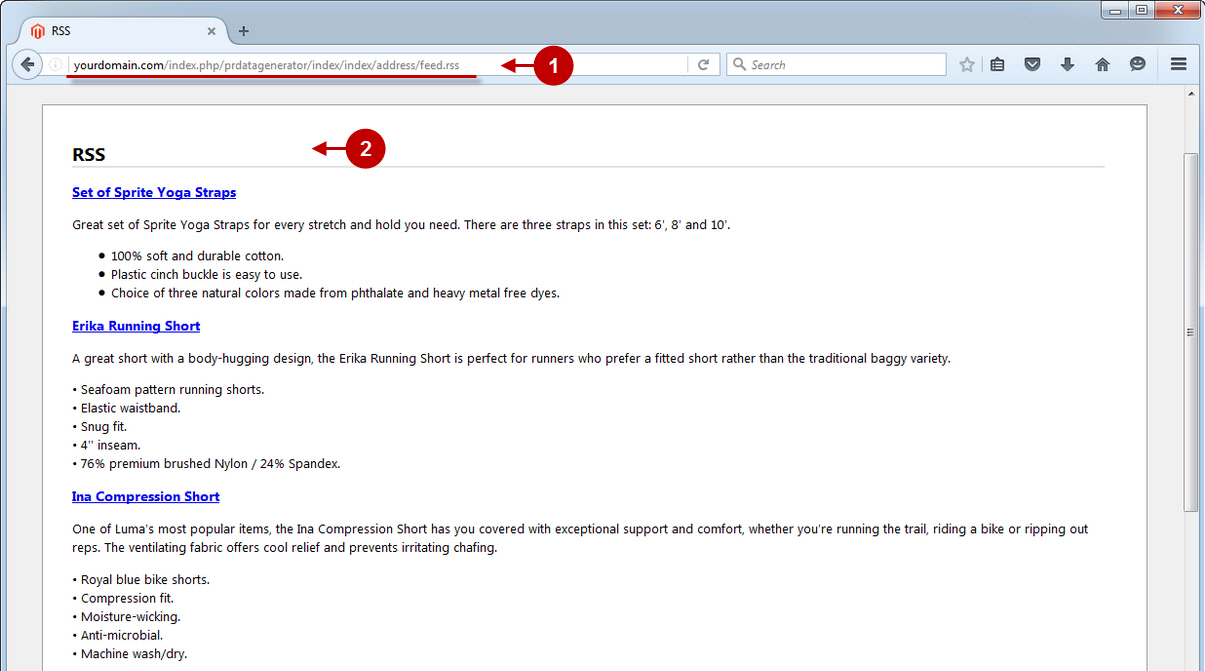
How Magento 2 Data Feed Extension Generates Data Feed on the Frontend
Step-by-step guide:
- This is the link to access the Data Feed page.
- This is the xml structure created by means of Magento 2 Data Feed Generator.