In this article, we will walk through each step of setting up Google Consent Mode in Tag Manager while configuring the Magento 2 Cookie Consent extension.
GTM Consent mode is a new feature presented by Google that helps manage how tags behave based on the consent status of your users in a more flexible way. This feature is replacing the deprecated “Associated Cookie Category” mode, allowing you to control each individual tag firing in GTM, instead of enabling/disabling the entire GTM when a visitor allows/denies the corresponding (associated) cookie category.
Please take the following steps to properly configure the GTM Consent Mode.
1. Set Up Your GTM Account
Create a GTM Account and Container
Important Information:
If your GTM account and the container are already created, skip this step and start adding new tags to the container.
Step-by-step guide:
- Go to tagmanager.google.com and sign in to Google Analytics using your existing Google account associated with your business. Please note that you may be automatically authenticated if you are logged in to the Google account in your browser. In this case, click the Account icon and check whether you are using the correct account.
- Click Create Account to start creating a GTM account.

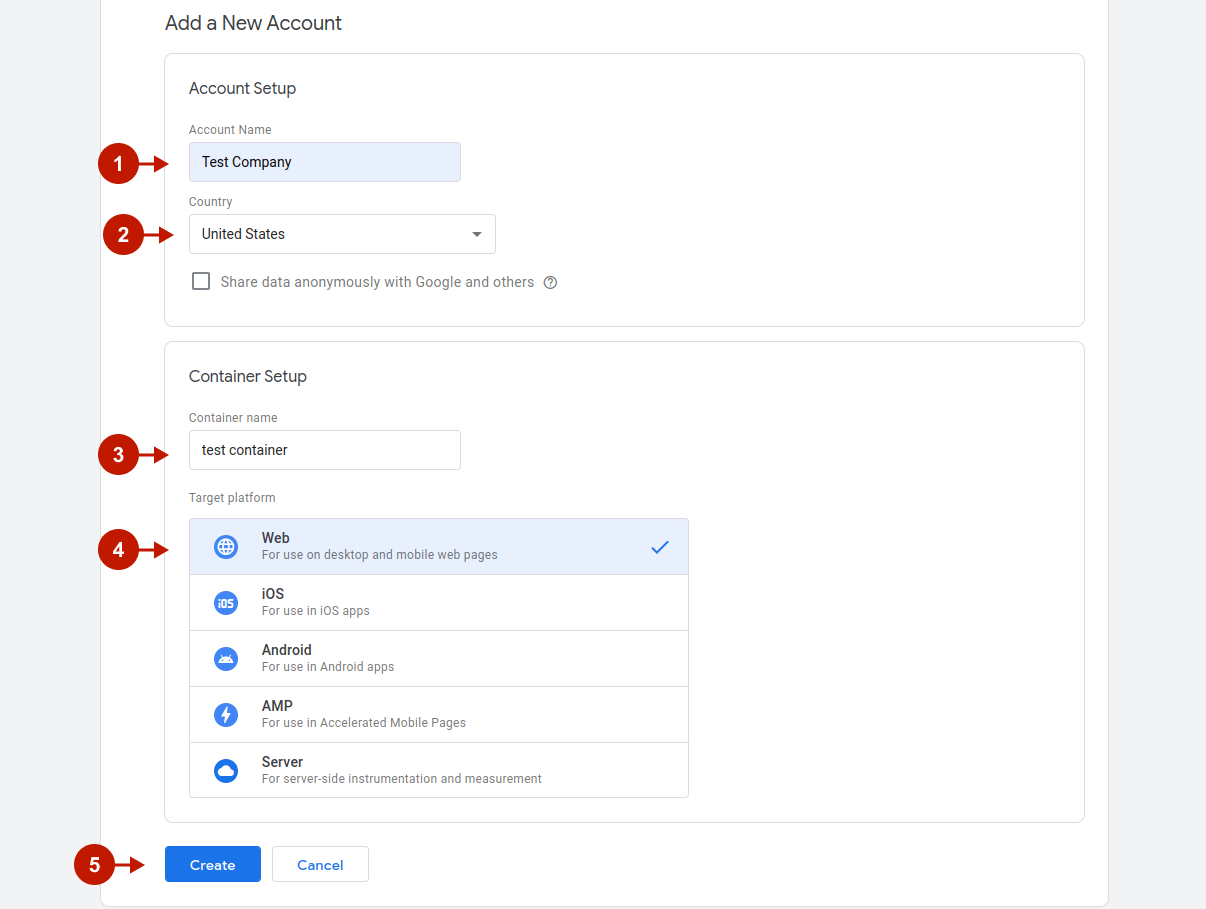
Step-by-step guide:
Account Setup
- “Account name“: please enter the name for your GTM account.
- “Country“: select the country of your business.
Container Setup
- “Container name“: please enter the descriptive name for your GTM container.
- “Target platform“: select the Web type of content.
- Click Create.
Review the Terms of Service and click Yes if you agree to those terms.
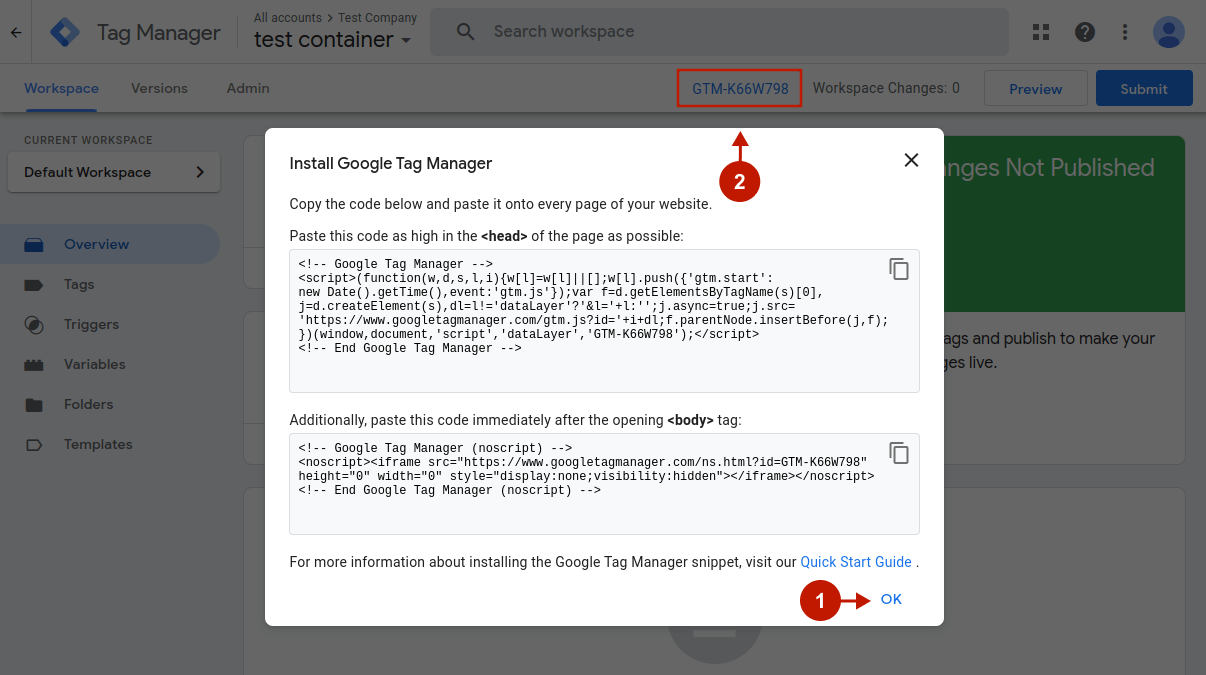
Step-by-step guide:
- The web container installation code snippet will appear. This snippet fires tags and needs to be added to each web page. However, you do not need to do this manually thanks to the Cookie Consent extension built-in GTM integration. Just click OK to clear this dialog.
- Near the top of the window, find your container ID, formatted as “GTM-XXXXXX”. Copy it to paste it later in the Magneto admin panel to set up the Magento 2 Cookie Consent extension integration (see the next step).
Install GTM Container in Magento 2
Step-by-step guide:
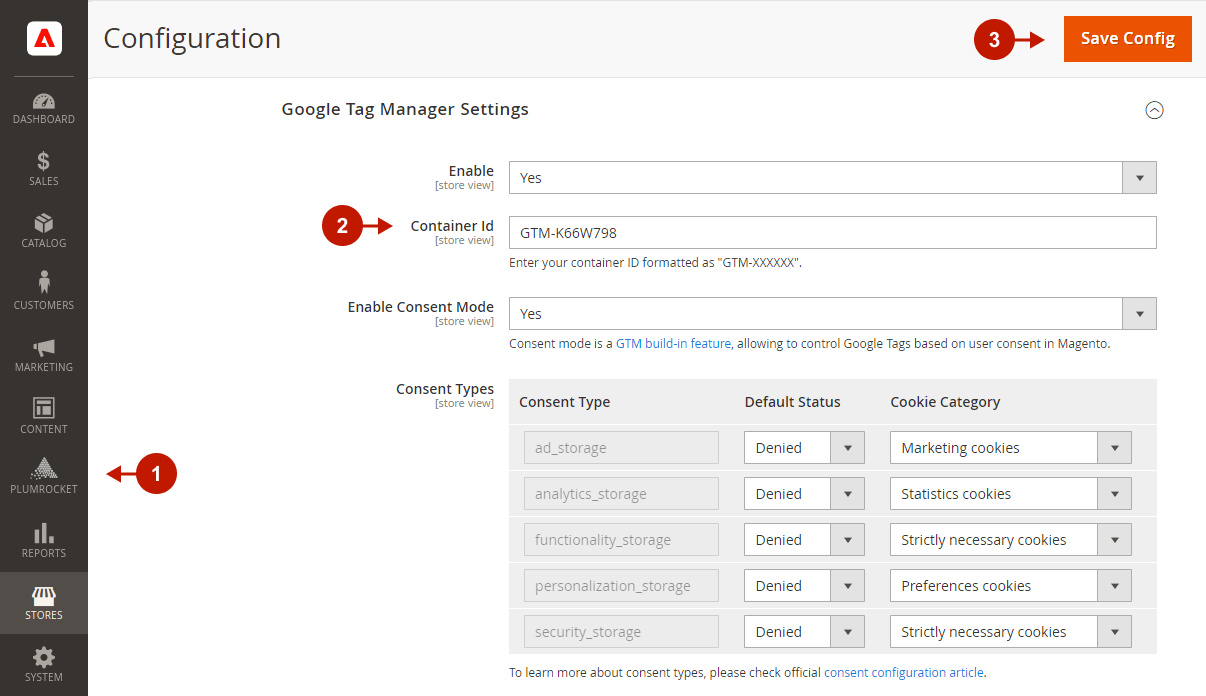
- In the Magento admin panel, go to Plumrocket -> Cookie Consent extension -> Configuration.
- Scroll down to the Google Tag Manager Settings tab and paste your Container ID in the Container Id field.
- Click Save Config.
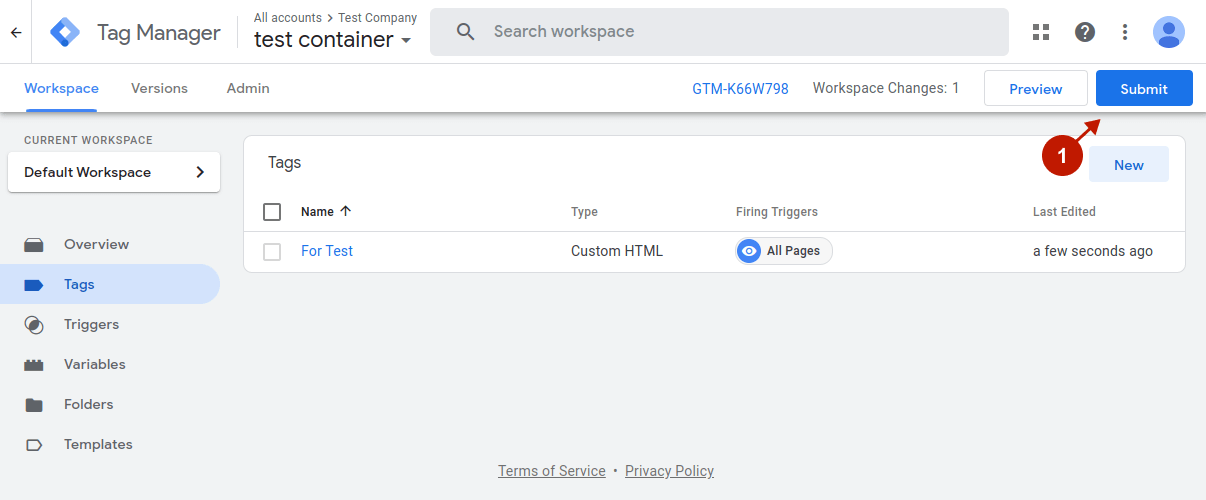
2. Add GTM tags
Once a GTM account and container are installed, you’re ready to add new tags.
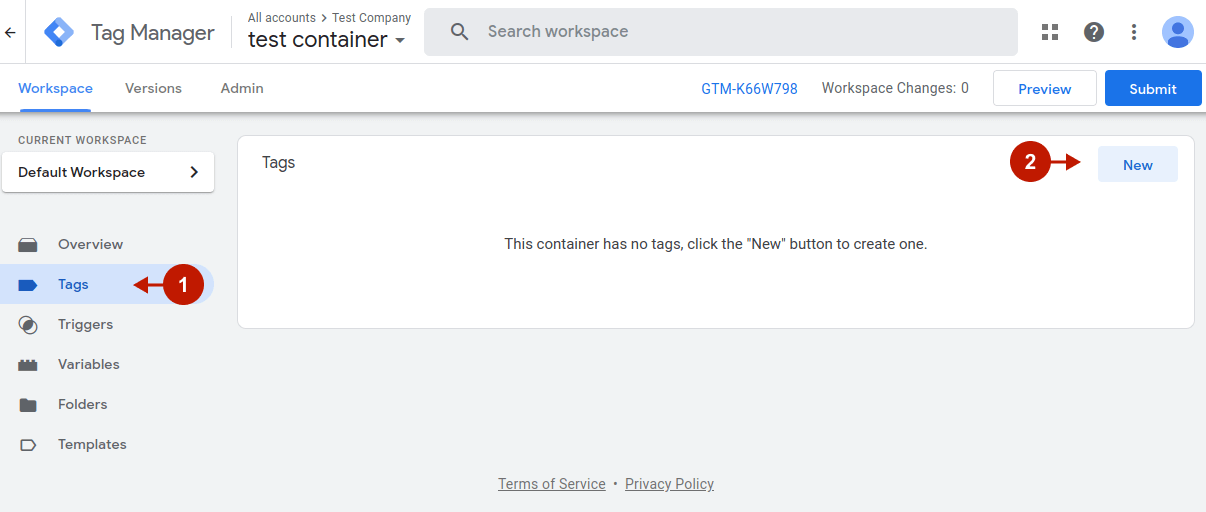
Step-by-step guide:
- In Google Tag Manager, click Tags from the navigation menu.
- Click New.
Tag Configuration
Step-by-step guide:
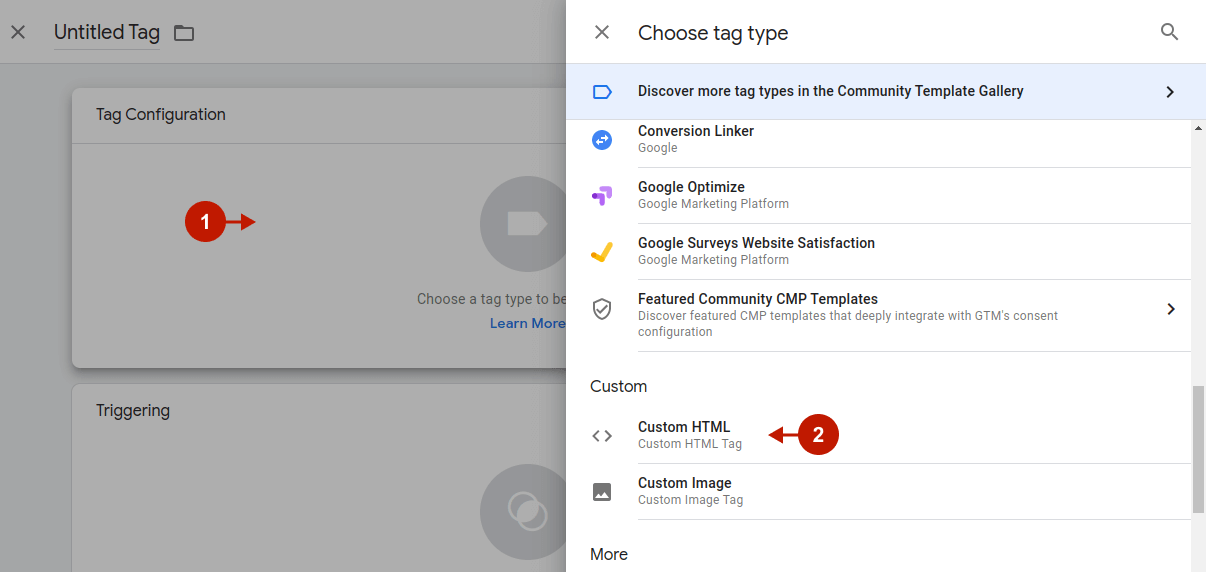
- Click anywhere on the Tag Configuration field to start setting it up.
- Find and choose the tag type that suits your needs. Some of the further configurations will be set by default according to the selected tag type requirements. However, in this tutorial, we will show you how to add a custom HTML tag. For this, scroll down and choose the Custom HTML tag type.
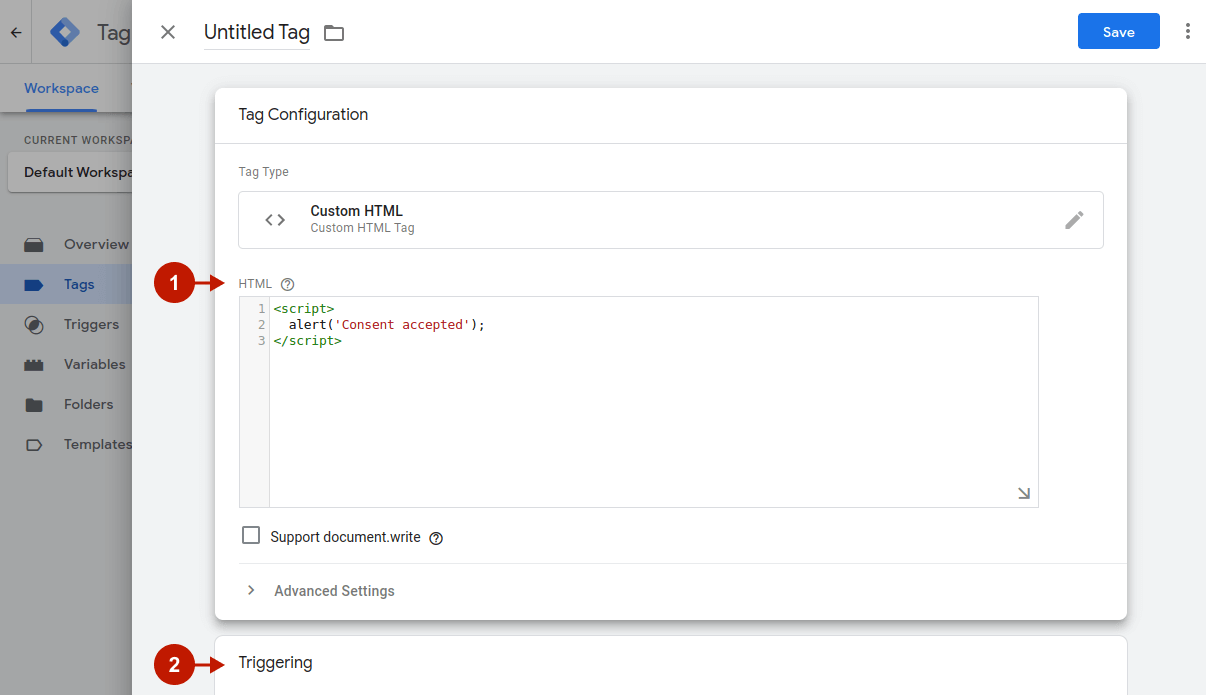
Step-by-step guide:
- In the HTML section, add the code that will be executed when a user allows cookies on the site.
- For example:
<script>
alert('Consent accepted');
</script>
- For example:
- Expand the Advanced Settings.
Step-by-step guide:
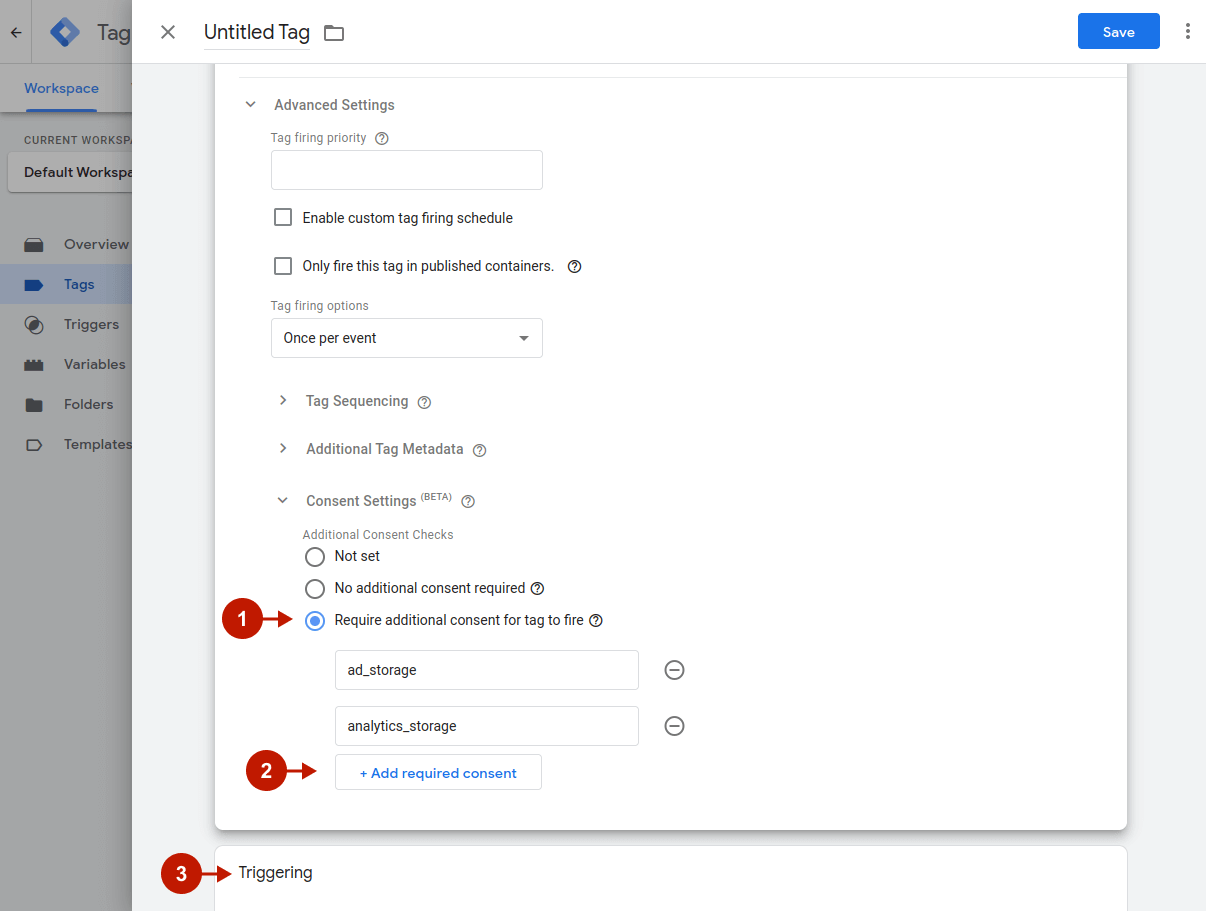
- Expand the Advanced Settings -> Consent Settings and select the Require additional consent for tag to fire checkbox.
- Add the required consent types
ad_storageandanalytics_storage. The following consent types are supported and can be used to control tag firing in Google:
| Consent Type | Description |
| ad_storage | Enables storage (such as cookies) related to advertising |
| analytics_storage | Enables storage (such as cookies) related to analytics e.g. visit duration |
| functionality_storage | Enables storage that supports the functionality of the website or app e.g. language settings |
| personalization_storage | Enables storage related to personalization e.g. video recommendations |
| security_storage | Enables storage related to security such as authentication functionality, fraud prevention, and other user protection |
Triggering
At this point, you need to specify triggers for when the tag should fire. The Google Consent Initialization trigger is designed to ensure that all user consent is honored before any other triggers fire.
Step-by-step guide:
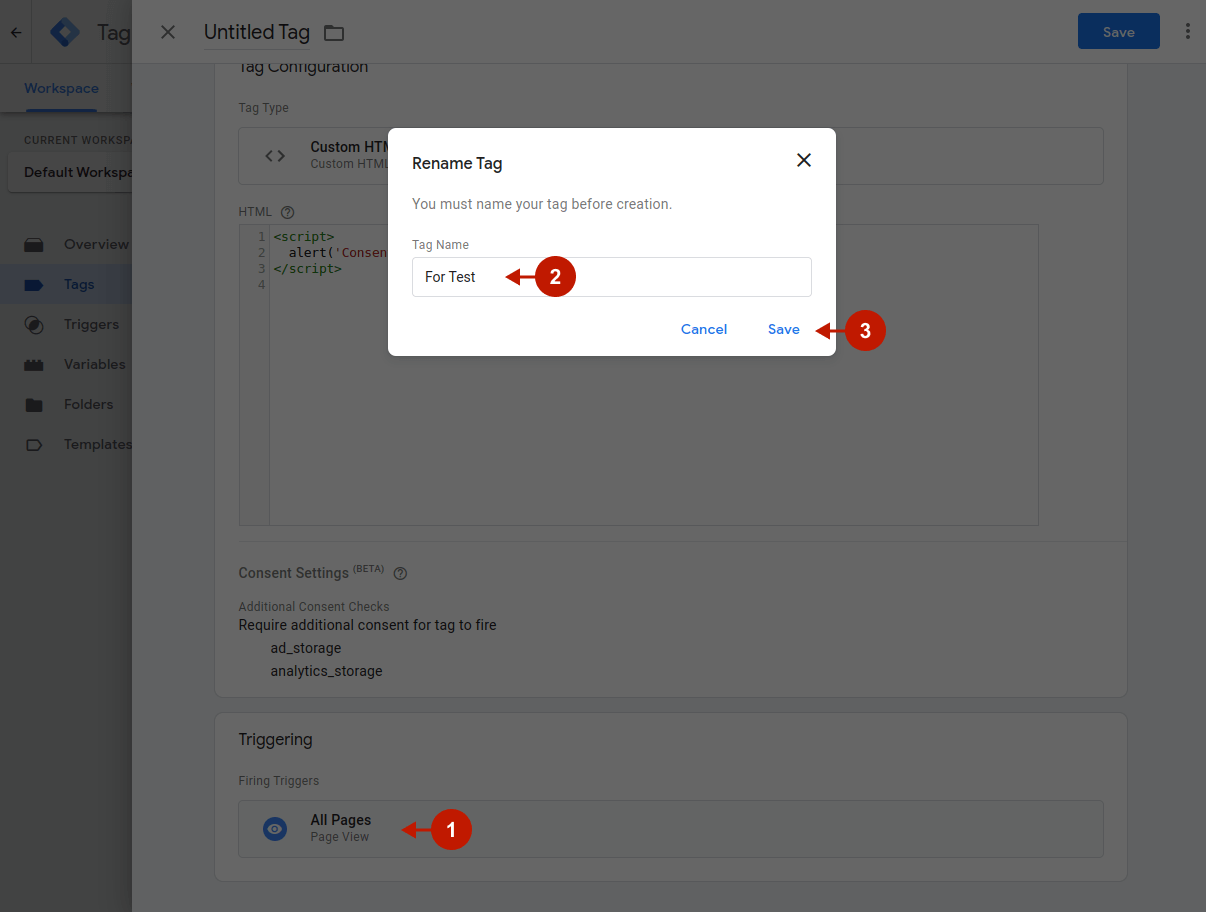
- Click on the Triggering section and select the All Pages trigger to fire the tag after a user consent is granted.
- Rename the tag before creation.
- Click Save.
Step-by-step guide:
- Review and apply the recent changes by clicking Submit -> Publish.
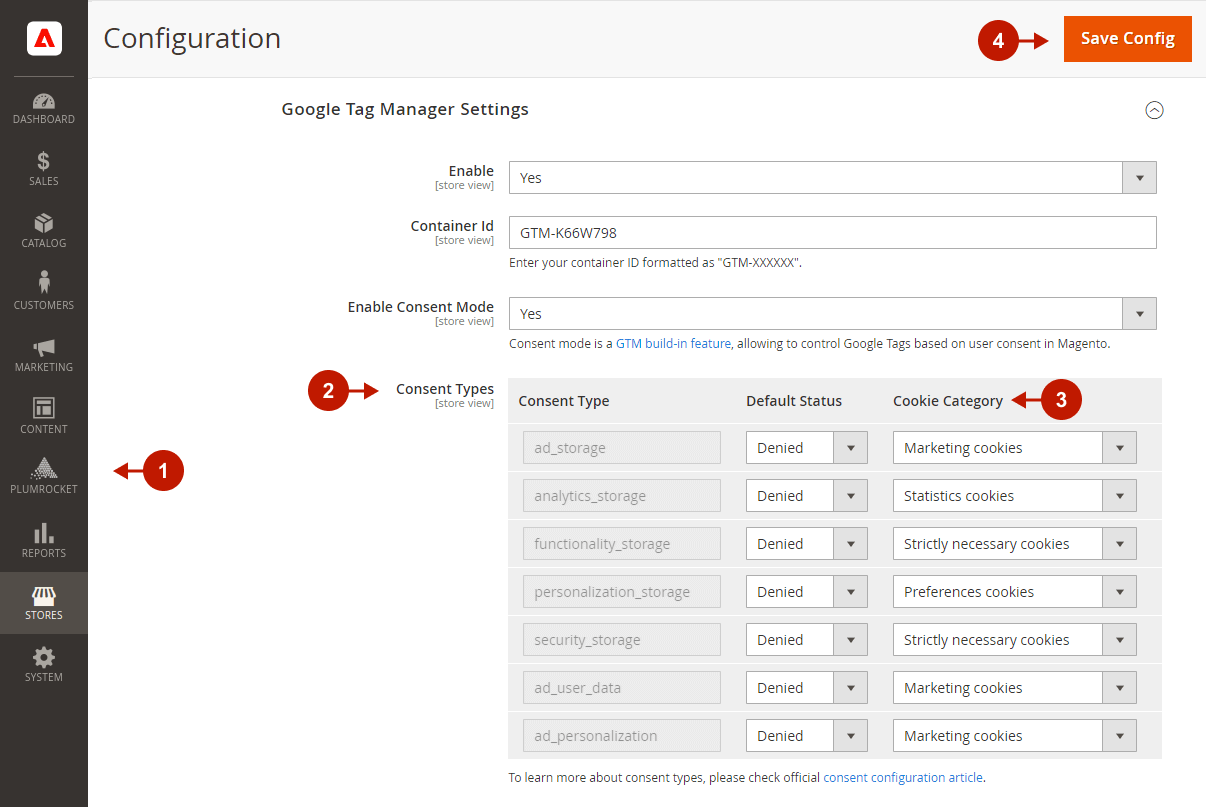
3. Set Up GTM Consent Mode in Magento 2
Important Information:
Consent mode was updated in November 2023 and now contains two additional consent types: ad_user_data and ad_personalization. If you already use consent mode, upgrade your Magento to Consent Mode v2 by March 2024 to comply with the latest privacy regulations and ensure that data about new EEA users will be captured.
.
To ensure compliance with Consent Mode V2, please make sure that your Cookie Consent extension is version 1.11.2 or later. The newly introduced consent types are automatically assigned to cookie categories. However, if you have any customizations in place, please verify that the assigned cookie categories are accurate.
Step-by-step guide:
- In the Magento admin panel, go to Plumrocket -> Cookie Consent extension -> Configuration.
- Scroll down to the Google Tag Manager Settings tab -> Consent Types section.
- Set Cookie Categories for the Consent types that you added in the Tag Configuration section. In our example, we set the Marketing Cookies and Statistics Cookies categories for the
ad_storageandanalytics_storagecontent types accordingly. - Click Save Config.
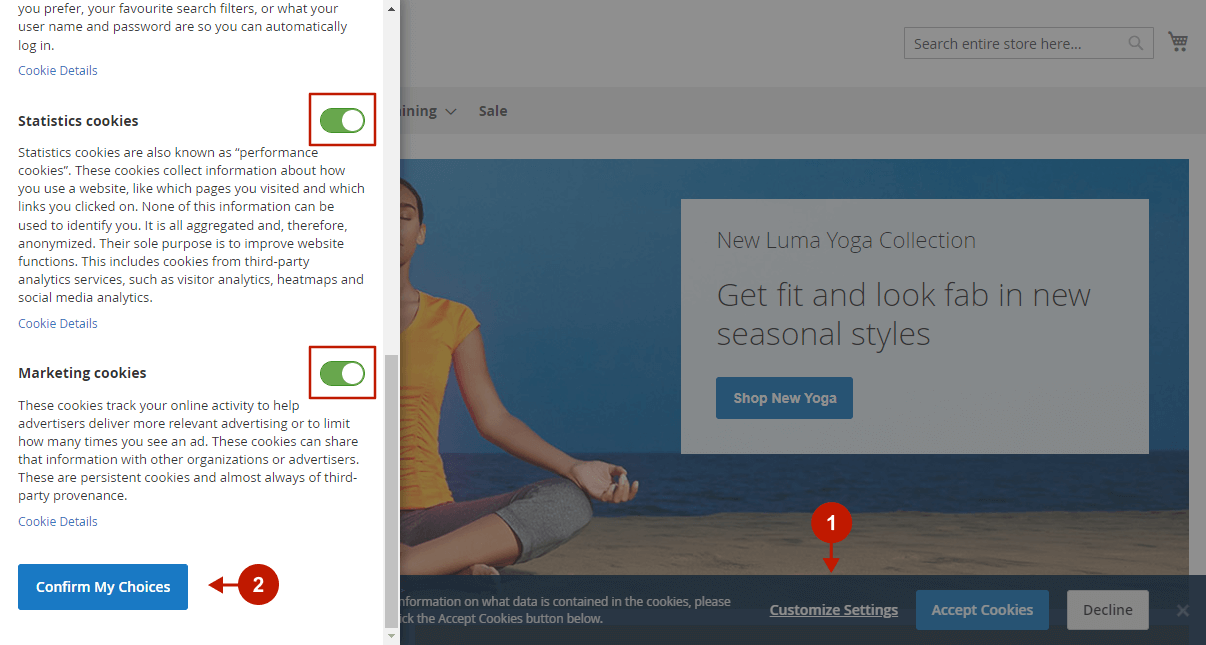
Test GTM Consent Mode in Magento 2
Now, in order to fire the created tag, you need to agree to the Marketing and Statistics cookies on your website.
Step-by-step guide:
- Go to your website’s frontend, and click Customize Settings when the cookie consent banner appears.
- Enable Marketing cookies and Statistics Cookies, and then click Confirm My Choice.
Step-by-step guide:
After cookie categories are enabled, you will see the “Consent accepted” message, which you have set in the tag HTML section.

The Google Consent Mode is now properly configured. Please mark this post as helpful or not, and feel free to contact us if you have any further questions.