To make the boutiques management more convenient we recommend creating a structure of boutiques. Imagine that you are going to create one or several boutiques with the sale period from March 14 to March 21. If you unite these boutiques into one subcategory the management process will be much easier.
To show you how it works we suggest the following title for this subcategory: “Week 03/14-03/21” which corresponds to the sale period of the products (March 14 – March 21) (in your case you will set any title (For example: “Day 03/14” or “Month_March”) and the required time frames).
Later, you can add several boutiques to this subcategory whereas the products of these boutiques can have any sale periods you set.
Such a structure of boutiques will enable you to control the activity of each boutique with different sale periods.
Sales Management
This Magento Private Sales Script allows you to set the time frame during which the boutiques will be displayed. The extension can be configured by means of a convenient tab available in every boutique management interface.
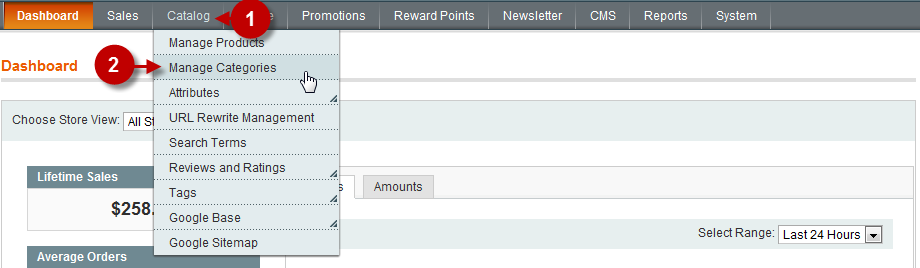
First, open the Sections and Stores Management page as shown on the screenshot.
Step-by-Step action:
- Click on the “?atalog” tab in main menu.
- Select “Manage Categories”.
Step-by-Step action:
- Press the “Private Sales Settings” tab.
- You can set the boutique sales time frame here.
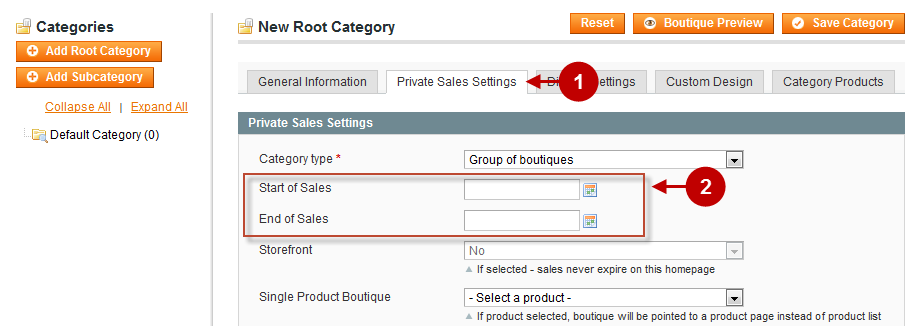
Thus, you can set the period when the boutiques will be available on the website and the customer will be able to purchase items belonging to this boutique.
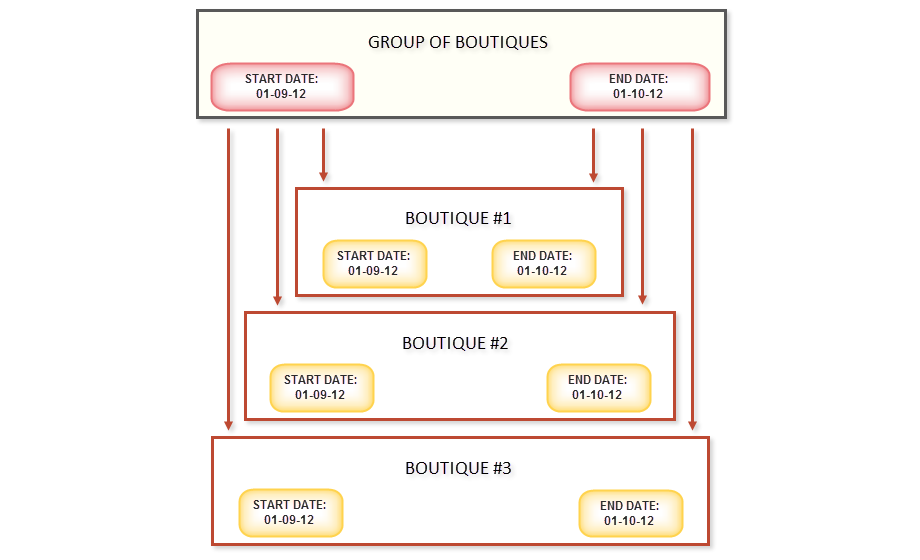
Note, this option allows you to set both the sales period for a single boutiques, and for the group of boutiques. Keep in mind that the sales period of a boutique has a higher priority than that of the group of boutiques it belongs to (i.e. with sales periods set for both a single boutique and a group of boutiques, the system will ignore the group settings and display the settings of each boutique separately).
The priority of settings is as follows: first, the system checks the sales period of a boutique; if there is not one, the system will display the sales period of a subcategory; if that is absent, the system will display the sales period of the root category.
Inheritance of dates, example
To better understand the inheritance of dates, look through the schemes below. This is the most common inheritance scheme – all boutiques inherit dates from their parent group of boutiques:
Below is the scheme depicting the date set for one boutique only.

This Magento private sales extension provides ‘to-the-minute’ time settings!
Additionally there are two further ways of how to configure the boutique page after the sales period has expired: 1) to show the 404 error indicating that the page is no longer available on the website; 2) to leave the page available while disabling the purchase option for all the products belonging to this boutique and providing corresponding notifications.
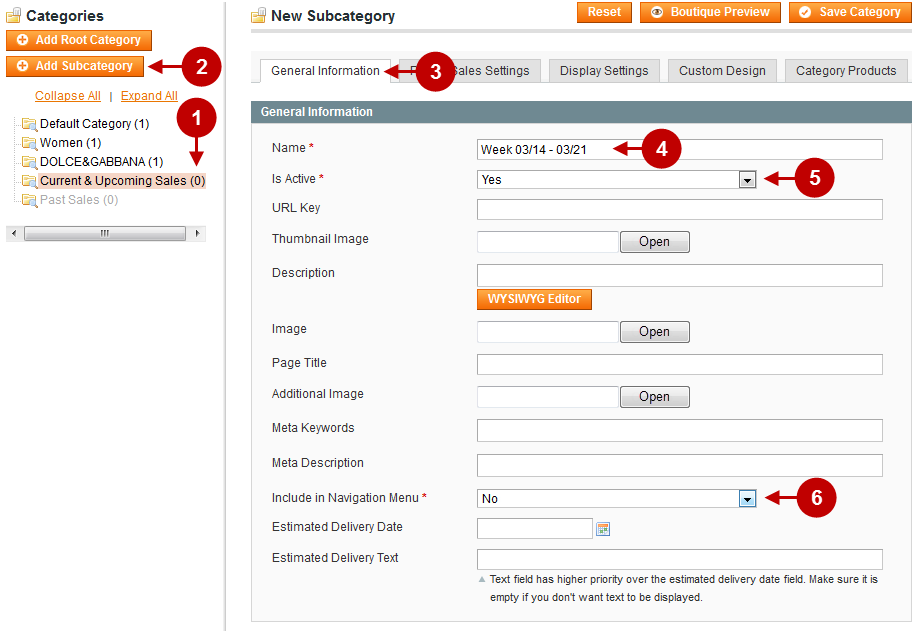
Creating a subcategory
In order to create a subcategory, follow the instructions below.
Detailed description:
- Click on the “Sale section”, you want to add a subcategory to.
- Press the “Add Subcategory” button.
- Choose “General Information” tab.
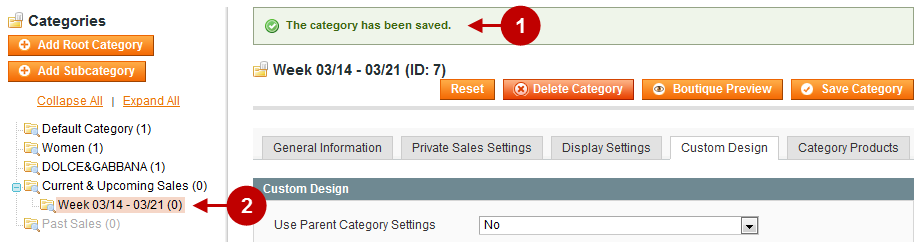
- Field “Name”: Type the name of the category. In our example, it is “Week 03/14-03/21”.
- Field “Is Active”: set “YES”.
- Field “Include in Navigation Menu”: set “No”.
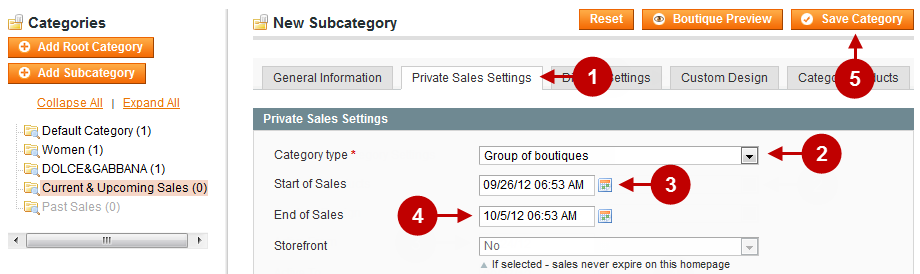
Move to “Private Sales Settings” tab, fill in all the required fields and save.
Important Information:
Here you have to set the sales period for this subcategory, that is, all the boutiques belonging to this subcategory will be shown in the selected period of time.
Detailed description:
- Choose tab “Private Sales Settings”.
- Option “Category type”: allows you to choose the type of category you need. Possible options are: Boutique, Home Page, Group of Boutiques.
- Option “Starts of Sales”: Set the start of sales for this category.
- Option “End of Sales”: Set the end of sales for this category.
- Press the “Save Category” button.
Next Step > Step 5: Creating first boutique
If you have followed the guidelines correctly, you will see a Successful Message and a new Subcategory in the list on the left side.