Before you start mailing using the MailChimp System you should synchronize the list of your clients (those who have subscribed for the mailing) with the MailChimp System first.
Important Information:
To make sure all your clients receive newsletters from your Private Sales Store, you will have to repeat this step every time before you start another mailing campaign.
For instance, since you last sent newsletters to your clients on 04/19/2012, 20 more clients registered at your website. To add these clients to the Mailing List on MailChimp, you will have to repeat Step 3. This will allow you to add new clients to the Mailing List.
Video Tutorial: Synchronizing the List Of Subscribers With MailChimp
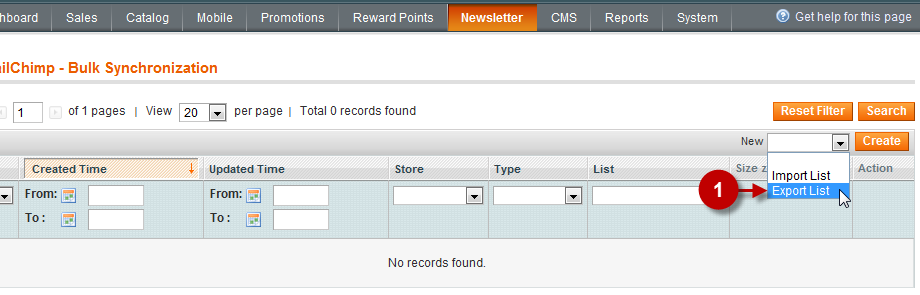
Bulk Synchronization Menu
To reach the synchronization settings page, follow these steps.
Step-by-Step action:
- Select form the menu bar “NEWSLETTER”
- Choose “MAILCHIMP”
- Move to “BULK SYNCHRONIZATION”

Export List
Step-by-Step action:
- FROM THE DROP-DOWN LIST IN THE BLOCK TITLED “NEW” SELECT THE LINE WITH THE VALUE “EXPORT LIST”.
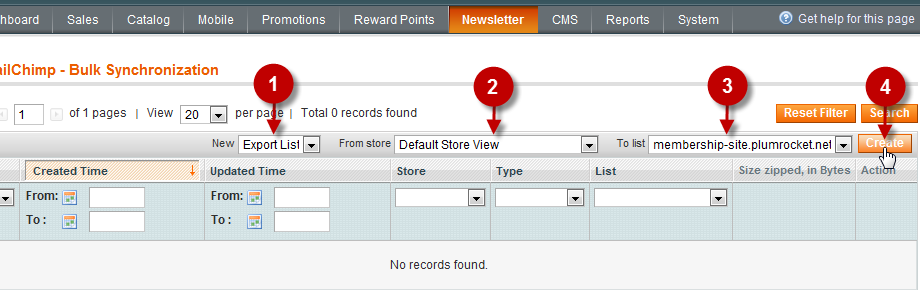
Export List Settings
Continue the synchronization of settings:
Step-by-Step action:
- IN THE SECTION TITLED “NEW” THE VALUE SHOULD BE “EXPORT LIST”.
- Field: “New”: Set “Export List”
- Field: “From Store”: Set “Default Store View”
- Field: “To List”: Choose the list previously created in MailChimp you want to synchronize data with.
- Press “Create” button
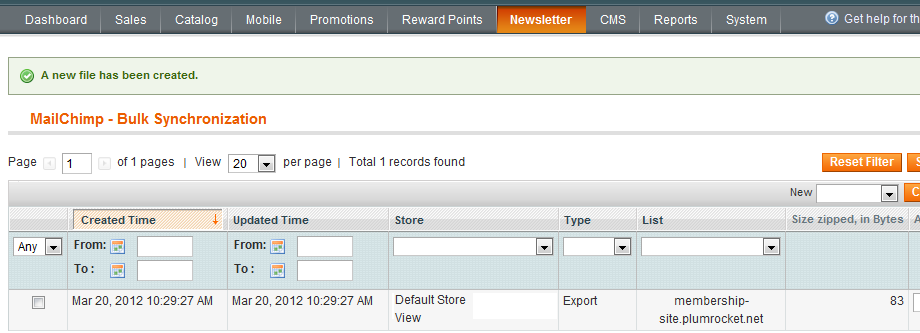
Successful creation
If you completed the previous steps properly, you will see the message telling that the file has been successfully created. In its turn, the Export List will appear in the list on the page as shown below.
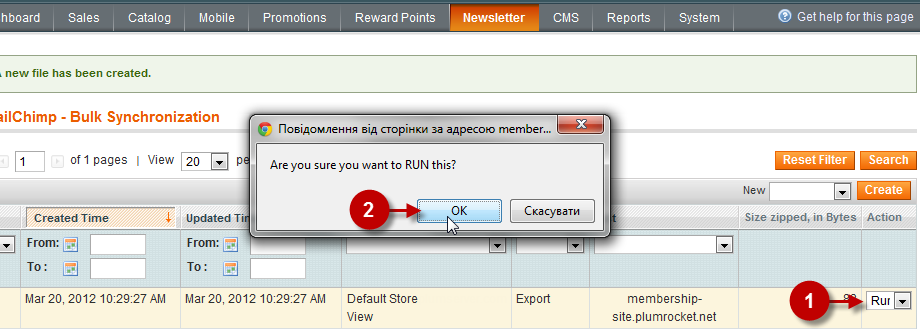
Synchronization
Now the preparation steps are over, and you can launch the synchronization of your clients data with the MailChimp system.
Step-by-Step action:
- Select “RUN” from the drop-down list next to the previously created “Export List”.
- Click on ?? , on the pop-up window to confirm the launching of synchronization
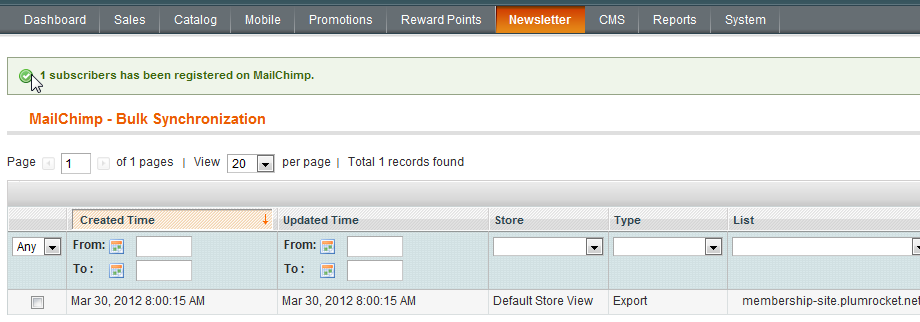
The result of Synchronization
In case of a successful synchronization you will see the message containing the number of subscribers synchronized.
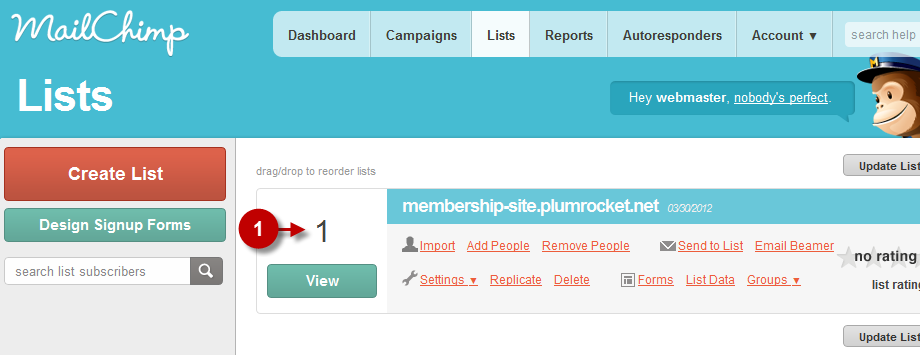
The Result of Synchronization in MailChimp
When you log into your MailChimp account you will be able to see how many of synchronized subscribers you have. This information is saved in the section LISTS
Next Step > Step 4: Setting up email campaign in MailChimp