Video Tutorial: Setting Up Mailing Campaign in MailChimp
Login to MailChimp
To start the setting of mailing, you should log into the MailChimp System using the login and password you provided during the account registration.
Step-by-Step action:
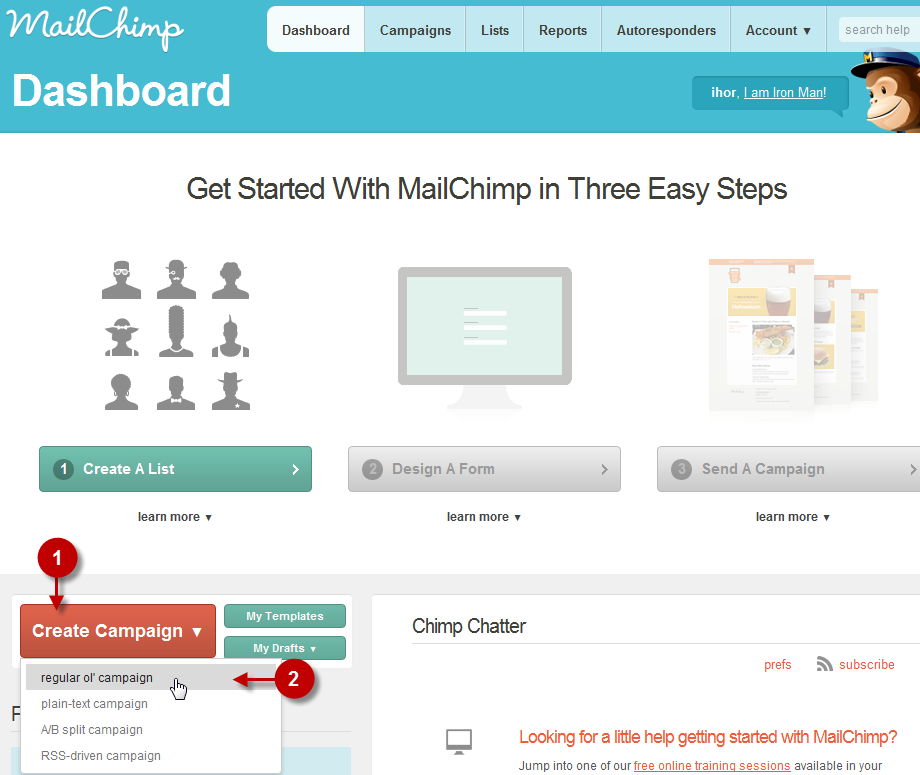
- In the section “Dashboard” click on the “CREATE CAMPAIGN” tab
- Select “REGULAR OL’ CAMPAIGN”
Choose the list
Step-by-Step action:
- Choose the list you would like to send this campaign to
- Then press “NEXT”

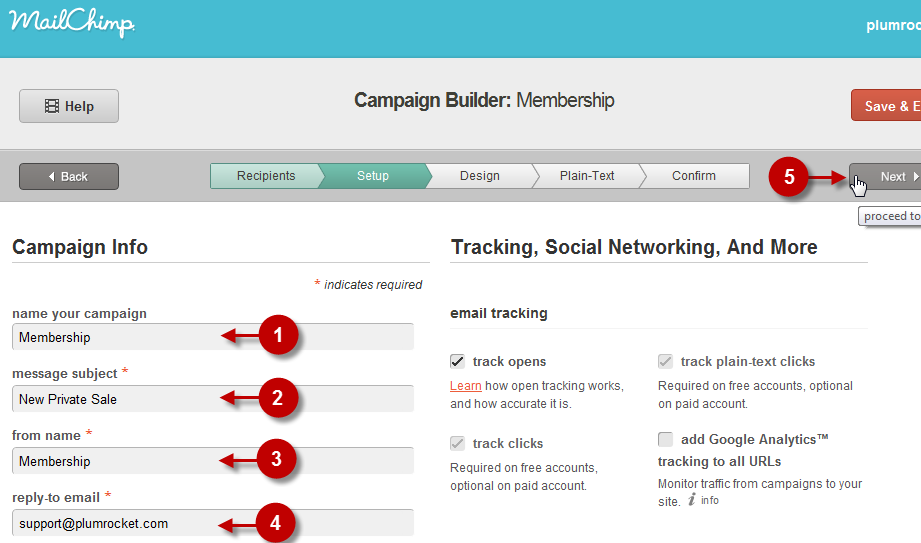
Required Fields
Step-by-Step action:
- Field “Name your campaign”: Enter the name of your mailing campaign
- Field “Message subject”: Enter the subject of mailing
- Field “From Name”: Enter the sender’s name
- Field “Reply-to e-mail” Enter the e-mail for reply
- Then press the “NEXT” button
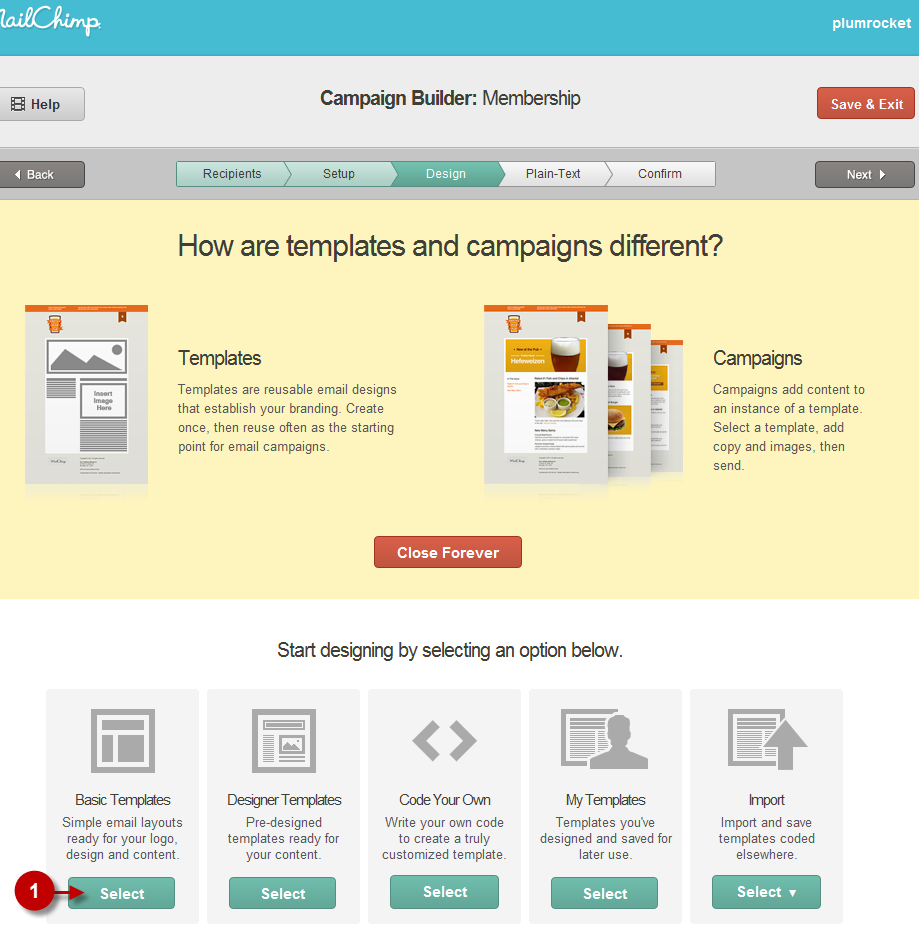
Type of Template
Step-by-Step action:
- Choose the category of the template. These could be either standard templates, or designer templates
- Press “NEXT”
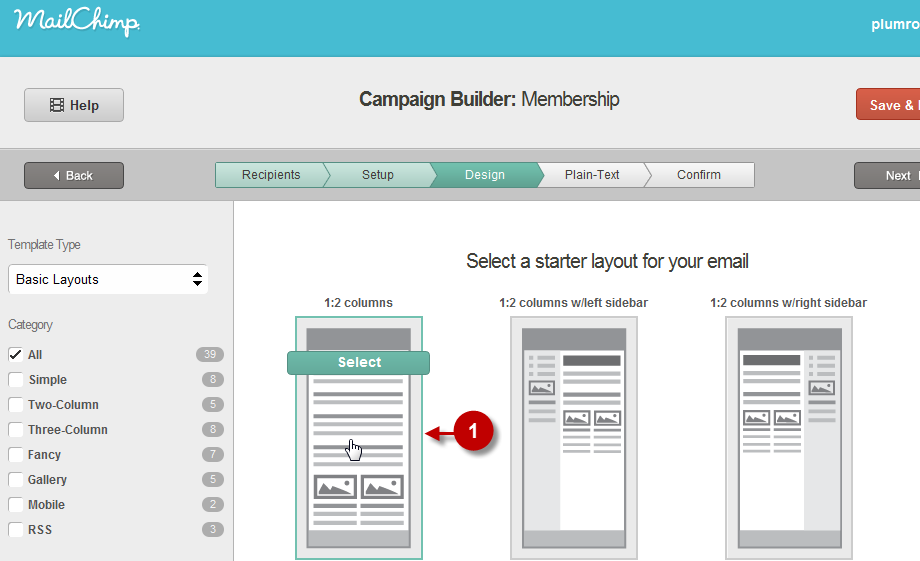
Kind of Template
Step-by-Step action:
- Choose the template
- Press “NEXT”
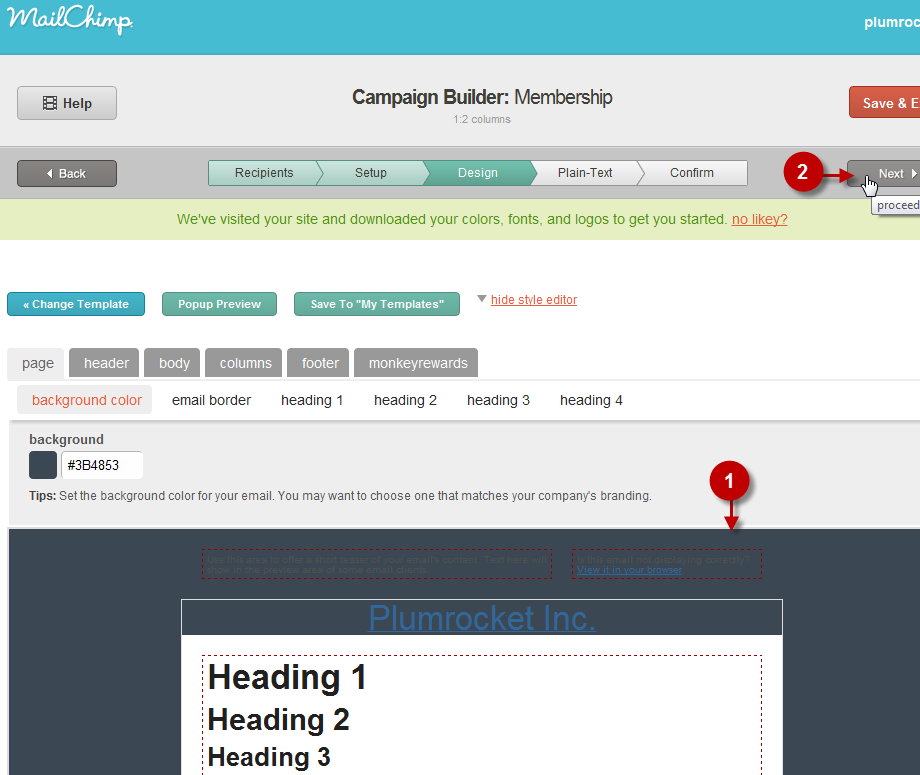
Editing a Template
You will see a template edition page, where you will be able to change the content and style of mailing message.
Step-by-Step action:
- Edit the content of the message if necessary
- Press “NEXT” button
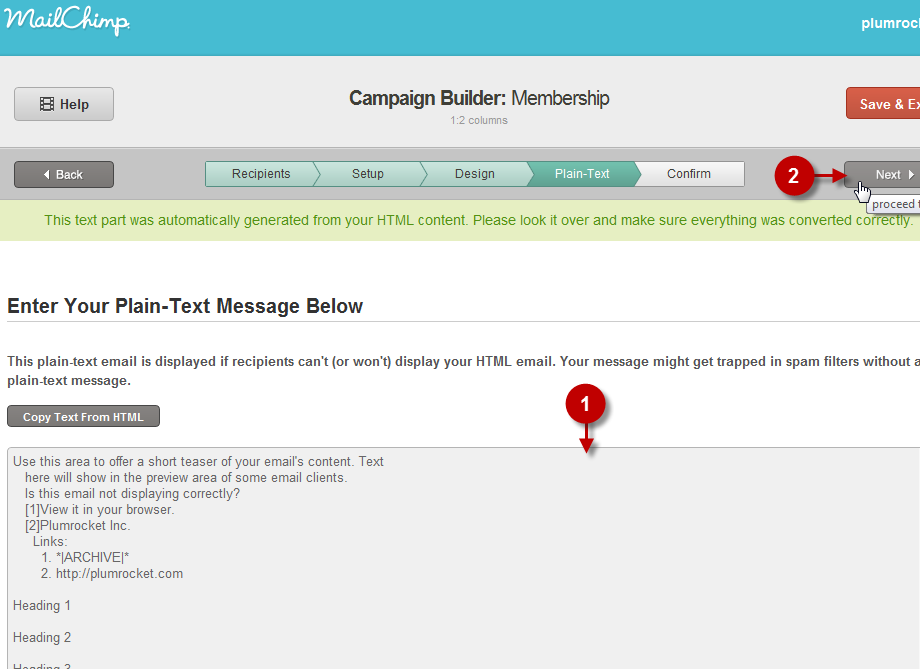
Editing a Template in Plain-Text Format
This page will let you edit the template in case the subscribers cannot receive messages in HTML-format, while only Plain-Text format is available.
Step-by-Step action:
- Edit the content of the message if necessary
- Press the “NEXT” button
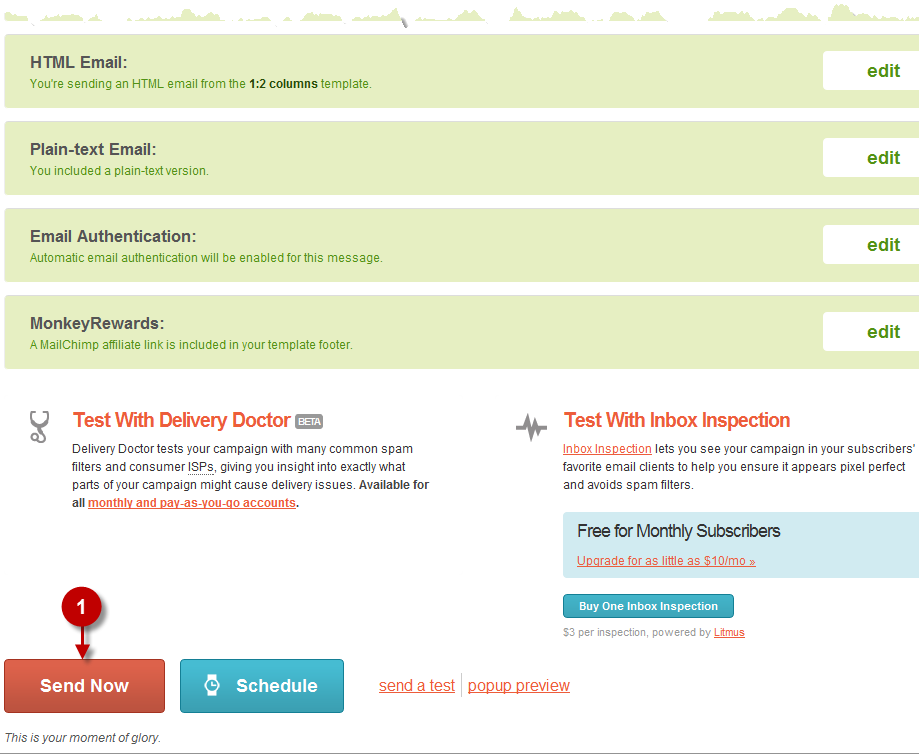
Starting Mailing
Step-by-Step action:
- Go to the bottom of the page and press “SEND NOW”.
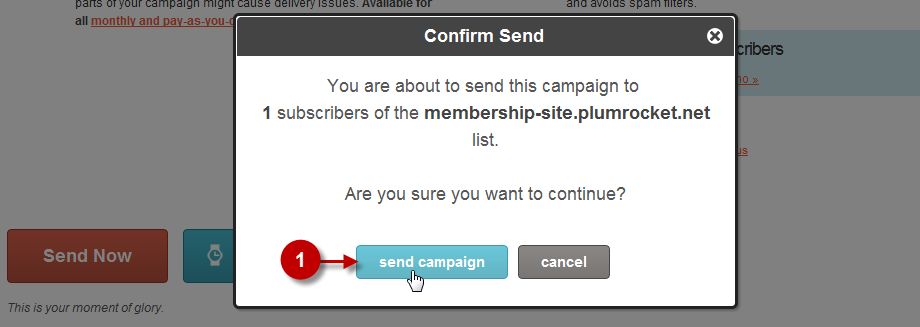
Confirmation of Mailing
Step-by-Step action:
- To confirm the launching of mailing campaign, click on “SEND CAMPAIGN”.
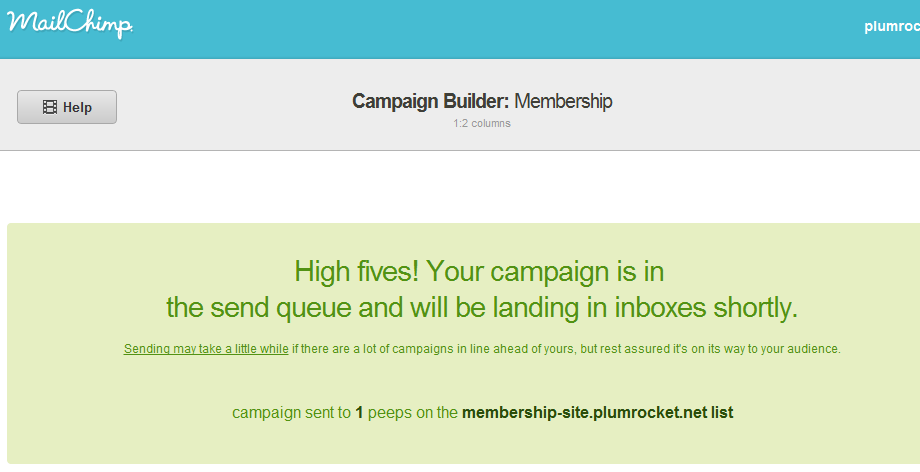
Successful Mailing
If everything was completed properly, you will see the page confirming your mailing campaign execution
Was this article helpful?