Video Tutorial: Creating MailChimp List
Creating a new list
To create a new list of your subscribers you should log into the MailChimp system using the login and password you provided during registration. Then, follow these steps:
Step-by-Step action:
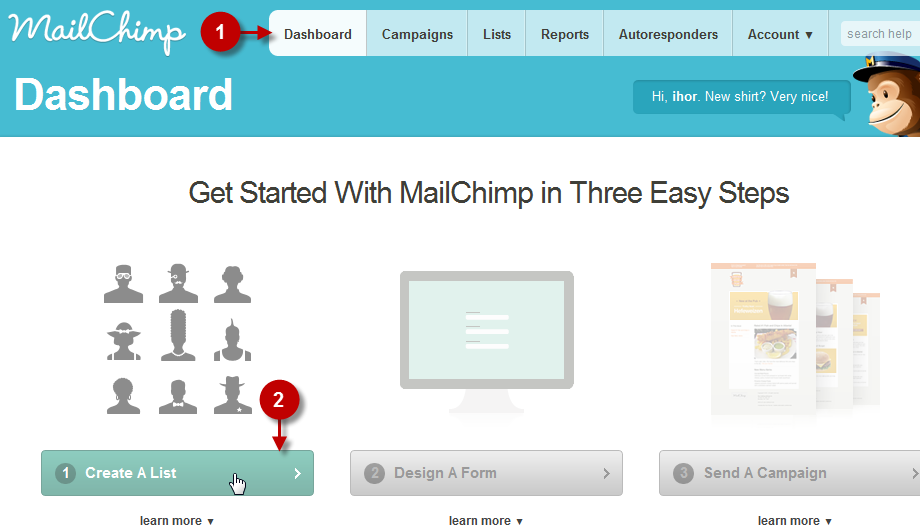
- Choose the “DASHBOARD” Tab in the main menu
- Click on the button “CREATE A LIST”
List Settings
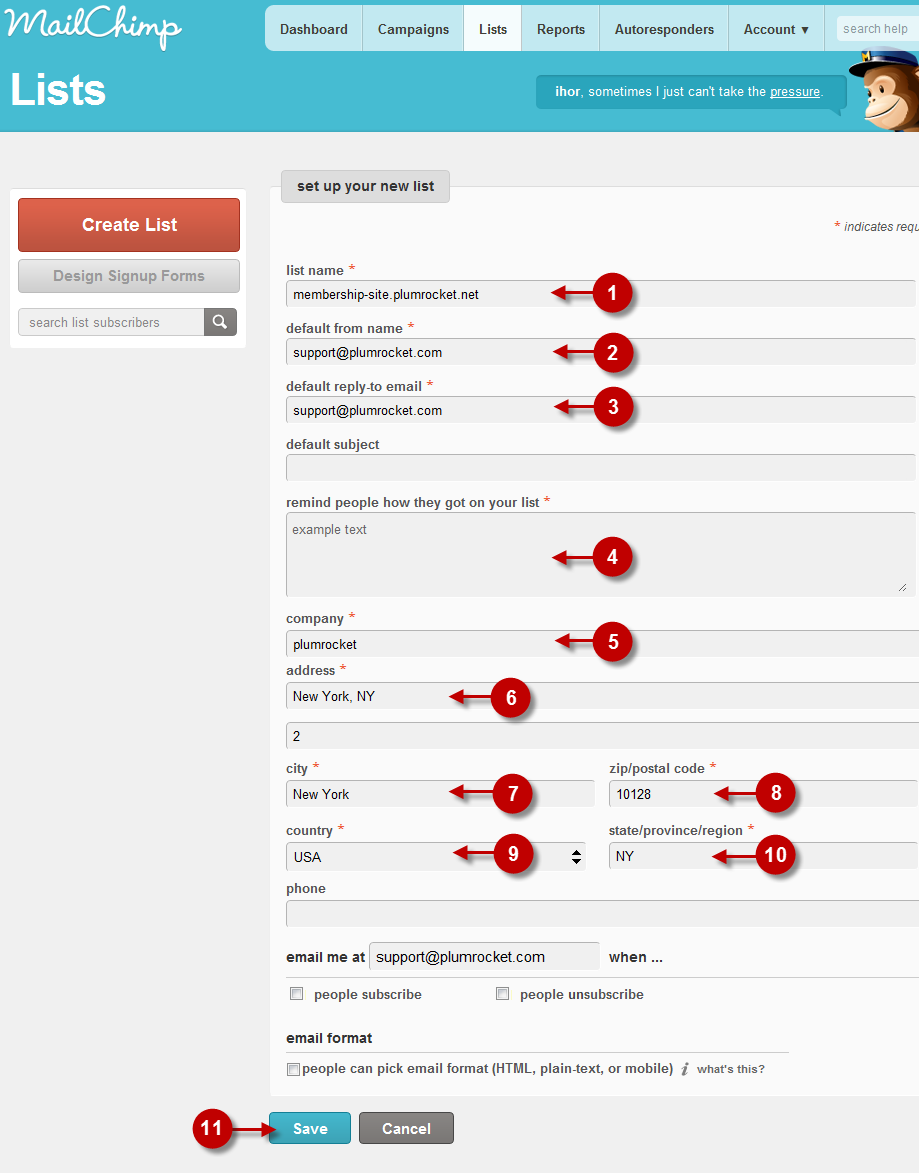
Fill in all the fields:
Step-by-Step action:
- Field “List Name”: Enter list name
- Field “Default From Name”: Enter the e-mail address mail will be sent from
- Field “Default Reply-To Email”: Enter the e-mail address the answer will be sent to
- Field “Remind People How They Got On Your List”: Provide a short explanation telling when the client was added to your mail list and why he received this e-mail.
- Field “Company”: Enter the new name of your company
- Field “Address”: Enter the company address
- Field “City”: The city where the company is located
- Field “Zip/Postal Code”: Enter the Zip Code
- Field “Country”: The country where the company is located
- Field “State/Province/Region”: Enter State/Province/Region
- Press “SAVE” button
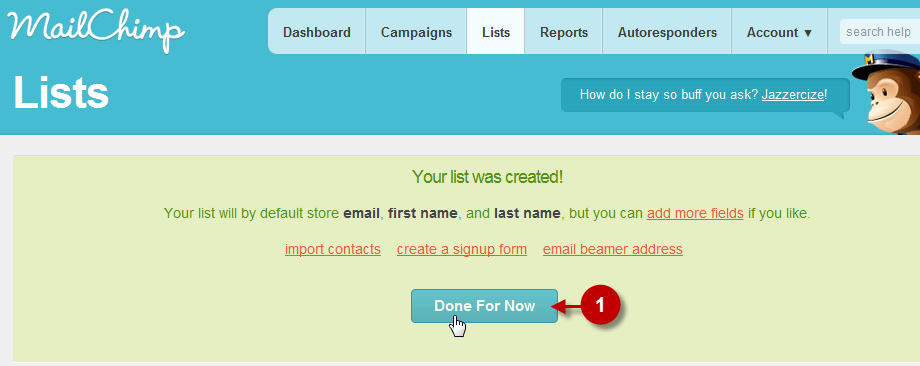
Successful creation of a list
If everything was done properly, you will see the message as shown below
Step-by-Step action:
- Press the “DONE FOR NOW” button
Next Step > Step 2: Configuring MailChimp module in Magento
Was this article helpful?