Theme Settings
Here you will find Private Sales Ocean Blue Mobile Magento Theme configuration tips that will help you configure the theme according to your needs and preferences.
This magento private sales theme requires Plumrocket Private Sales Magento Extension and Plumrocket Special Settings Magento Extension. However in order to get the most out of this magento theme it is recommended to install the full solution – Magento Private Sales Script.
The location of key theme files
Images
The images that are used in this theme are stored at the server at this address:
/web/skin/frontend/private_sales_ocean_blue_theme/mobile/imagesCSS
CSS files are stored at this address:
 /web/skin/frontend/private_sales_ocean_blue_theme/mobile/css/iphone.css
 /web/skin/frontend/private_sales_ocean_blue_theme/mobile/css/privatesales.css
The rest of Plumrocket Extensions create their own folders for CSS files. For instance, the Popup Login CSS files are located at this address:
/web/skin/frontend/private_sales_ocean_blue_theme/default/css/plumrocket/popuplogin/popup.cssTemplates
Theme templates are stored at this address:
/web/app/design/frontend/private_sales_ocean_blue_theme/mobile/template/Java Scripts
Java Scripts are located at this address:
/web/skin/frontend/private_sales_ocean_blue_theme/mobile/js/plumrocket/Mobile view mode
In order to enable switching from “Private Sales Ocean Blue” to “Private Sales Ocean Blue Mobile” you should follow the instructions described below. You must add the following link in the desired place of the mobile theme template:
<a href="?___viewmode=desktop" title="Go to Desktop version"><span>Go to Desktop version</span></a>You will also have to insert the following link in the desired place of the desktop theme template:
<a href="?___viewmode=mobile" title="Go to Mobile version"><span>Go to Mobile version</span></a>When switching to desktop the desktop theme will be displayed irrespective of the device a user used to enter the site; when switching to default the mobile theme will be displayed on mobile devices and desktop version will be displayed on other devices.
How to change a logo on the Splash Page
The logo that is displayed on the splash page is located at the server at this address:
web/skin/frontend/private_sales_ocean_blue_theme/mobile/images/plumrocket/privatesales/splashlogo.pngIn order to change a logo you will have to change the file “splashlogo.png”.
Changing Store Logo
The directory structure is the same on a local install as it is on a web server:
your_magento_install_directory/skin/frontend/private_sales_ocean_blue_theme/mobile/images/logomain.pngYou’ll need to connect to your site via FTP and upload your own logo to theme images folder. After you upload the logo you will have to confirm the chosen image as a store logo. In order to do this, go to Admin Panel > Configuration and follow the instructions described below:
Detailed description:
- Open the “Design” tab.
- Option “Logo Image Src”: allows you to choose the file name of your logo (Be sure to keep the format images/file_name.file_extenstion) and save the changes.
Recommended Image Sizes
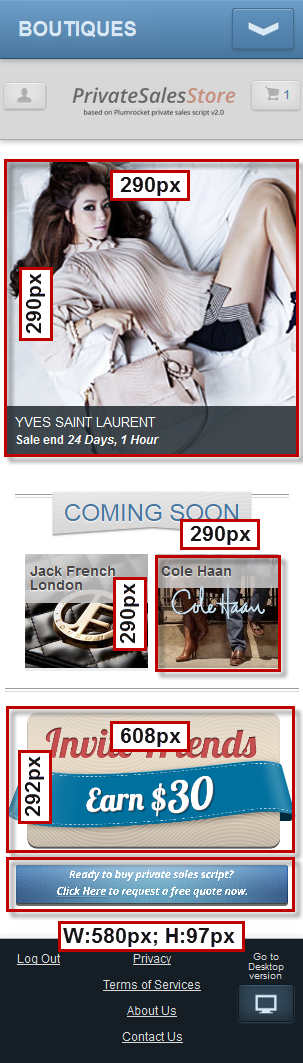
Below you will find recommended image sizes that are used in the mobile theme.
- The recommended size of the boutique image to be used in the mobile theme is 290px*290px. Note, the size itself can be different but you should keep the aspect ratio of 1:1.
- The Ending/Coming Soon Image: The recommended image size is 290px*290px too. If you decide to use another size, be sure to keep the aspect ratio of 1:1.
- Banner size in the mobile theme should be 608px high and 292px wide.
- The long bottom banner size in the mobile theme should be 580px wide and 97px high.
The screenshot below represents a mobile theme with all recommended image sizes used as an example.
Boutique Page
For more information on how to create a boutique, move to Creating first boutique.
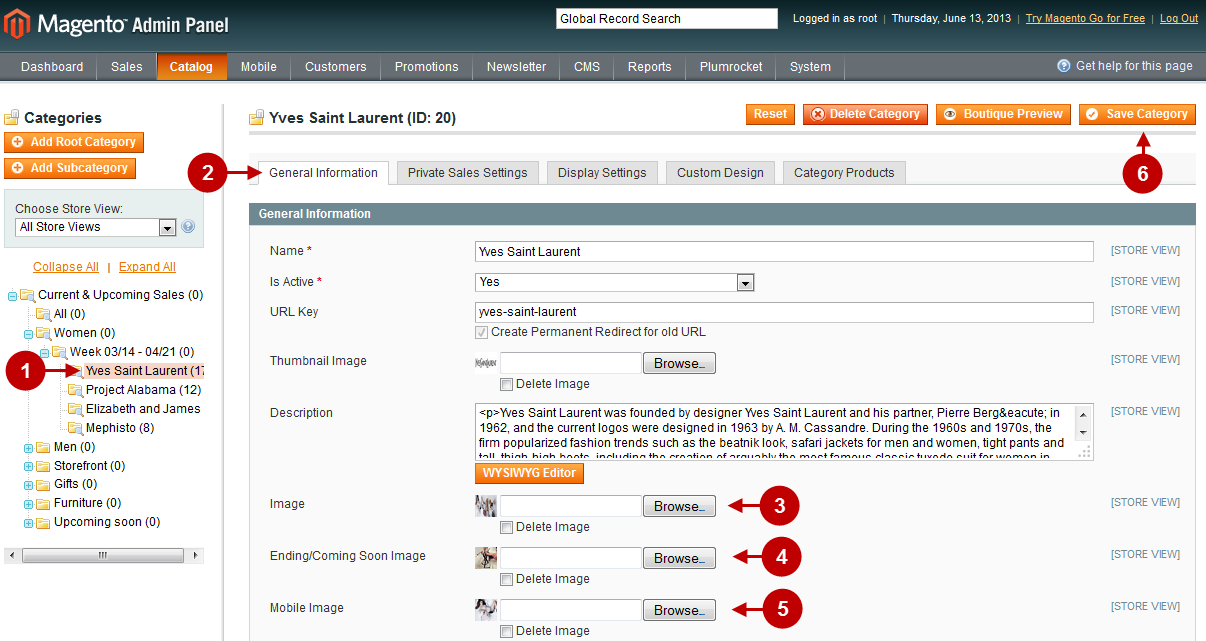
Additional Event Field at Ocean Blue Mobile Magento Theme
Detailed description:
- Select the boutique you need from the categories list on the left.
- Select the tab General Information.
- Press “Browse…” next to the field “Image” in order to choose the image that will be displayed to represent the boutique on the homepage (if there is no image selected in the field “Mobile Image”).
- Press “Browse…” next to the field “Ending/Coming Soon Image” in order to choose the image that will be displayed to represent the boutique belonging to the section Coming Soon.
- Press “Browse…” next to the field “Mobile Image”, in order to choose the image that will be displayed to represent the boutique on the homepage or in the section Ending Soon.
- Press “Save Category” to save the changes.
Editing Static Blocks and Theme Elements
In order to see the list of static blocks move to admin panel and follow the instructions below:
Detailed description:
- Press “CMS”.
- Select “Static Blocks” from the menu.

The screenshots below show what static blocks and theme elements look like in the front-end, as well as ways to edit and configure them.
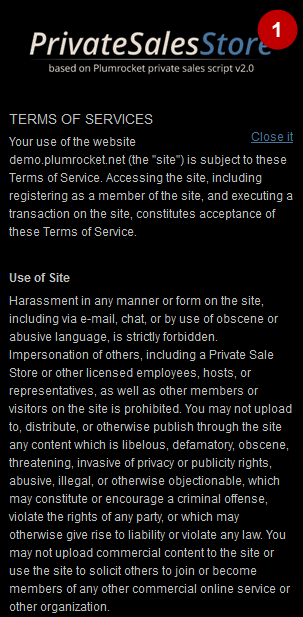
Detailed description:
- In order to change the Terms of Services on Splash page, edit the static block called “Terms of Services – Splash page”.
Detailed description:
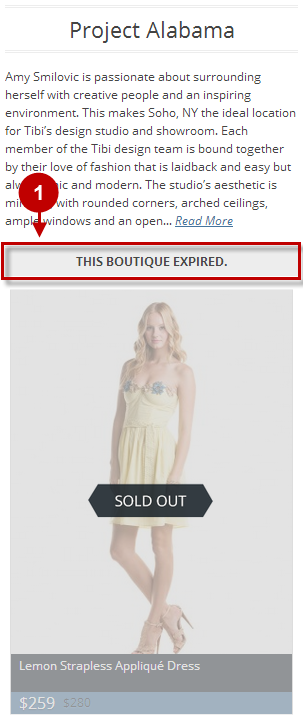
- In order to change the boutique expiration notification text, edit the static block called “This boutique expired”.
Detailed description:
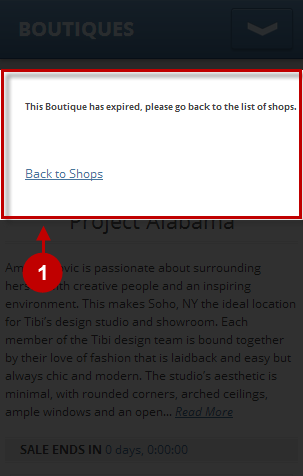
- In order to change the boutique expiration notification text on popup form, edit the static block called “This boutique expired popup”.
Detailed description:
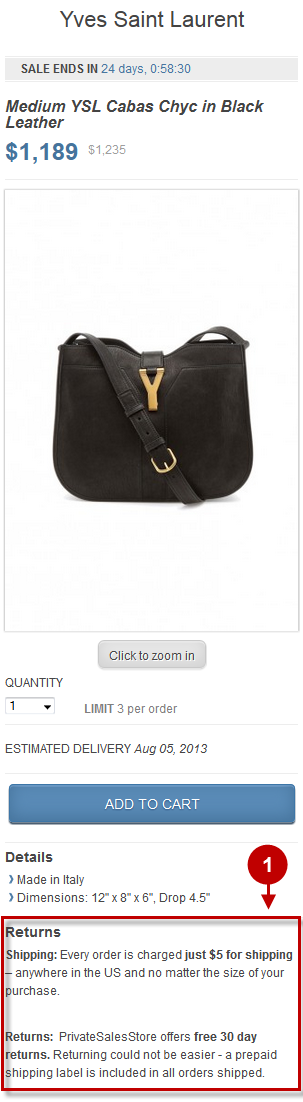
- In order to change the “Returns” tab that is located on the product page, edit the static block called “shipping_and_returns_tab”.
Detailed description:
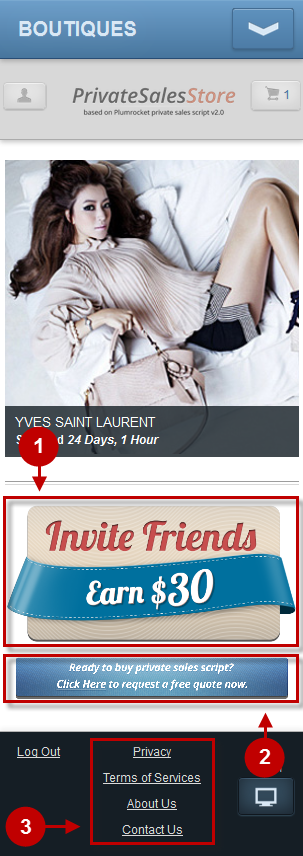
- In order to change this banner, edit the static block called “Mobile Version Banners”.
- In order to change the bottom banner, edit the static block called “Mobile Version Bottom Banner”.
- In order to change the footer, edit the static block called “Mobile Version Footer Links”.
How to enable Customer Reviews for Ocean Blue Magento Mobile Theme
In order to activate customer reviews for your theme, please follow the steps below:
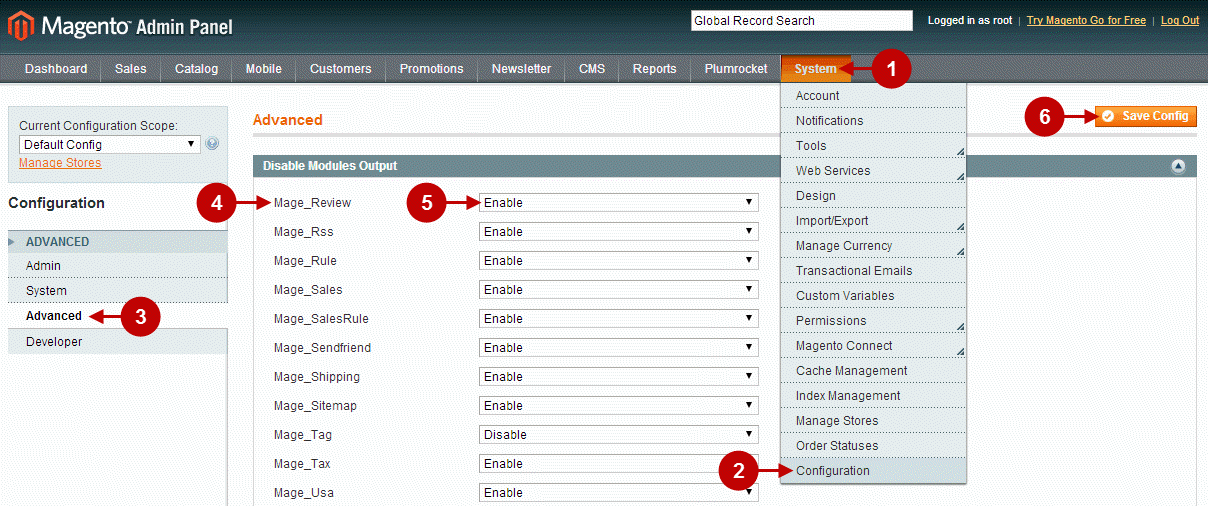
Step-by-Step actions:
- In your Magento backend choose “System” tab.
- Click on “Configuration” tab.
- In the menu on the left select “Advanced”.
- In the list of multiple options please find “Mage_Review”.
- Activate this option be clicking “Enable”.
- Press “Save Config” button.
Clear Magento Cache
After these steps are completed – don’t forget to clear Magento cache. To do this, follow the instructions below:
Step-by-Step actions:
- Go to the Admin Panel >> System.
- Click on Cache Management.
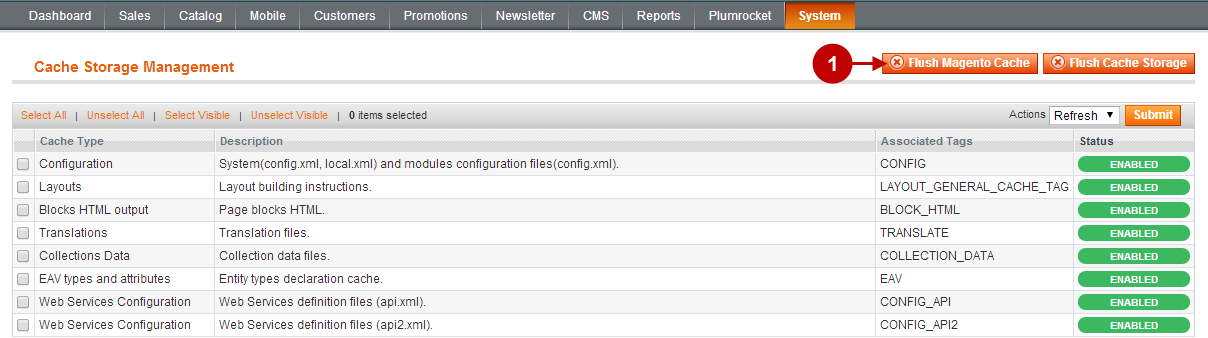
Step-by-Step actions:
- Press the “Flush Magento Cache” button.
Sign-out and Sign-in back to Admin Panel. After you have successfully cleared the cache, Reviews and Ratings options will become available in your Magento backend:
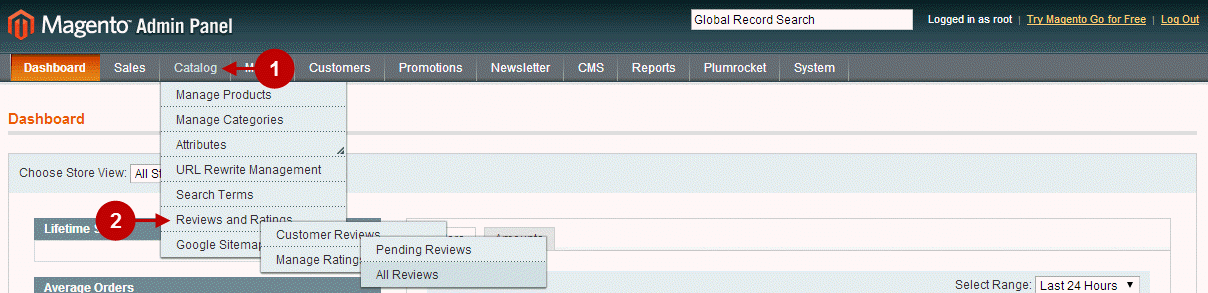
Note: After your customers submit their reviews, these reviews will be available for moderation in “All Reviews” tab.
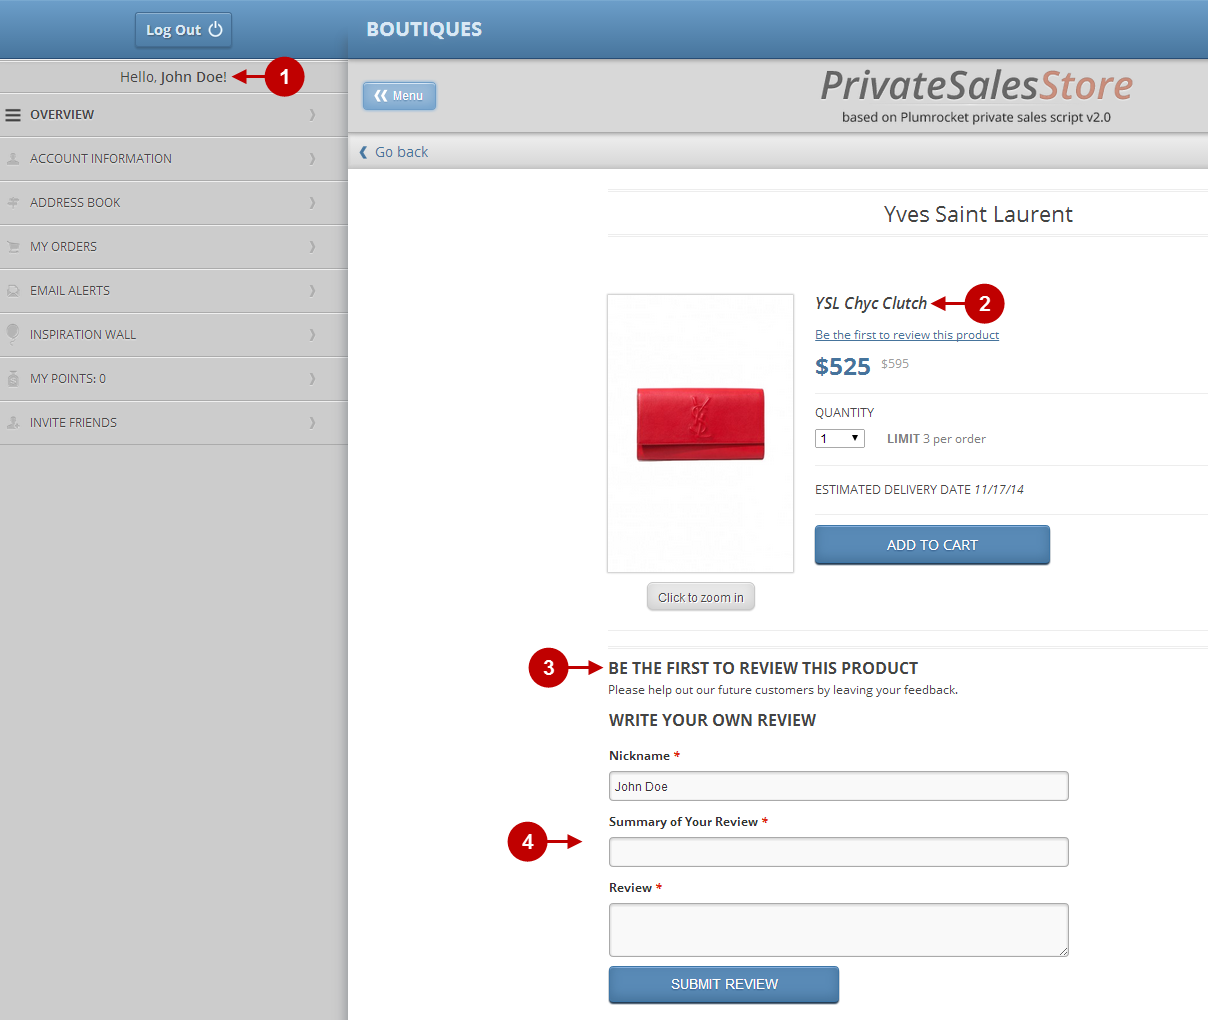
In order to see the appearance of Customer Reviews on your frontend – please follow these steps:
Step-by-Step actions:
- Login to your store as a customer.
- Go to any available product’s page.
- On the product page locate the “Be the first to review this product” section.
- Customer review form will be available for submitting.
Enabling Search on Ocean Blue Magento Mobile Theme
In order to activate search for this mobile theme, please follow the steps below:
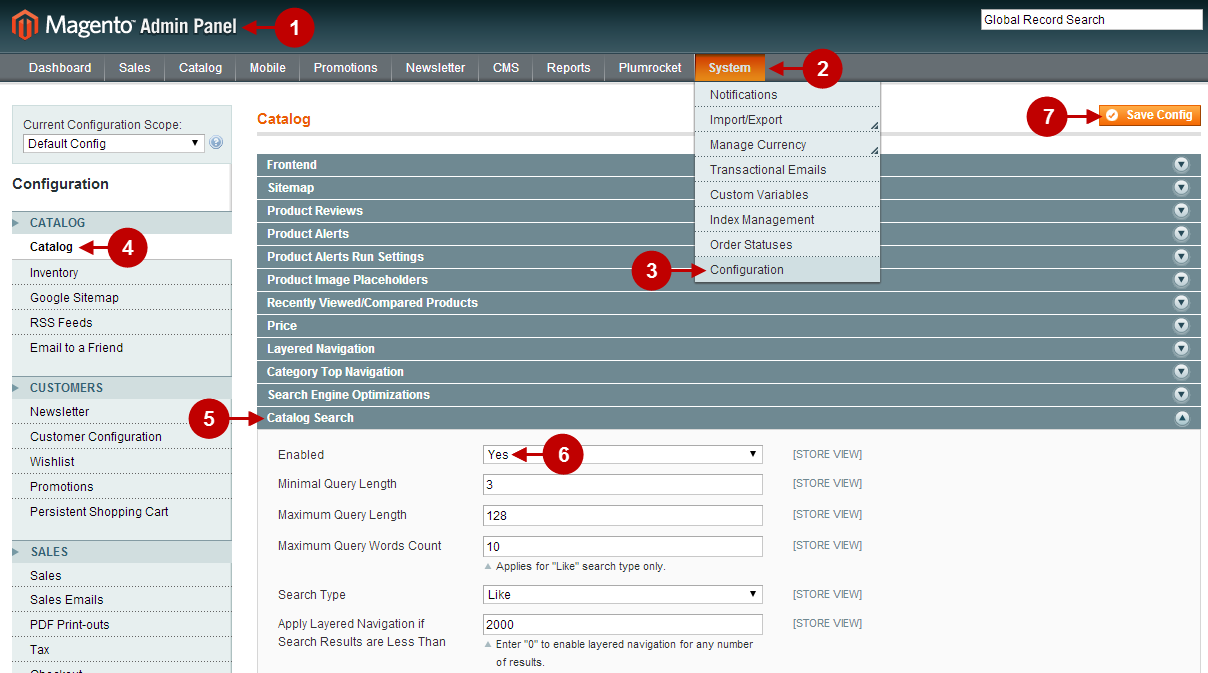
Detailed description:
- Login to your Magento admin panel.
- Select “System” tab.
- Click on “Configuration” option.
- Select “Catalog” option from left hand side menu.
- Press on “Catalog Search” tab. Other search options are available there for your convenience.
- Change option “Enabled” to “Yes”.
- Press “Save Config” button to save your changes.
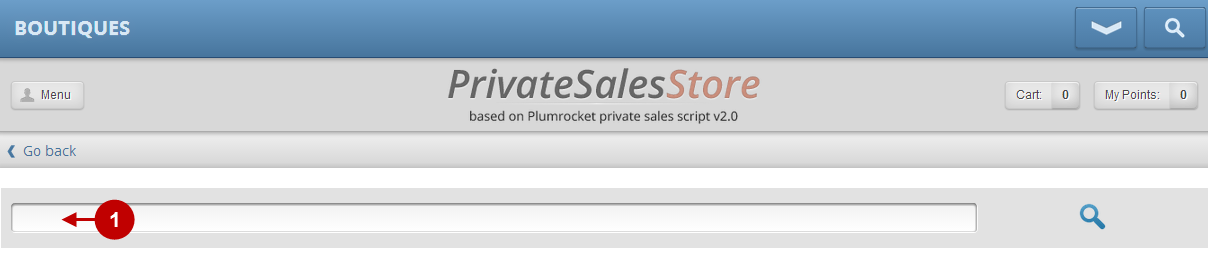
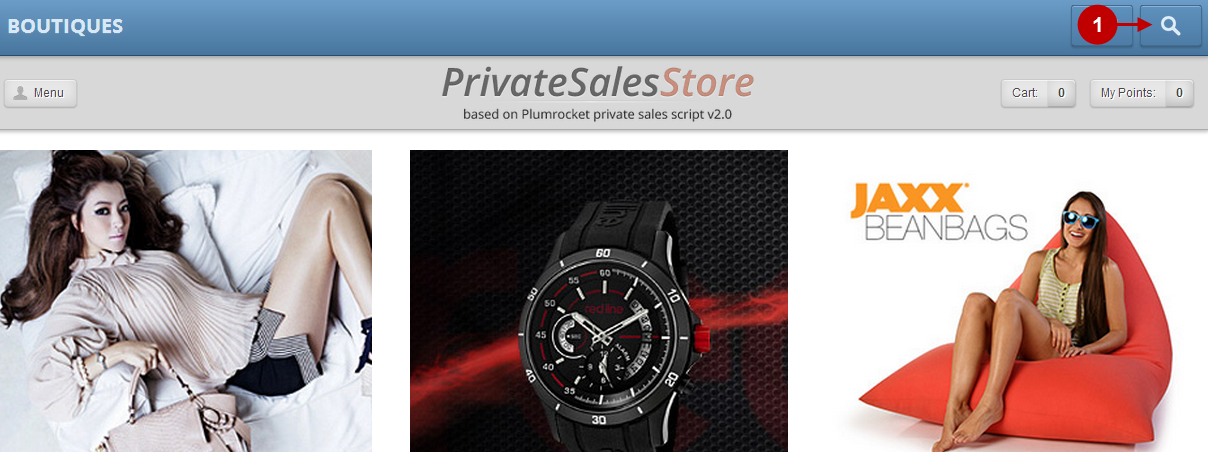
Now go to your Magento frontend, there you can check the search tab as shown below.
Detailed description:
- Click on the search icon.
Detailed description:
- You can use this field for search.