How to Configure Google address book using the Google Cloud
In this article you will learn how to setup the “Gmail” Address Book functionality using the Google Cloud. Please follow the step-by step instructions below.
Step-by-Step action:
- Login to https://console.developers.google.com and click on “Create Project” button.
- Indicate the name for your project.
- Press on “Create” button.

Step-by-Step action:
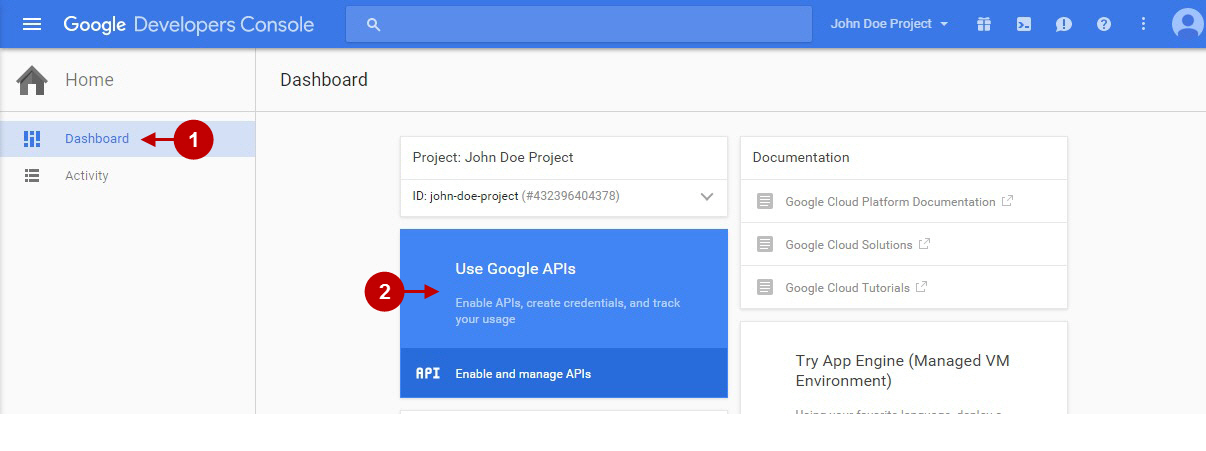
- From menu on the left, select “Dashboard”.
- Select “Use Google APIs”.
Step-by-Step action:
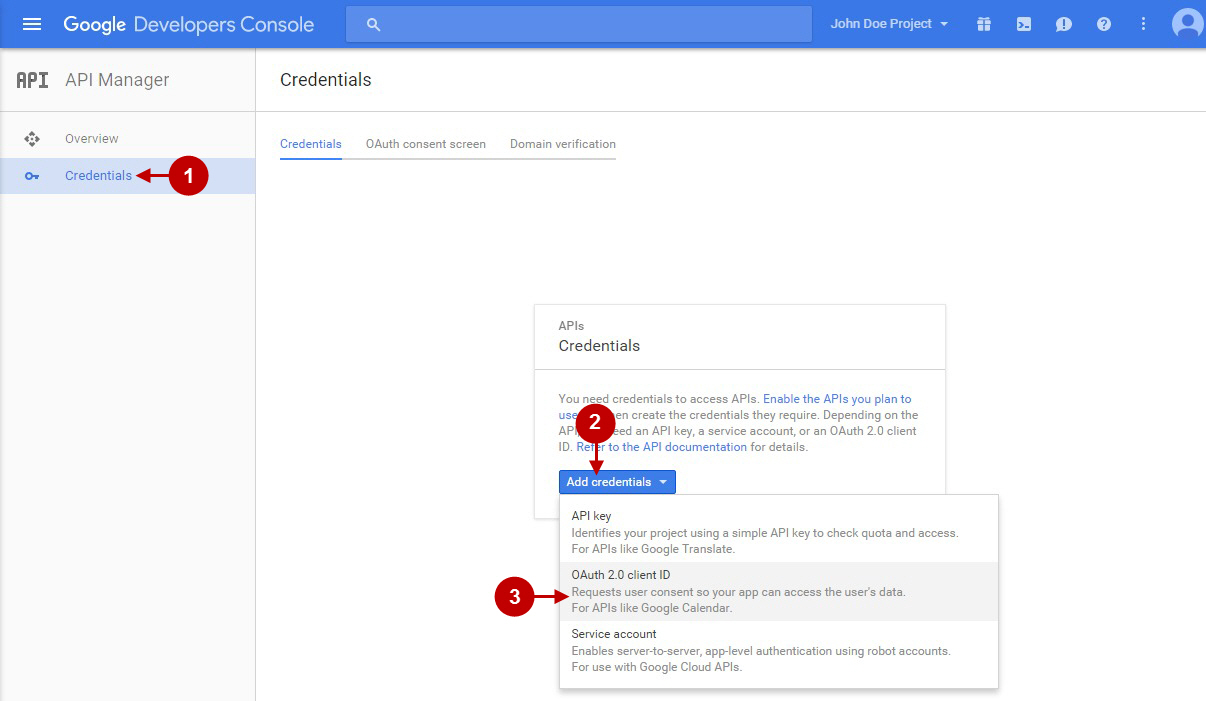
- Navigate to “Credentials” section.
- Click on “Add credentials” button.
- Select “OAuth 2.0 client ID” option.
Step-by-Step action:
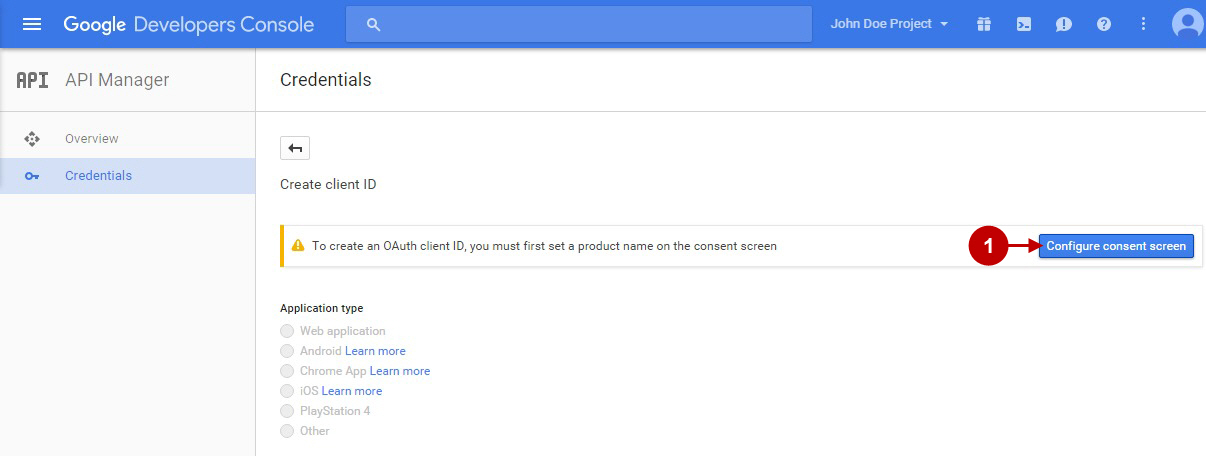
- Navigate to “Configure consent screen” in order to indicate your magento social share extension application data.
Step-by-Step action:
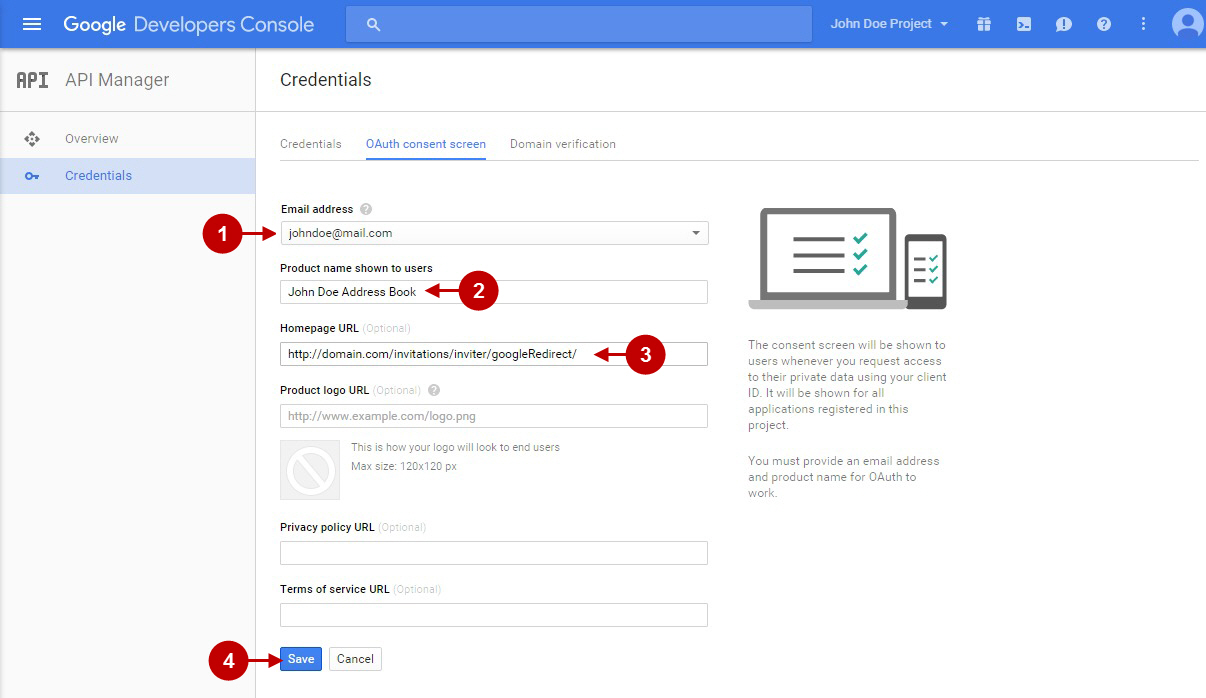
- Select your email address to be used with this application.
- Indicate the name of your product.
- Paste the homepage for your project.
- Click on “Save” button.
Step-by-Step action:
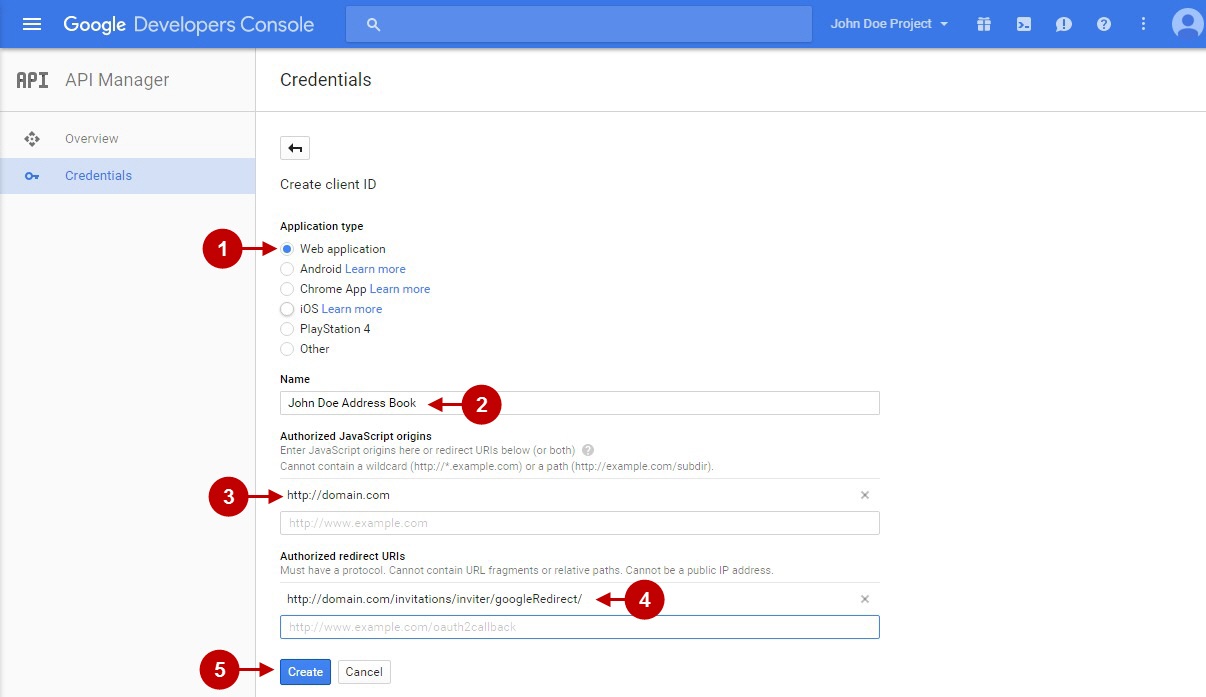
- Select application type to be “Web application”.
- Fill in the name of your application.
- Indicate the name of your live domain.
- Indicate the authorized redirect URI. To find it, go to your backend-> Plumrocket-> Invitations-> Manage Address Books->
Gmail ->Redirect Uri .
- Click on “Create” button to finish creating your application.
Step-by-Step action:
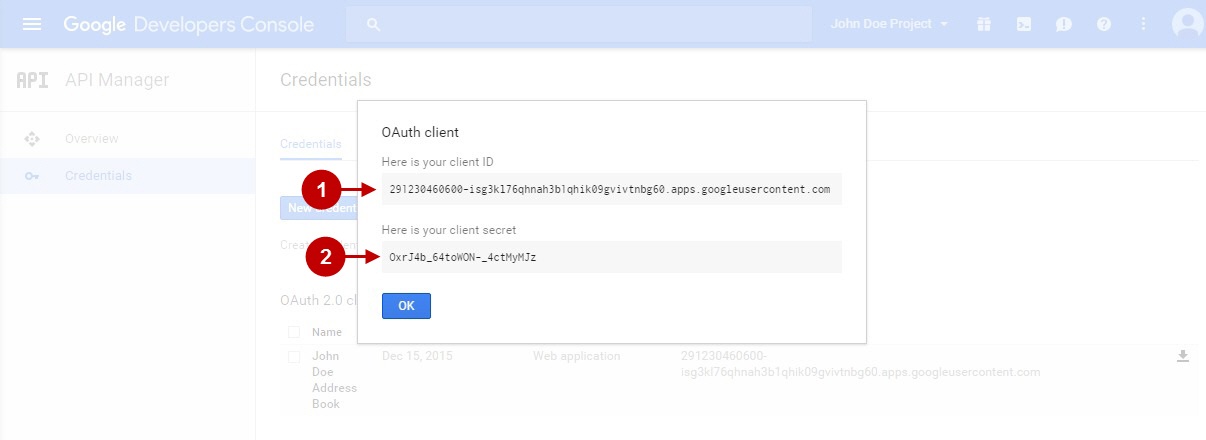
- Here you can find the “Client ID” of your Google Plus application.
- Here you can find the “Client Secret” of this application.
Step-by-Step action:
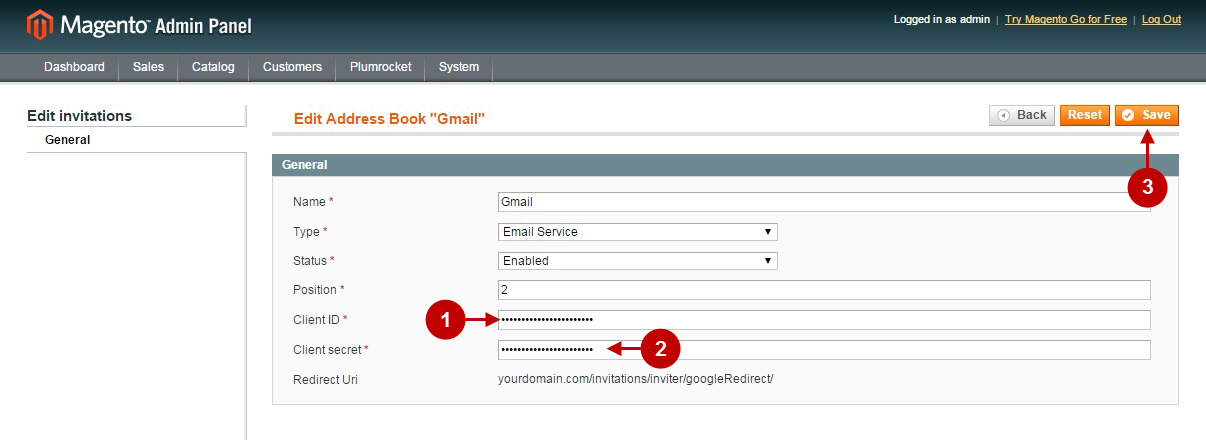
- Paste Client ID into according field of “Gmail” Address Book section of your backend.
- Paste Client Secret into according field of “Gmail” Address Book section of your backend.
- Press “Save Config” button.
Next Step > Return to Invitations API Reference
Was this article helpful?
