Description: Facebook is a popular free |
|
| Protocol | OAuth 2 |
| Returned Data | UserId, name, email, gender, birthday, photo |
| Requires SSL? | No |
How to Configure Facebook API for Magento
In this article you will learn how to find your Facebook API. Please follow the step-by step instructions below.
Step-by-Step action:
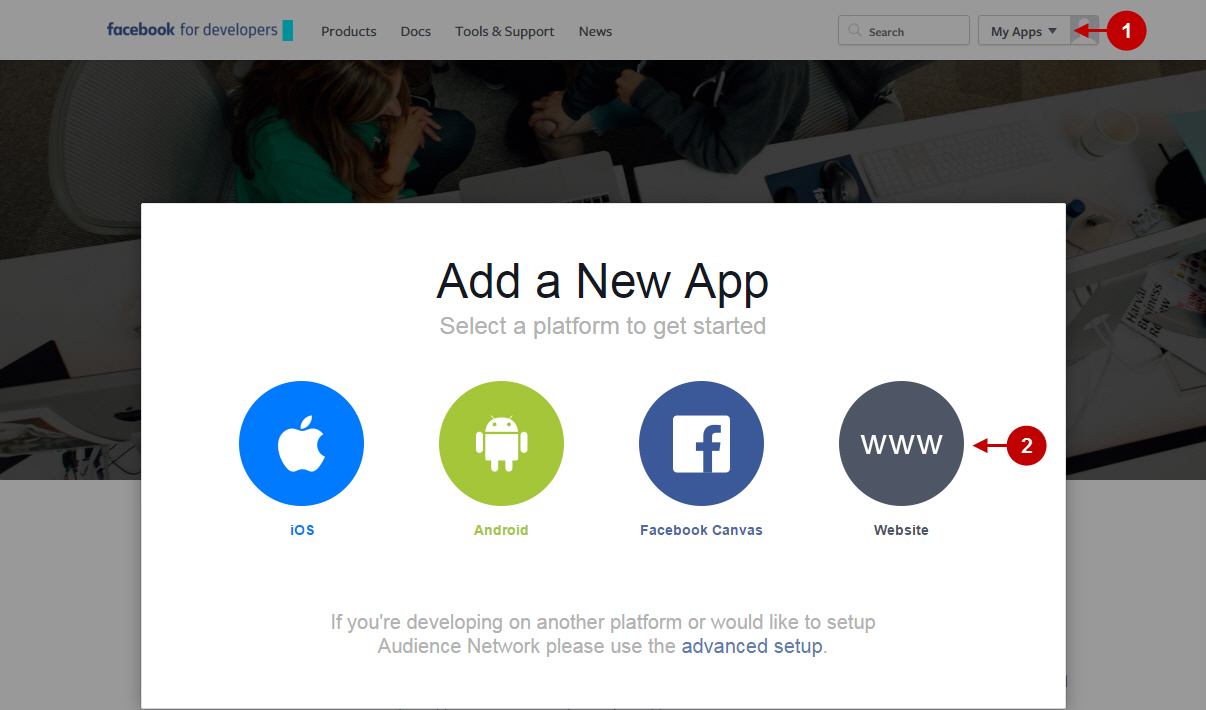
- Go to https://developers.facebook.com/, click on “Apps” and select “Add a New App”.
- Press “Website” button.
Step-by-Step action:
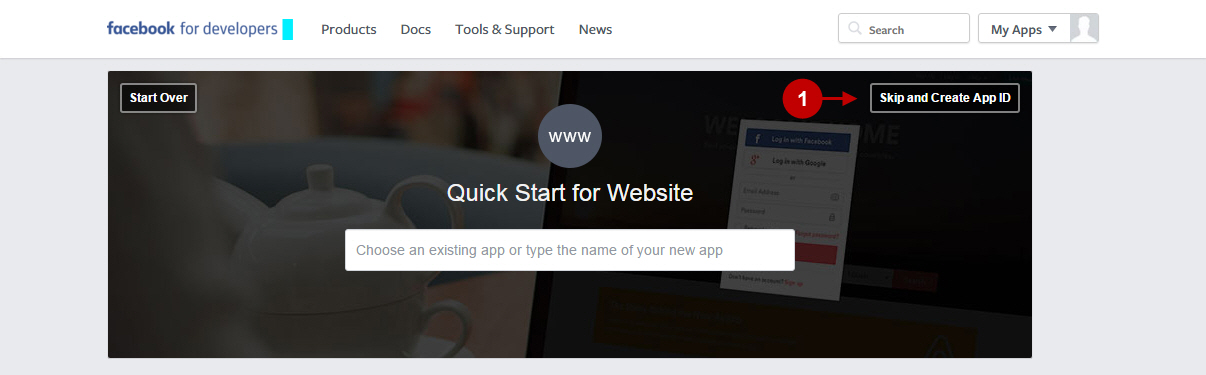
- For faster configuration, click on “Skip and Create App ID” button.
Step-by-Step action:
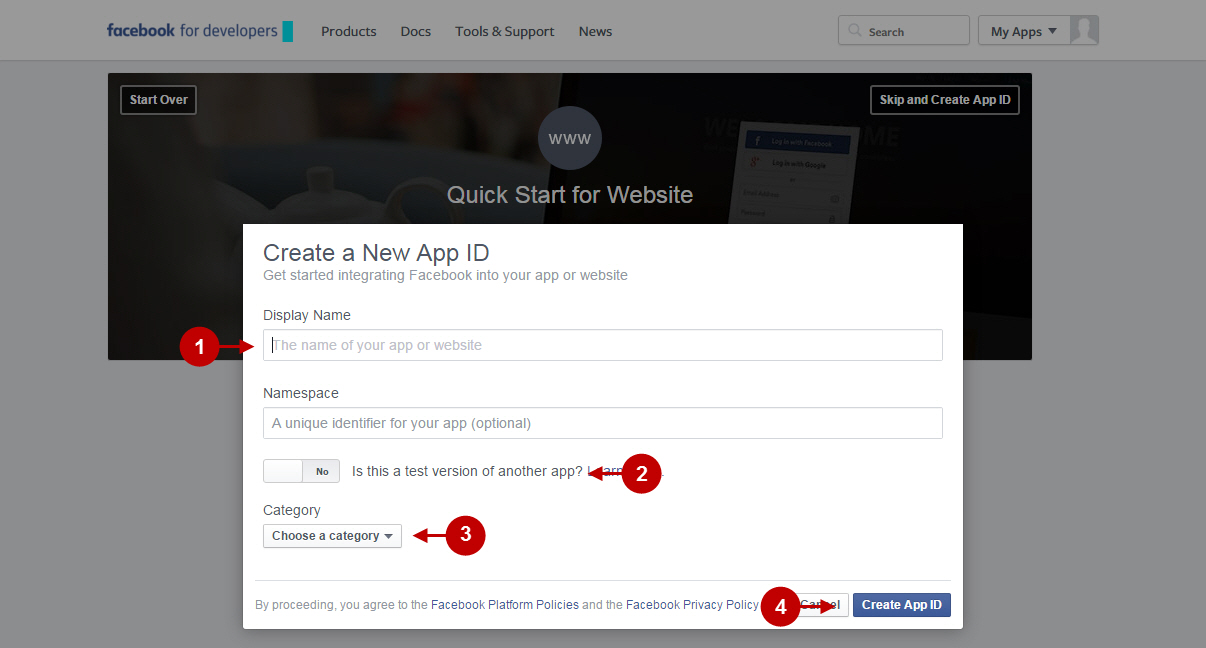
- Indicate the name of your App.
- Select “No” for the test version of your App.
- Choose a category for your App.
- Press “Create App ID” button.
Step-by-Step action:
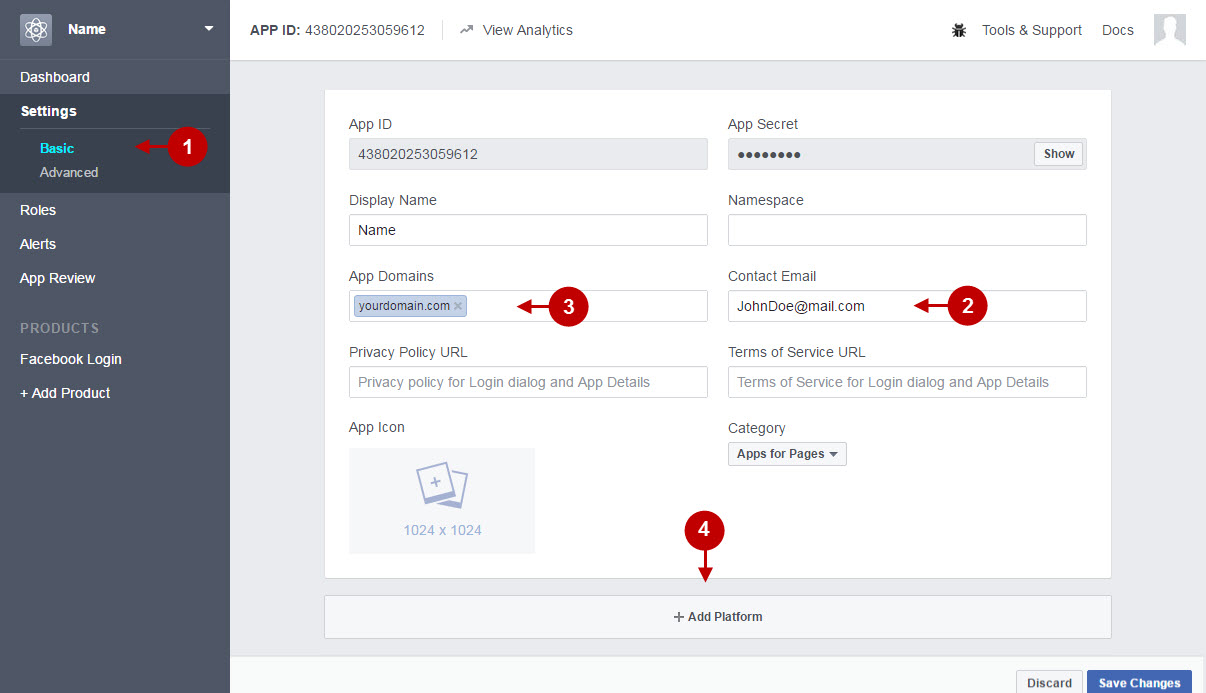
- Click on “Settings” in the menu on the left-hand side.
- Enter your Contact Email.
- Make sure to indicate the domain name for your Facebook Address Book application in format “yourdomain.com” . Note: This field is obligatory to make the Facebook API is working.
- Click on “+Add Platform” button.
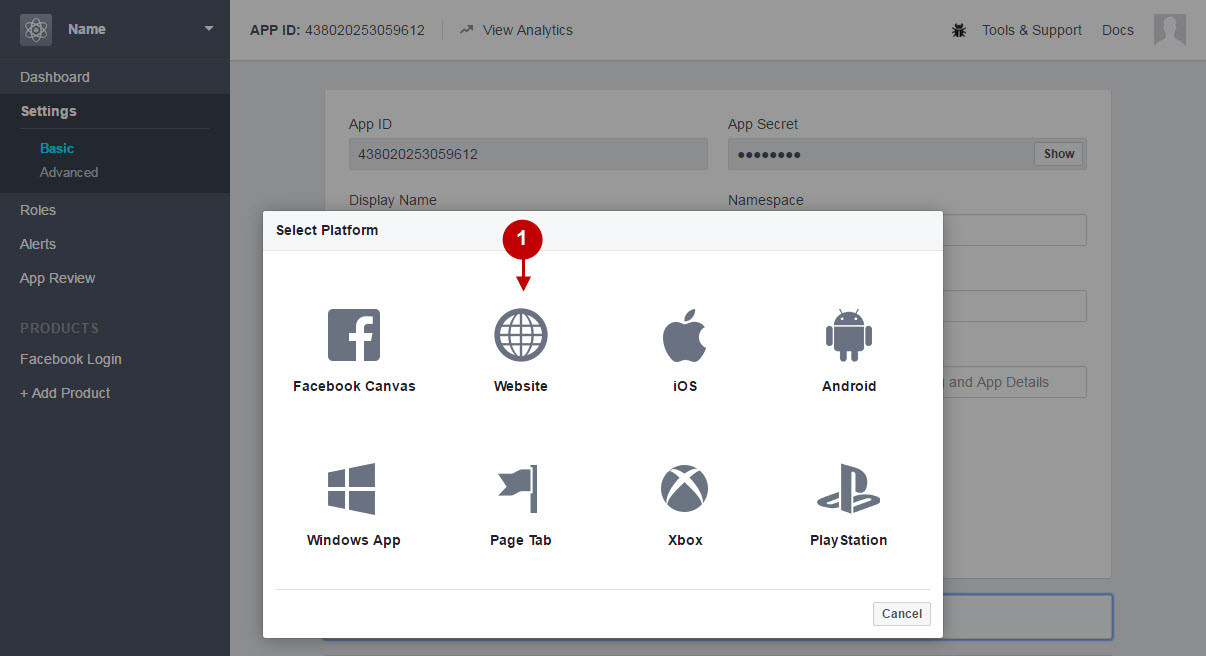
Step-by-Step action:
- Select the “Website” icon.
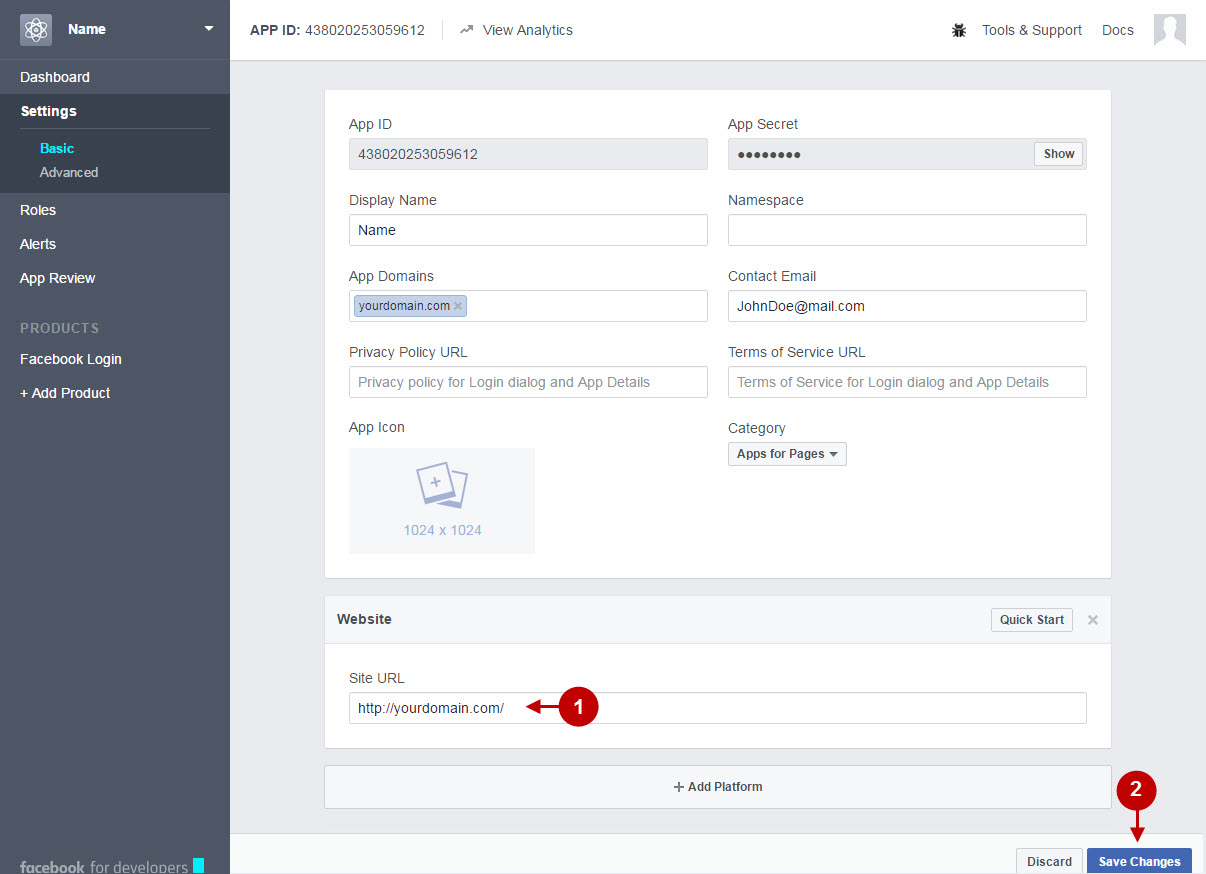
Step-by-Step action:
- Input the website address into the “Site URL” field.
- Press “Save Changes” button.
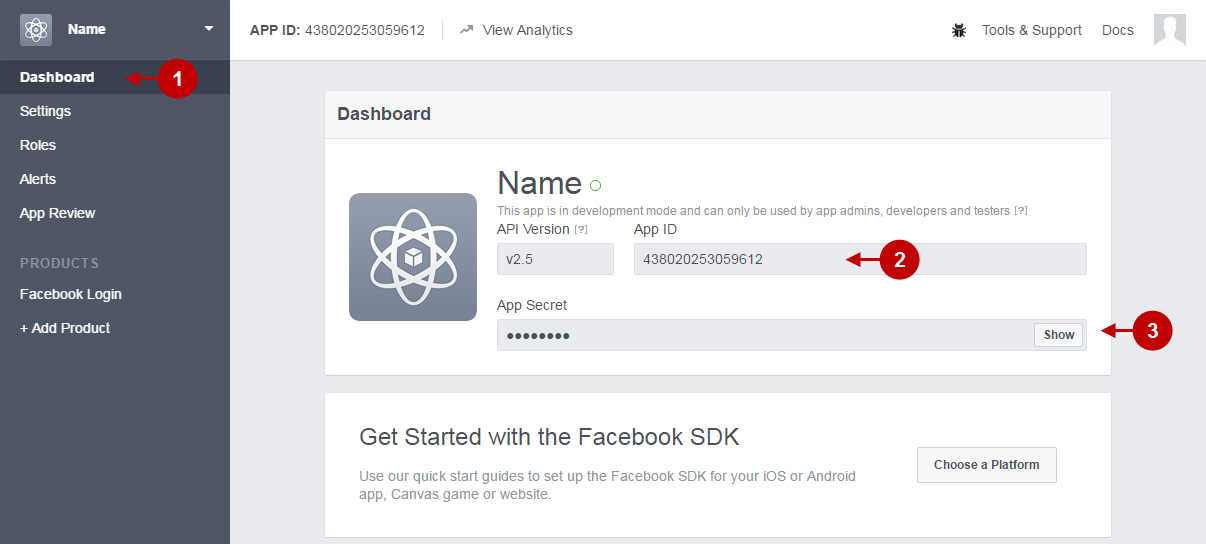
Step-by-Step action:
- Click on “Dashboard” in the menu on the left-hand side.
- Copy the “App ID” to your clipboard.
- Copy the “App Secret” to your clipboard.
Facebook address book configuration
Set Client ID , Client secret at Admin panel -> Plumrocket -> Invitations -> Manage Address Books -> Facebook Address Book.
Step-by-Step action:
- Set “Application ID”
- Set “Secret Key”
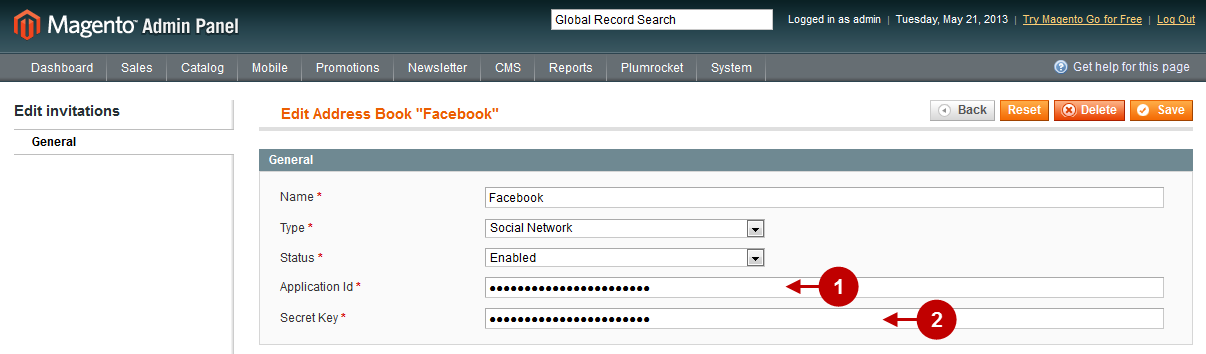
Save the Facebook Address Book settings after you have made the changes.
Make a test on front end.