How to Create Keap API for Magento
In this article, we will cover how to set up Magento 2 Keap integration for Newsletter Popup. Please, check the following step-by-step guide.
Step by Step Guide:
- Start a free trial on keap.com.
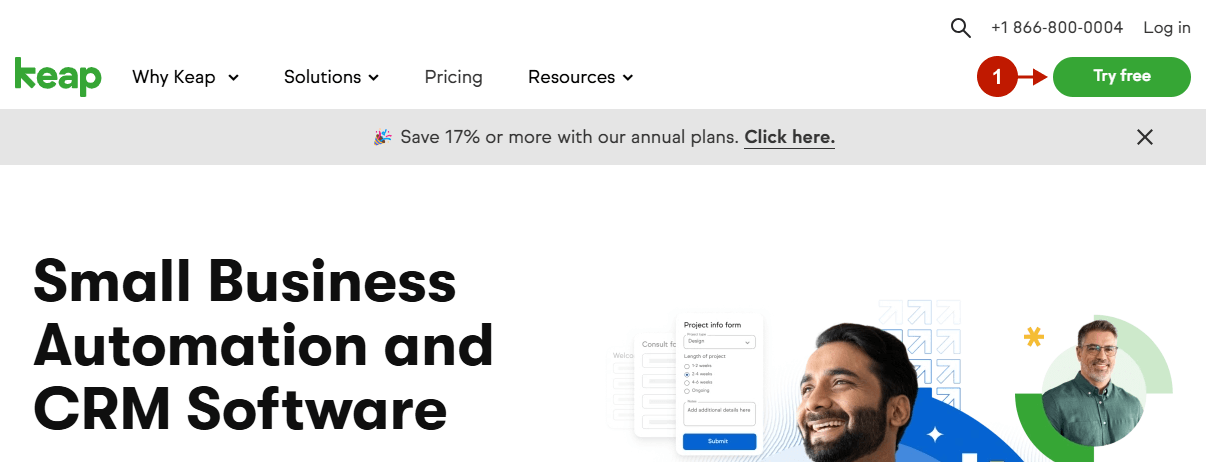
Step by Step Guide:
Account
- Navigate to your account.
- Select “Settings“.
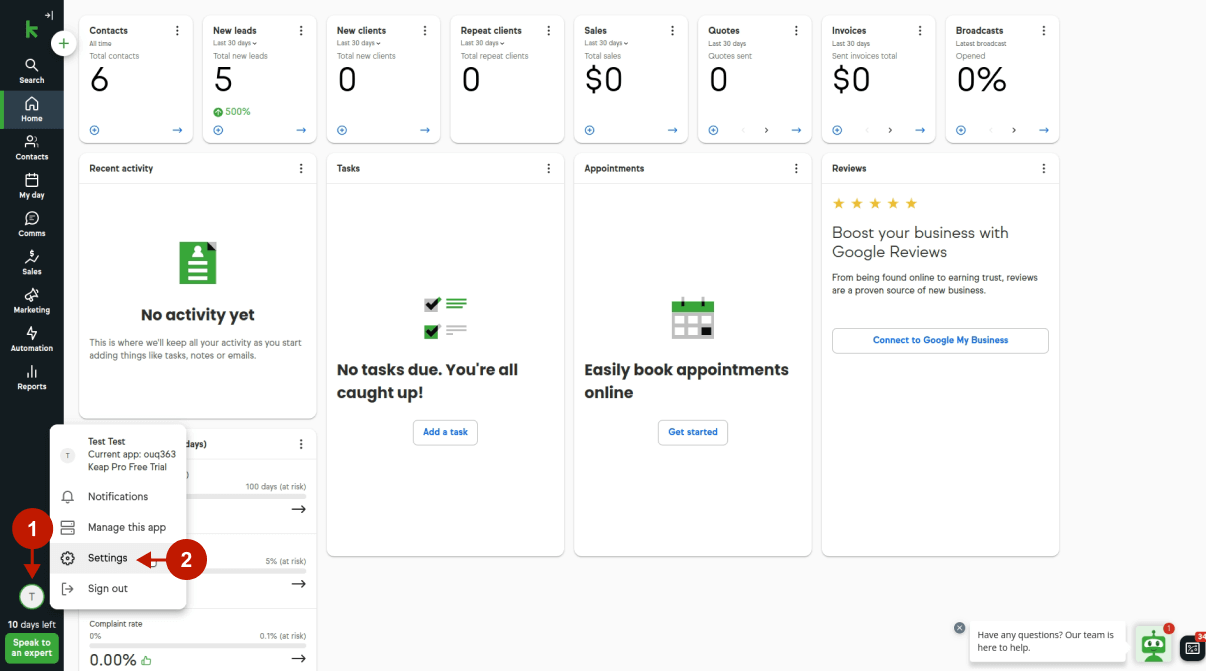
Step by Step Guide:
- Select the “API settings” section.
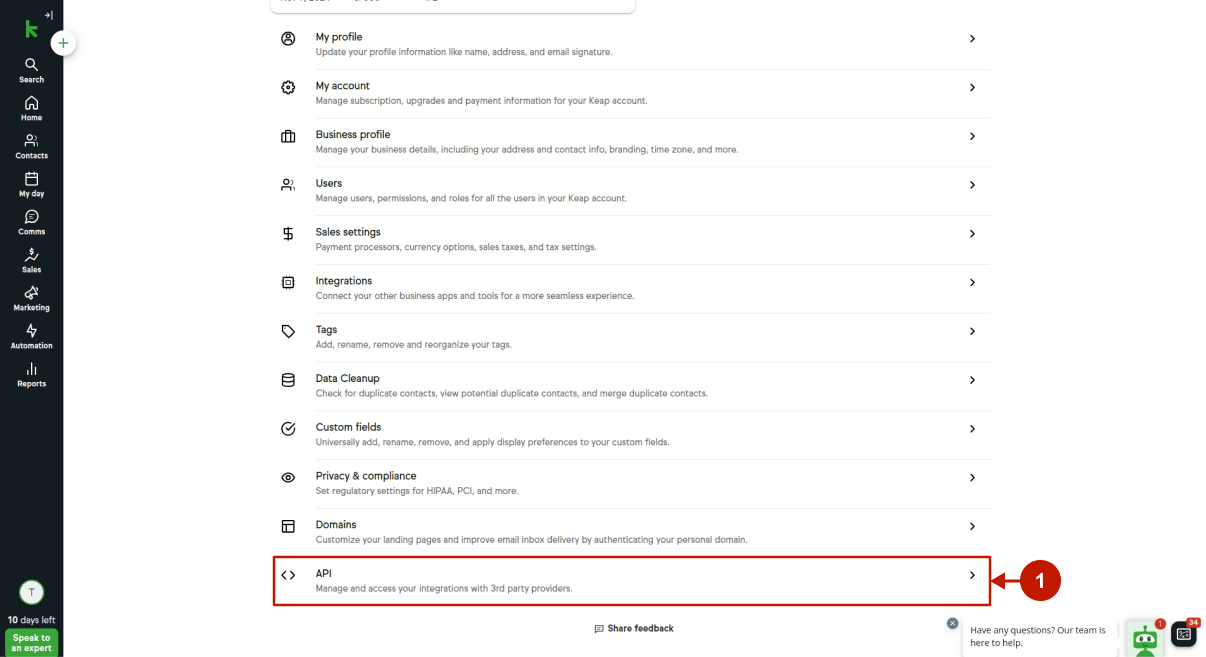
Step by Step Guide:
- Press the New Token button.
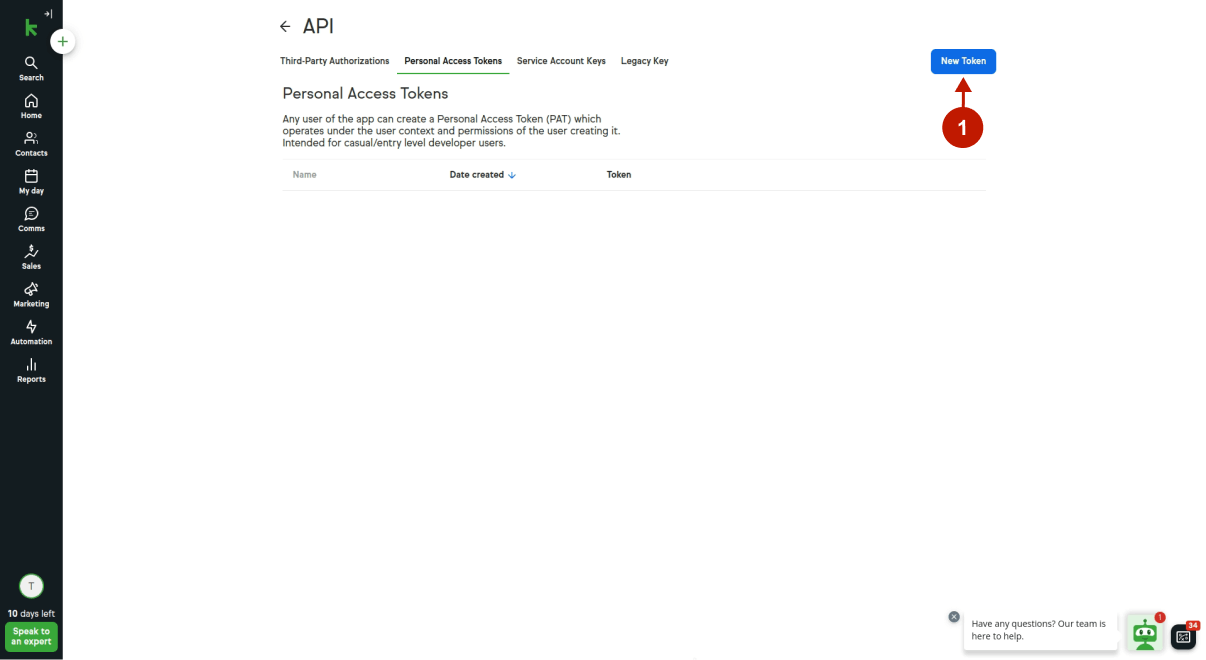
Step by Step Guide:
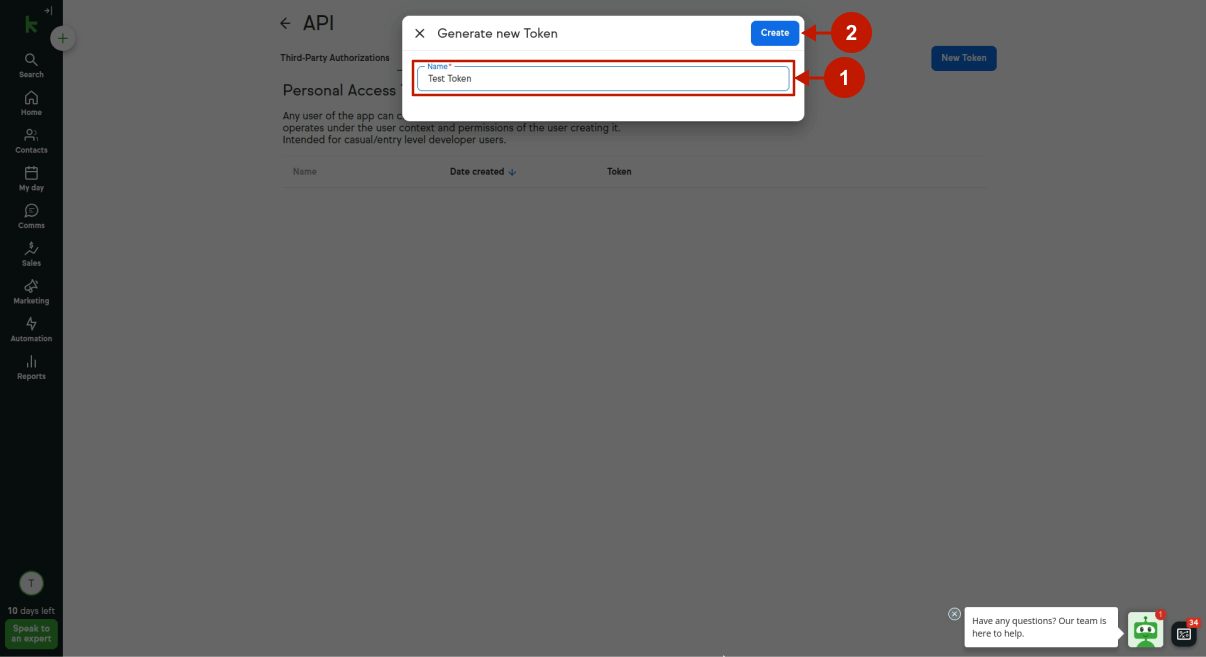
- Type a Token Name.
- Press the Create button.
Step-by-step guide:
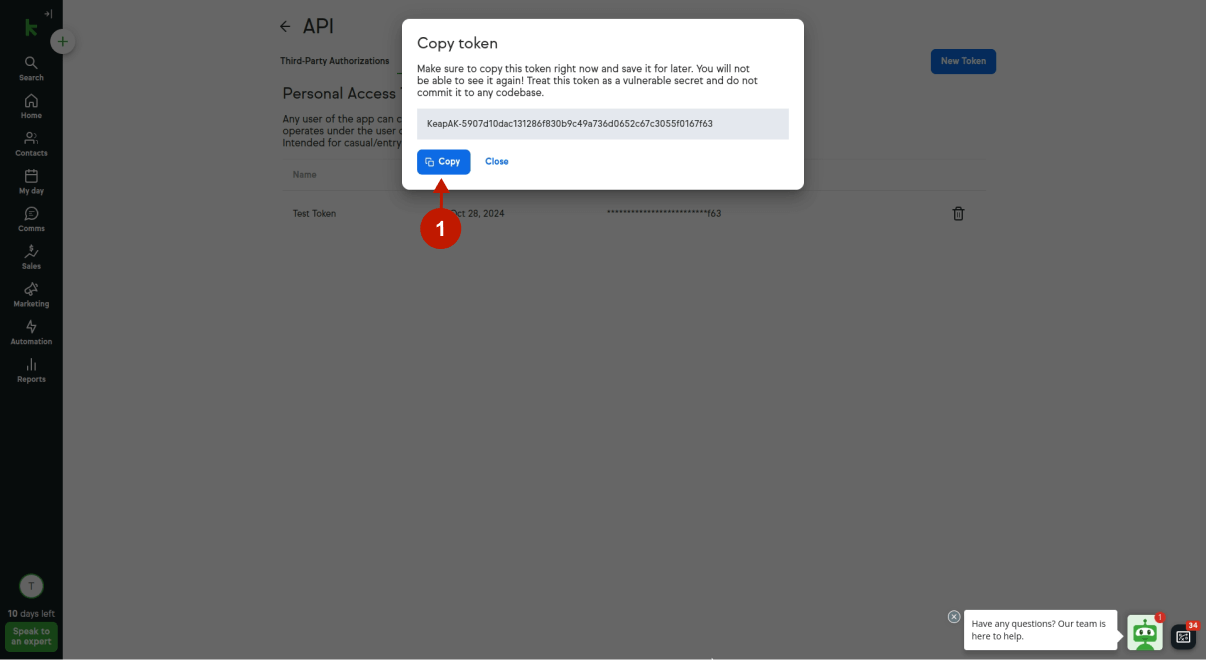
- Press the Copy button to copy your token. You will need this value for the extension configuration.
Step-by-step guide:
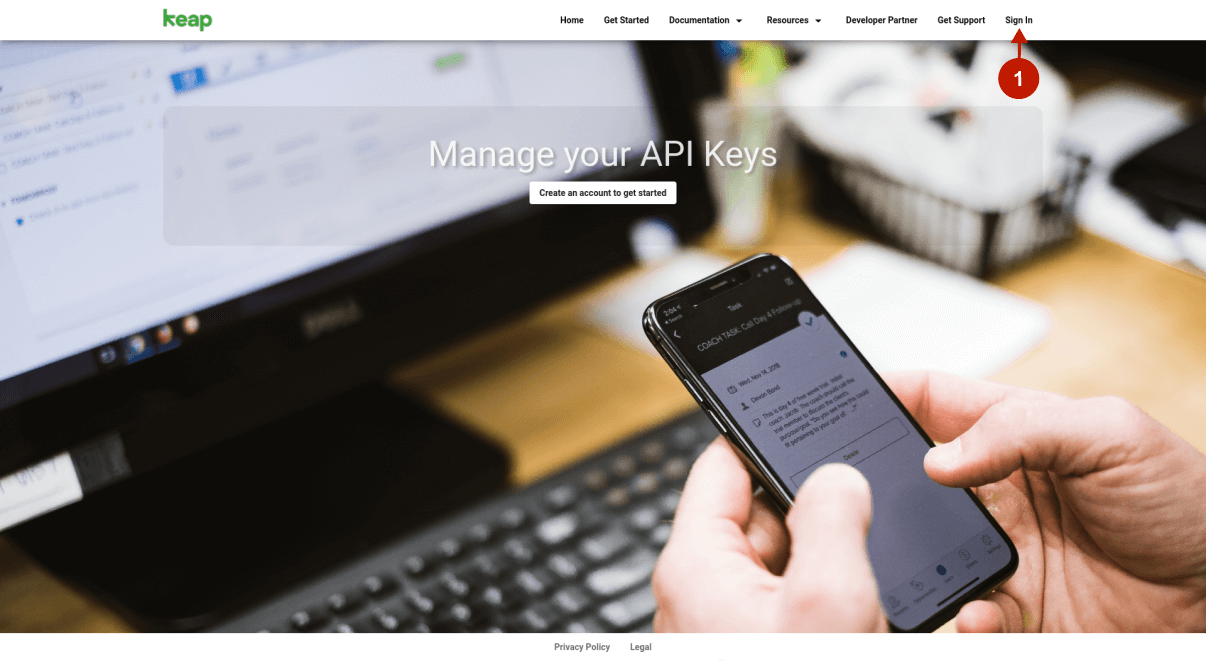
- Go to keys.developer.keap.com and Sign In to your account.
Step-by-step guide:
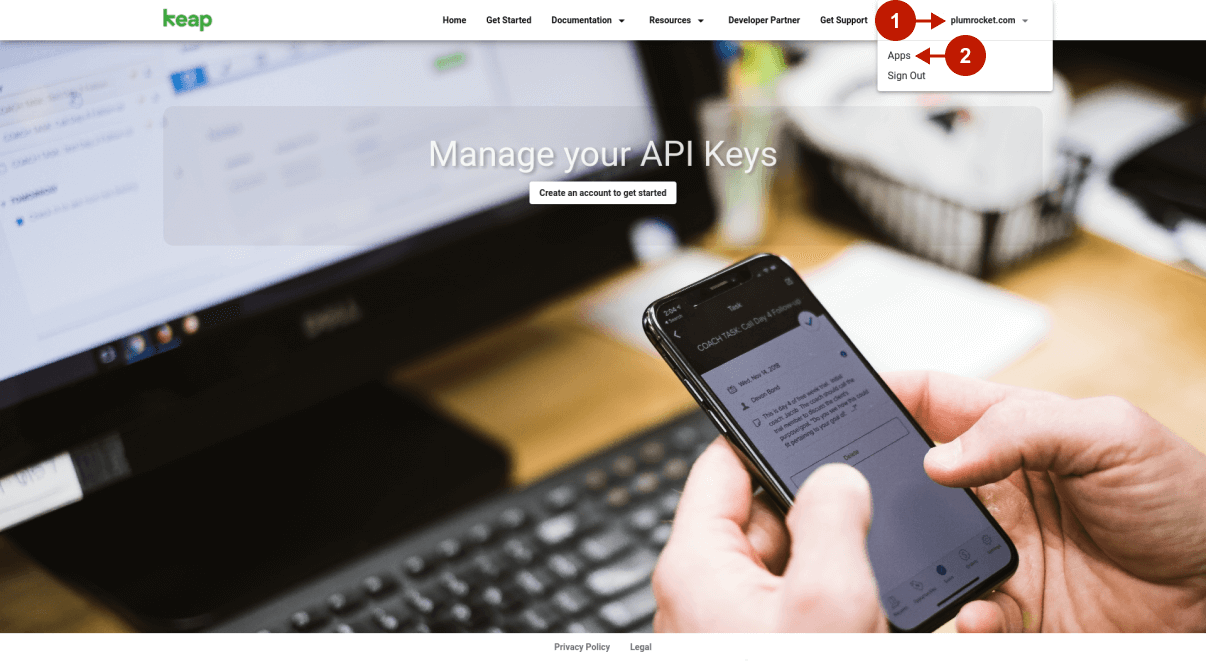
- Go to your Account.
- Go to Apps.
Step-by-step guide:
- Press the New App button.
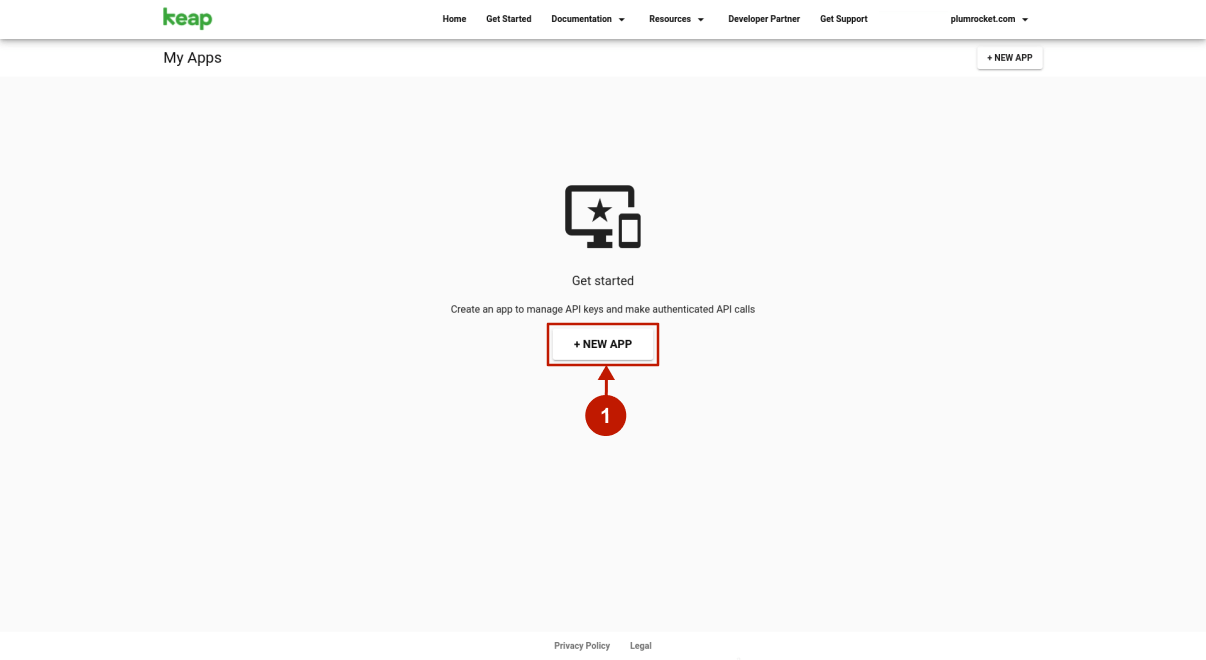
Step-by-step guide:
- Enter your App Name.
- Enter your App Description (not mandatory).
- Press the Enable button.
- Save the changes.
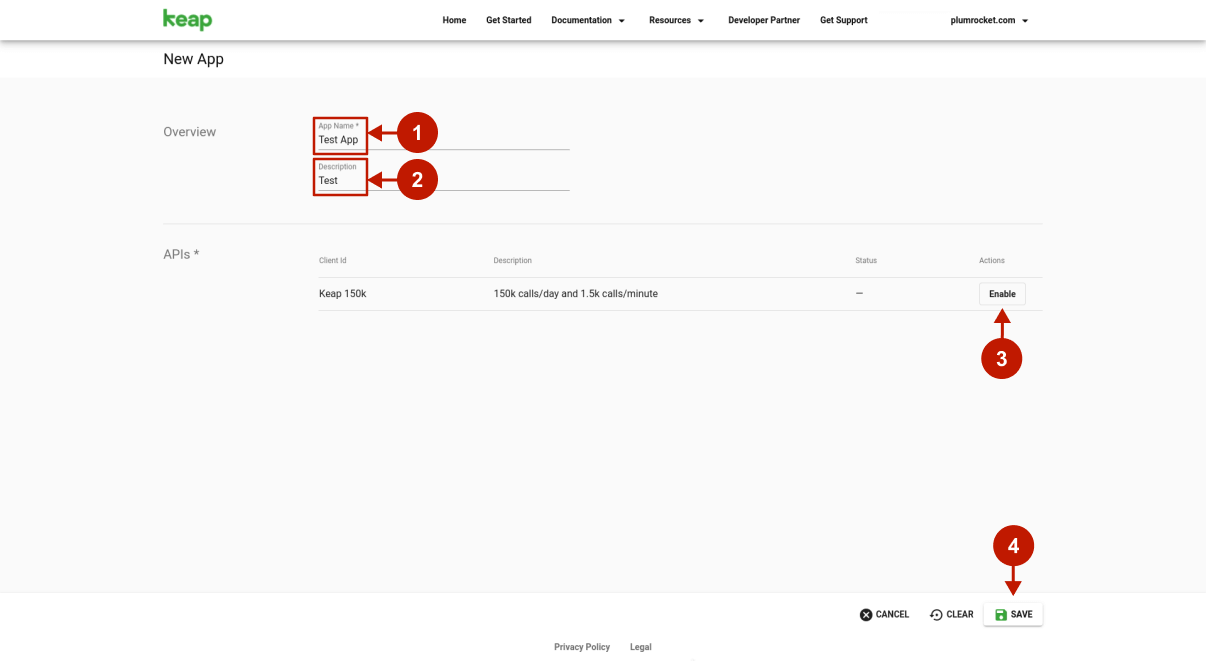
Step-by-step guide:
- Copy your Client ID.
- Copy your Secret.
- Press the Save button.
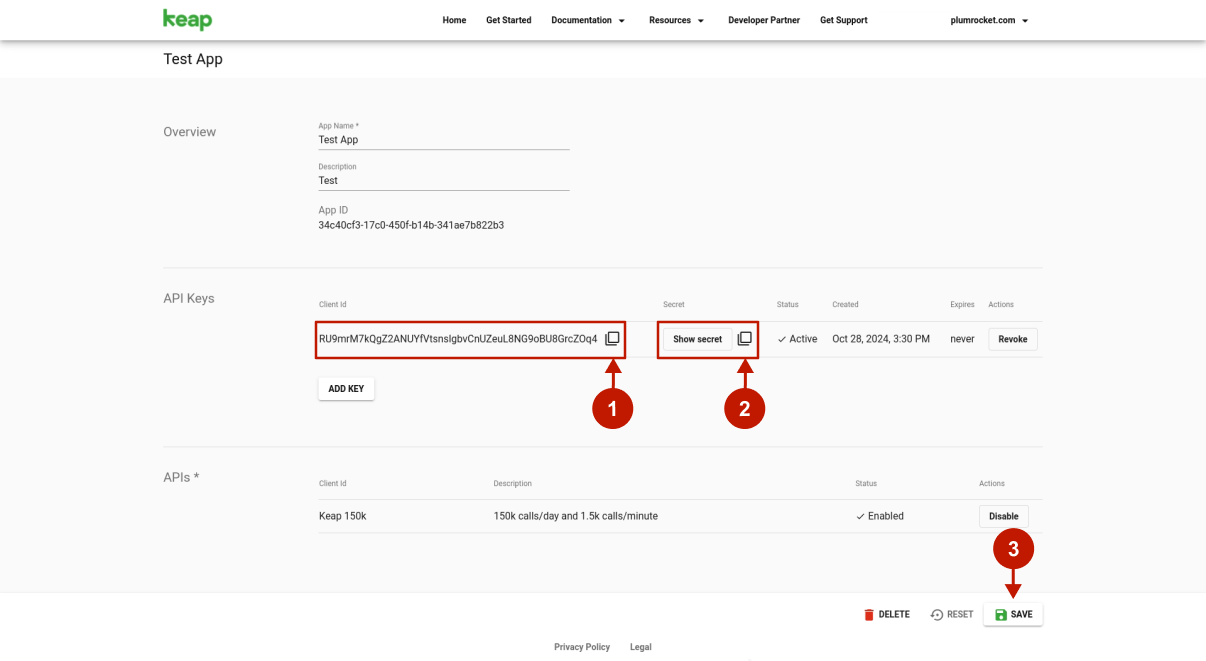
Configuring Keap API in Magento 1 Newsletter Popup Extension
Step by Step Guide:
Appilcation Name
- “Enable”: if enabled, this option allows you to transfer collected emails to your Infusionsoft List(s).
- “Application Name”: paste the Application Name copied from your Infusion account.
- “API Key”: paste the API Key copied from your Infusionsoft account.
- “Test connection”: press the button to test whether the connection is set.
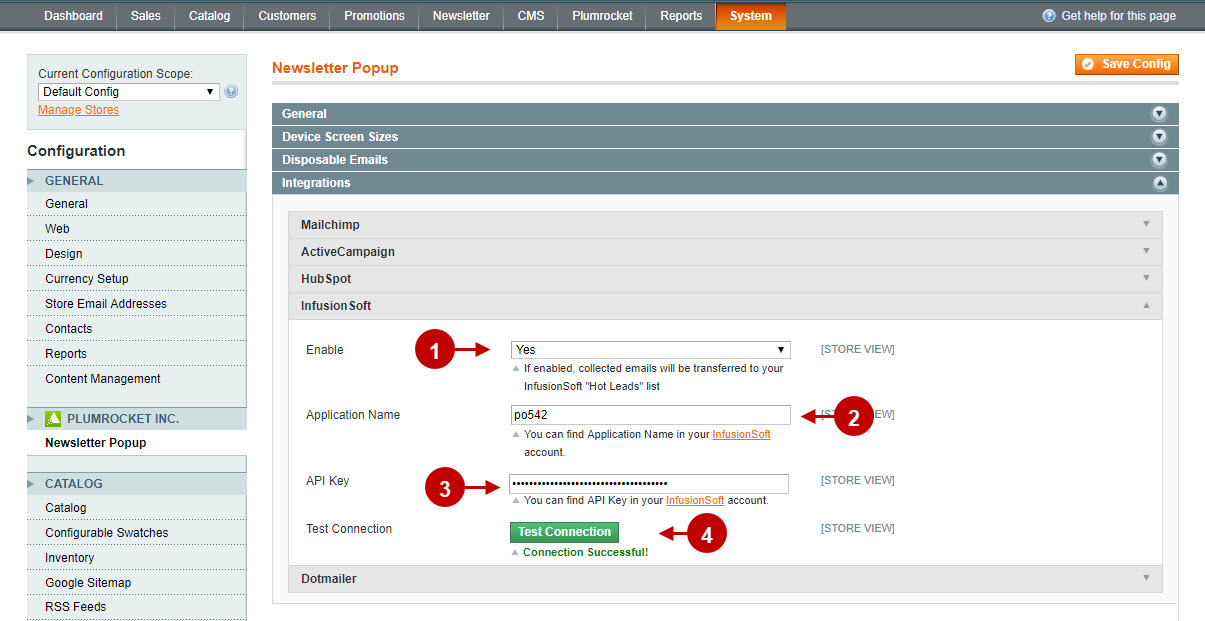
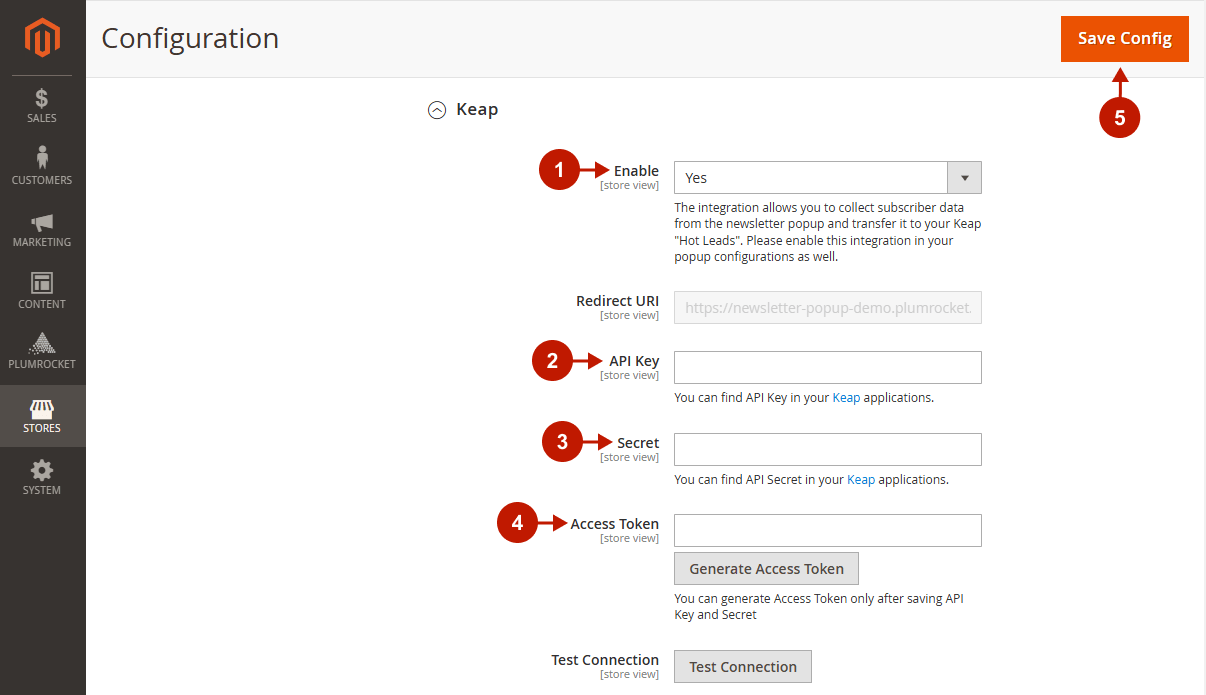
Configuring Keap API in Magento 2 Newsletter Popup Extension
Step by Step Guide:
Appilcation Name
- Enable: if enabled, this option allows you to transfer collected emails to your Infusionsoft List(s).
- API Key: paste the API Key copied from your Keap account.
- Secret: paste the Secret copied from your Keap account.
- Access Token: paste the Access Token copied from the Keap account.
- Press the Save Config button to save your changes.
Was this article helpful?
