Here you will learn how to configure the Plumrocket Magento 2 Order Status & Shipping Tracking Lite Extension correctly. In order to perform this, follow the instructions below.
Configuring Magento 2 Order Status & Shipping Tracking Lite Extension
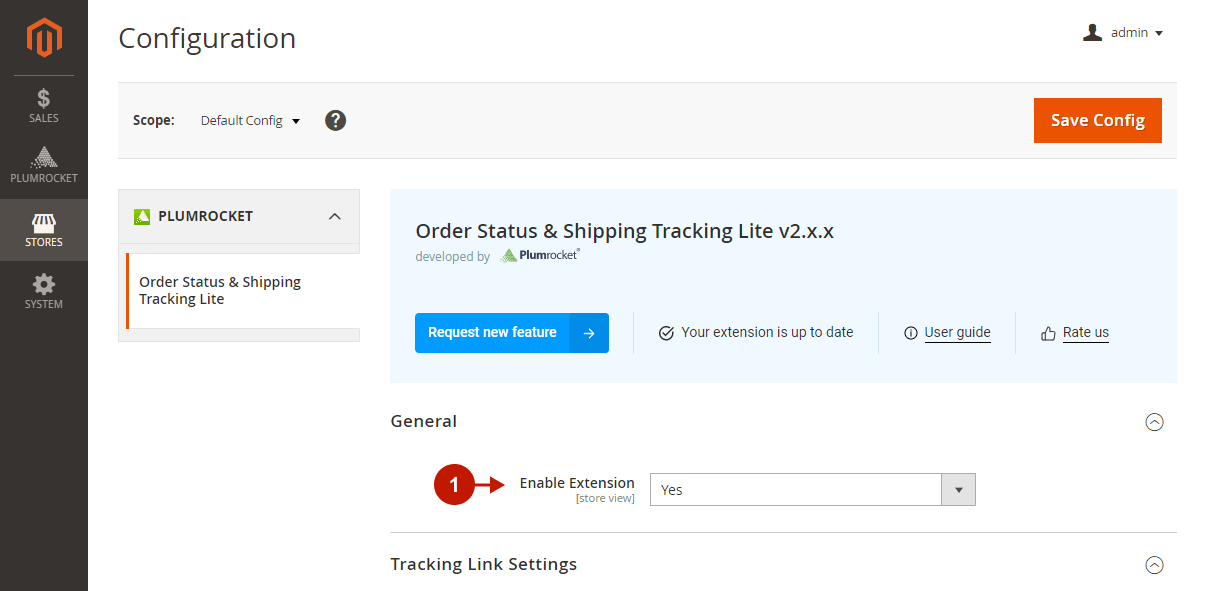
In the main Magento menu, go to the Plumrocket tab > select Order Status and Shipping Tracking Lite > Configuration.
General
Step-by-step guide:
- “Enable Extension“: select Yes to enable the extension.

Tracking Link Settings
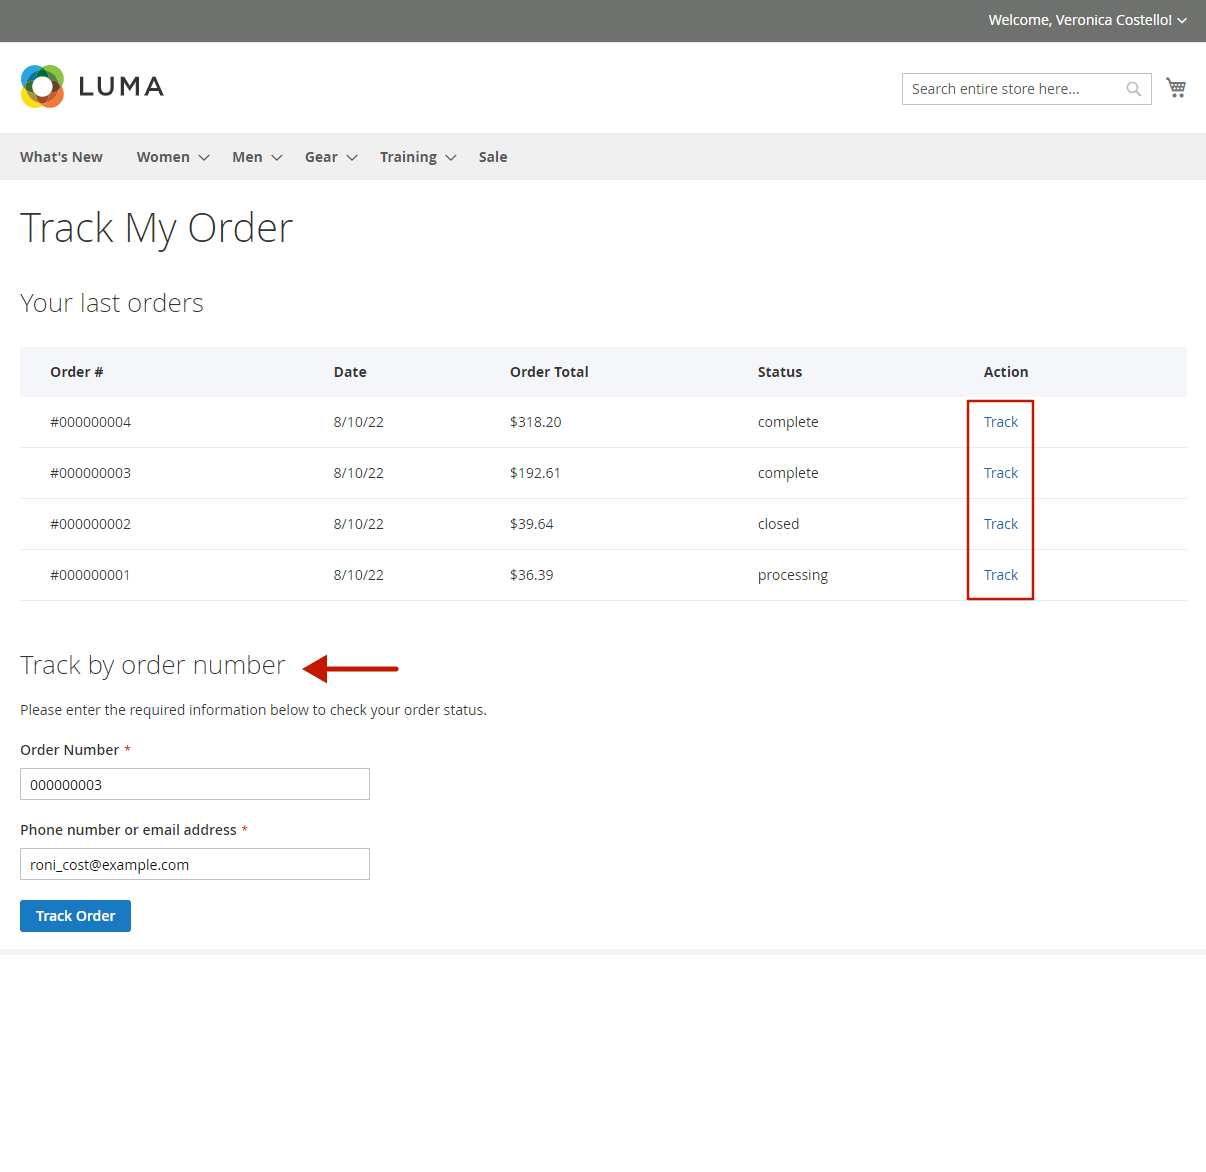
The extension automatically adds the Track My Order link to your website’s footer. The link leads to the Track My Order page, where users can view a list of all recent orders and find their tracking links. However, logged-out users will be prompted to enter the order number and email/phone to view the order tracking information on this page.
In this section, you can set your custom label for the Track My Order link.
Step-by-step guide:
- “Footer Link Label“: change the label of the Track My Order link displayed in the footer.

Shipping Services
- In this section, you can enable and set up the integration with the supported shipping carriers. Please find the service you want to integrate in the Shipping Carrier Integrations grid and use the provided guides for step-by-step instructions.
- Click Save Config to save your configurations.

Tracking Orders & Shipments in the Frontend
“Track My Order” Page
Customers can land on this page by clicking the Track My Order link in the footer. and view a list of their last orders, and click on the tracking link of the corresponding order (takes to the Order Tracking page).

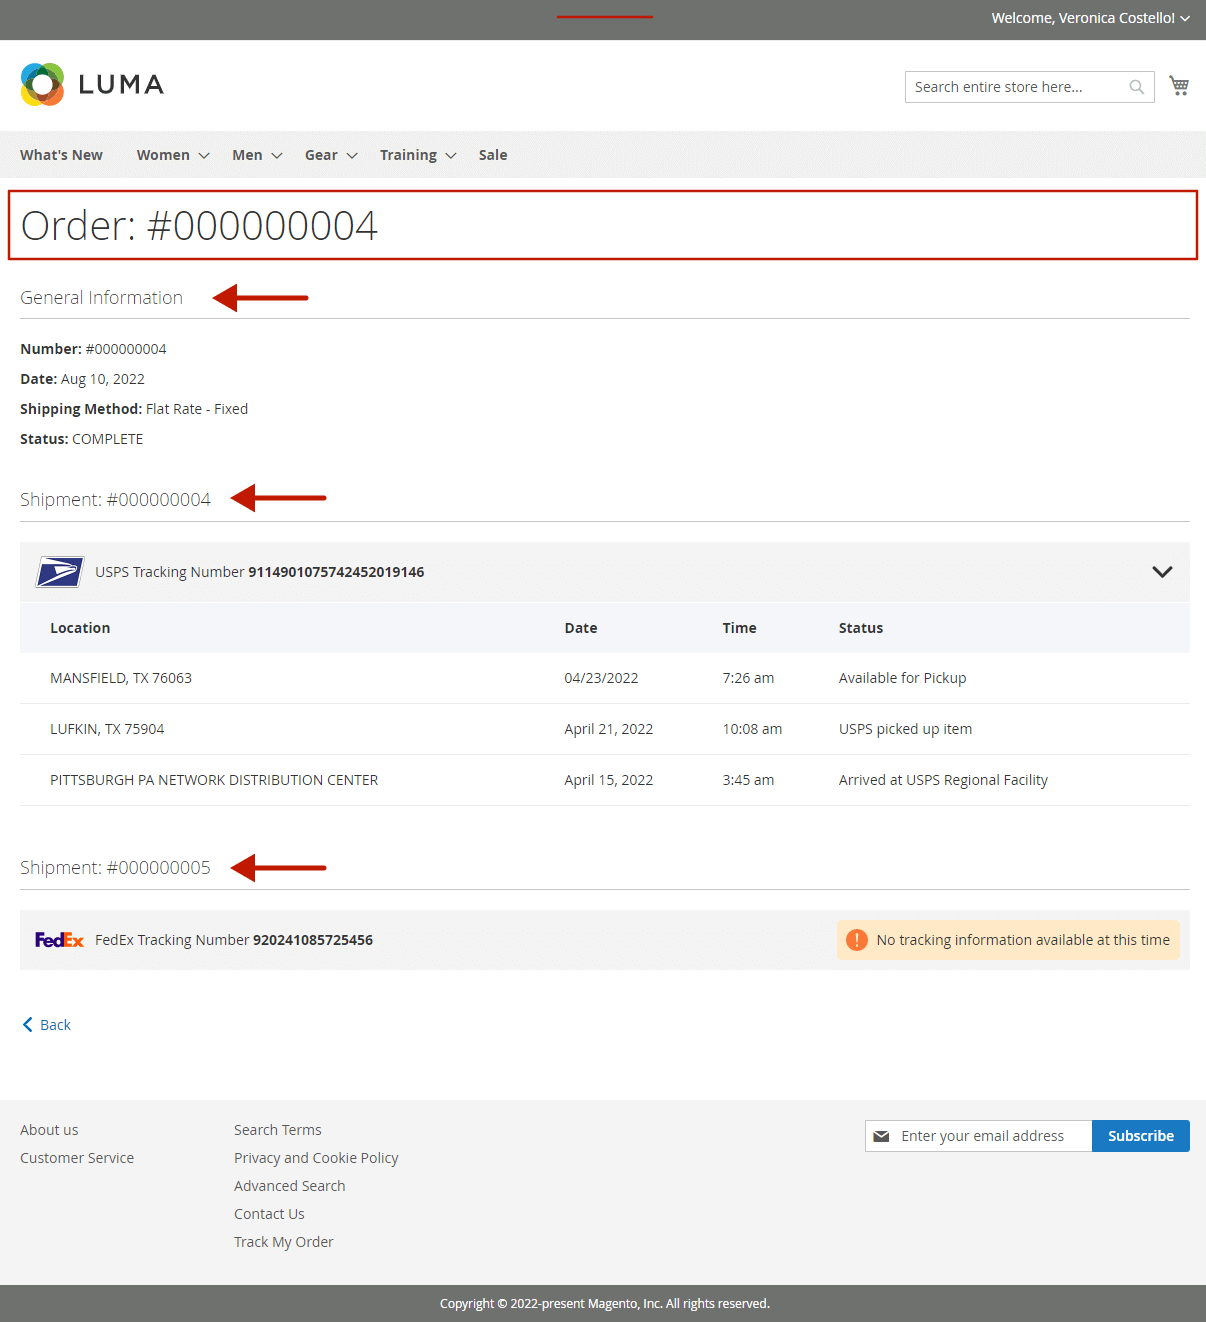
Order Tracking Page
The Order Tracking is a detailed page for an individual order that contains all order-related information in one place. Here, customers can view the order’s General Information, as well as its Shipment # with tracking details. If there are multiple shipments in the order, they are all displayed one by one on this page for easier order tracking.

Next Step: How to Test Magento 2 Order Status & Shipping Tracking Pro Extension
