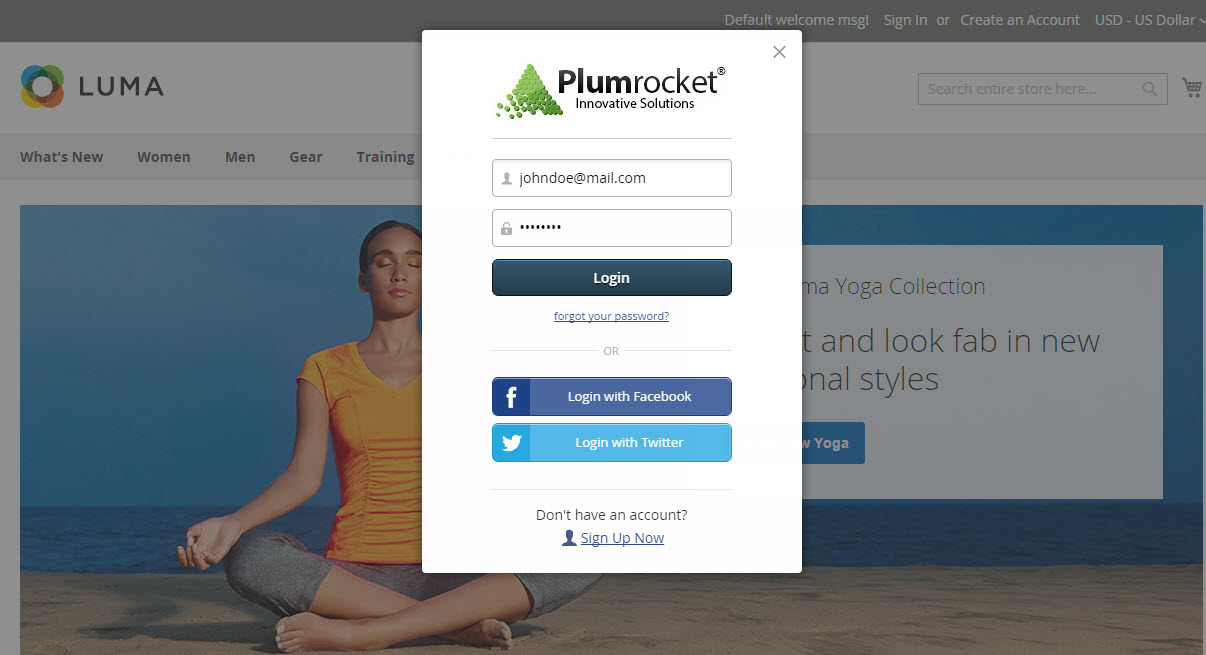
In this article you will learn how to configure Magento 2 Popup Login extension correctly. Please, follow this step-by-step guide.
Configuring Magento 2 Popup Login Extension
In the main Magento menu, go to Plumrocket -> Popup Login -> Configuration.
General
Step-by-step guide:
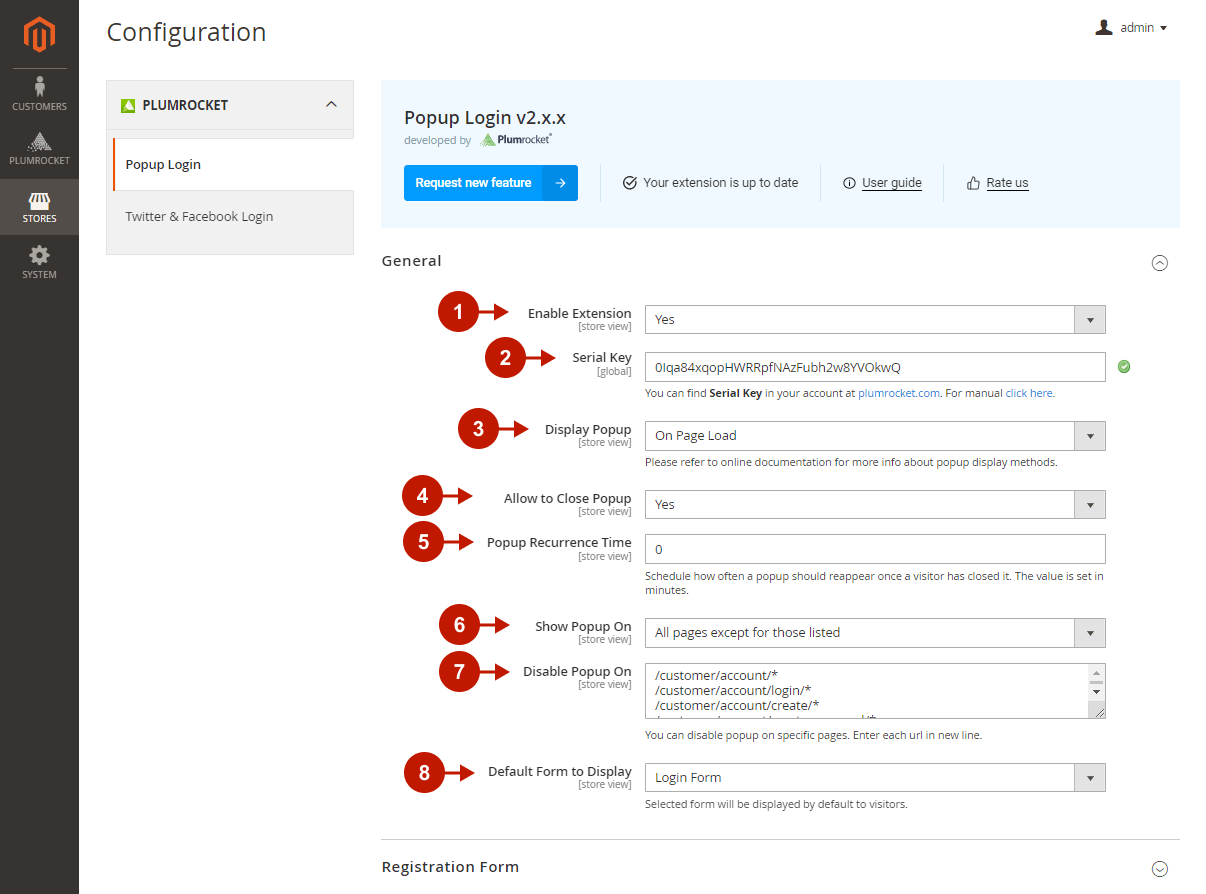
- The “Enable Extension” option allows you to enable or disable this Popup Login Extension.
- Please, enter the unique Serial Key received after the purchase of this extension in this field. Note: In most cases, Serial Key will be filled in automatically and the green check mark will be displayed. If there is no key entered, please, read Serial Key Activation article to get more information on how to insert the key manually.
- The “Display Popup” option allows you to choose the method to display the popup login. You may choose one of the suggested options:
- On page load: the popup login form will be displayed when the page is refreshed.
- On page click: the popup login form will be displayed when a user clicks anywhere on the page.
- On page links click: the popup login form will be displayed when a user clicks on any page link.
- Manually: allows you to choose any page element that will launch the popup login form once clicked. Please, check our Developer’s Guide & API Reference.
- If enabled, the “Allow to Close Popup” option lets your customers close the popup login.
- The “Popup Recurrence Time” option allows you to set how often a popup should reappear once a visitor has closed it. The value is set in minutes.
- The “Show Popup On” option allows you to select the pages your popup login will appear on. You may select one of the suggested options:
- All pages: the popup login form will be displayed on all pages of your website.
- Specific pages: the popup login form will only be displayed on the pages you indicate (the additional “Enable Popup On” text area to configure will appear, like it is shown below).
- All pages except for those listed: the popup login form will be displayed everywhere except for the pages you indicate (the additional “Enable Popup On” text area to configure will appear, like it is shown below).
- The ‘ Disable Popup On” text area will appear depending on the selected option above. In this field you have to specify the store pages the popup needs to be disabled/enabled on.
- The “Default Form To Display” option allows you to select the popup form you need to be displayed: Login Form or Registration Form.
Registration Form
Step-by-step guide:
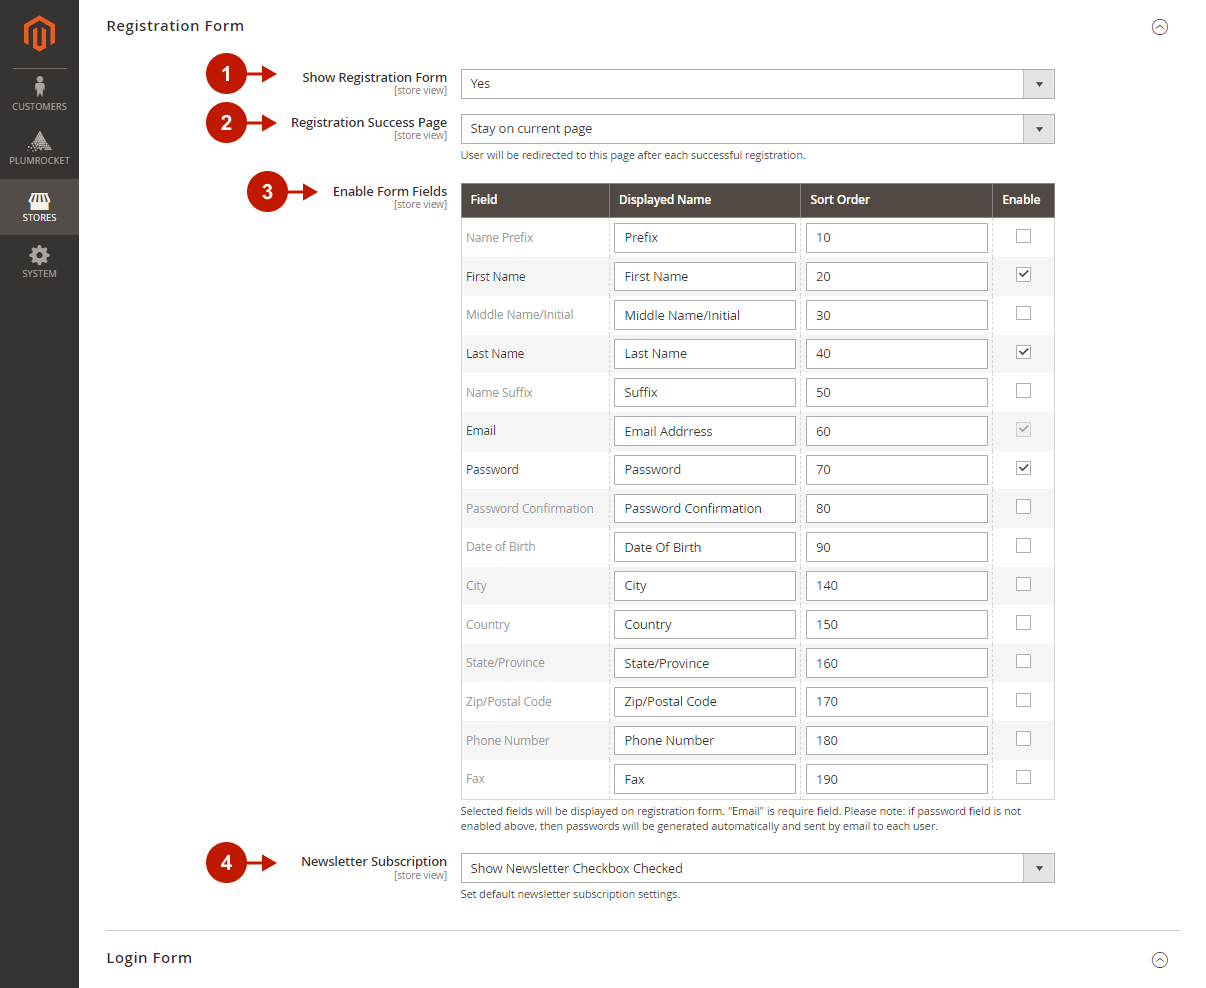
- The “Show Registration Form” option allows you to enable or disable the display of the Registration form in the Popup box.
- In the “Registration Success Page” specify the page your user will be redirected to after each successful registration.
- The “Enable Form Fields” option lets you select the fields customer will have to fill in during the registration process.
- The “Newsletter Subscription” option allows you to set default newsletter subscription settings.
Login Form
Step-by-step guide:
- The “Show Login Form” option allows you to enable or disable the Login Form in the Popup Login box.
- In the “Login Success Page” specify the page your user will be redirected to after each successful logging in.

Forgot Password Form
Step-by-step guide:
- The “Show Forgot Password Form” lets you enable or disable Forgot Password Form in the Popup Login box.

Popup Design and Effects
Step-by-step guide:
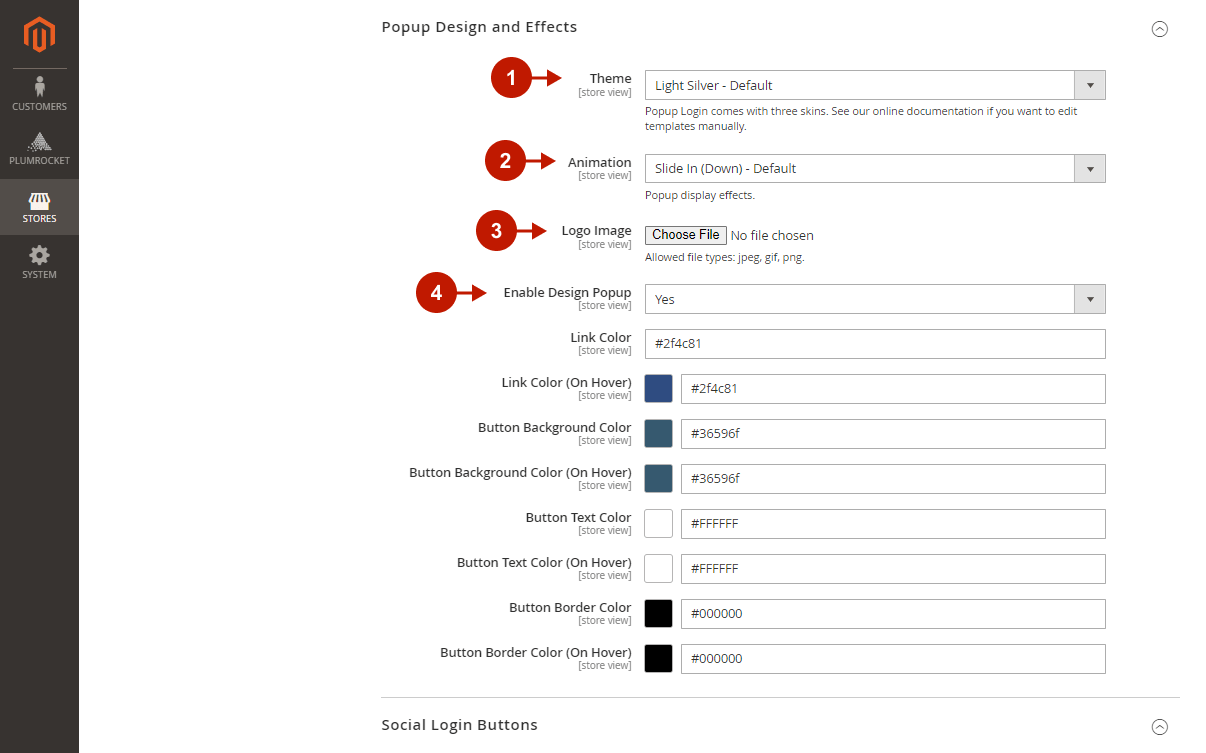
- The “Theme” option allows you to select among 3 skins for your popup.
- Choose the popup display effects in the “Animation” drop-down menu.
- The “Logo image” option allows you to display your logo in the Login Form in the Popup Login box.
- The “Enable Design Popup” option allows you to change the design of the popup. If enabled, multiple configurations will appear allowing you to change the design of links and buttons.
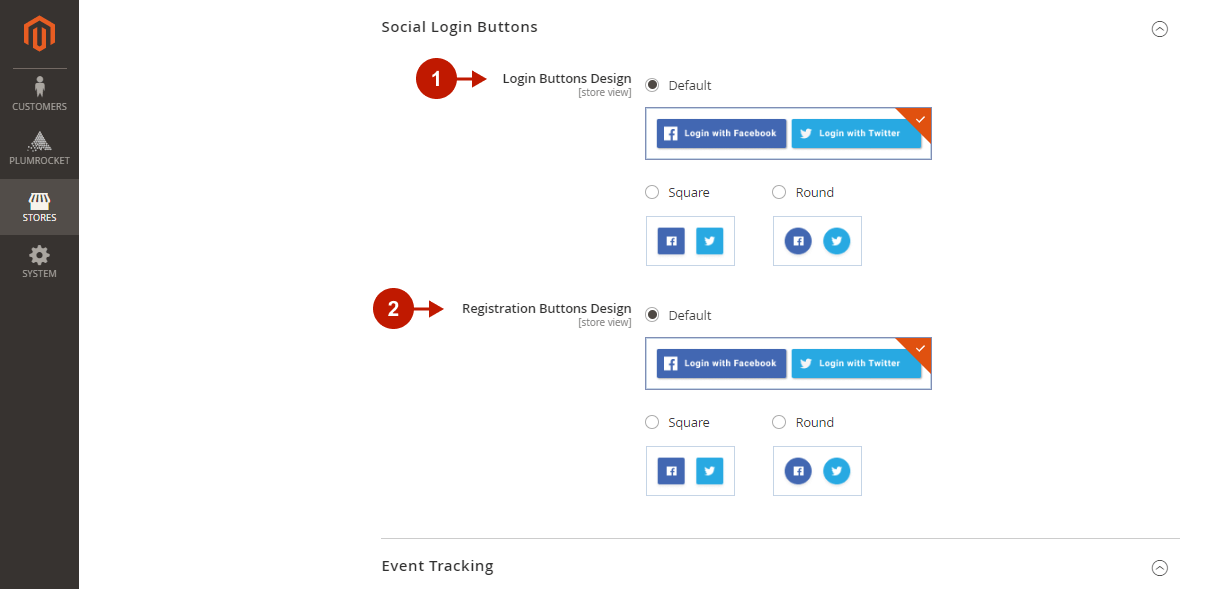
Social Login Buttons
This section appears if you have installed our free Twitter & Facebook Login or Social Login Pro extension. Please refer to the Twitter & Facebook Login Buttons section below to learn more.
Step-by-step guide:
- “Login Buttons Design“: please choose the design of social login buttons on the popup.
- “Registration Buttons Design“: please choose the design of social registration buttons on the popup.
Event Tracking
Step-by-step guide:
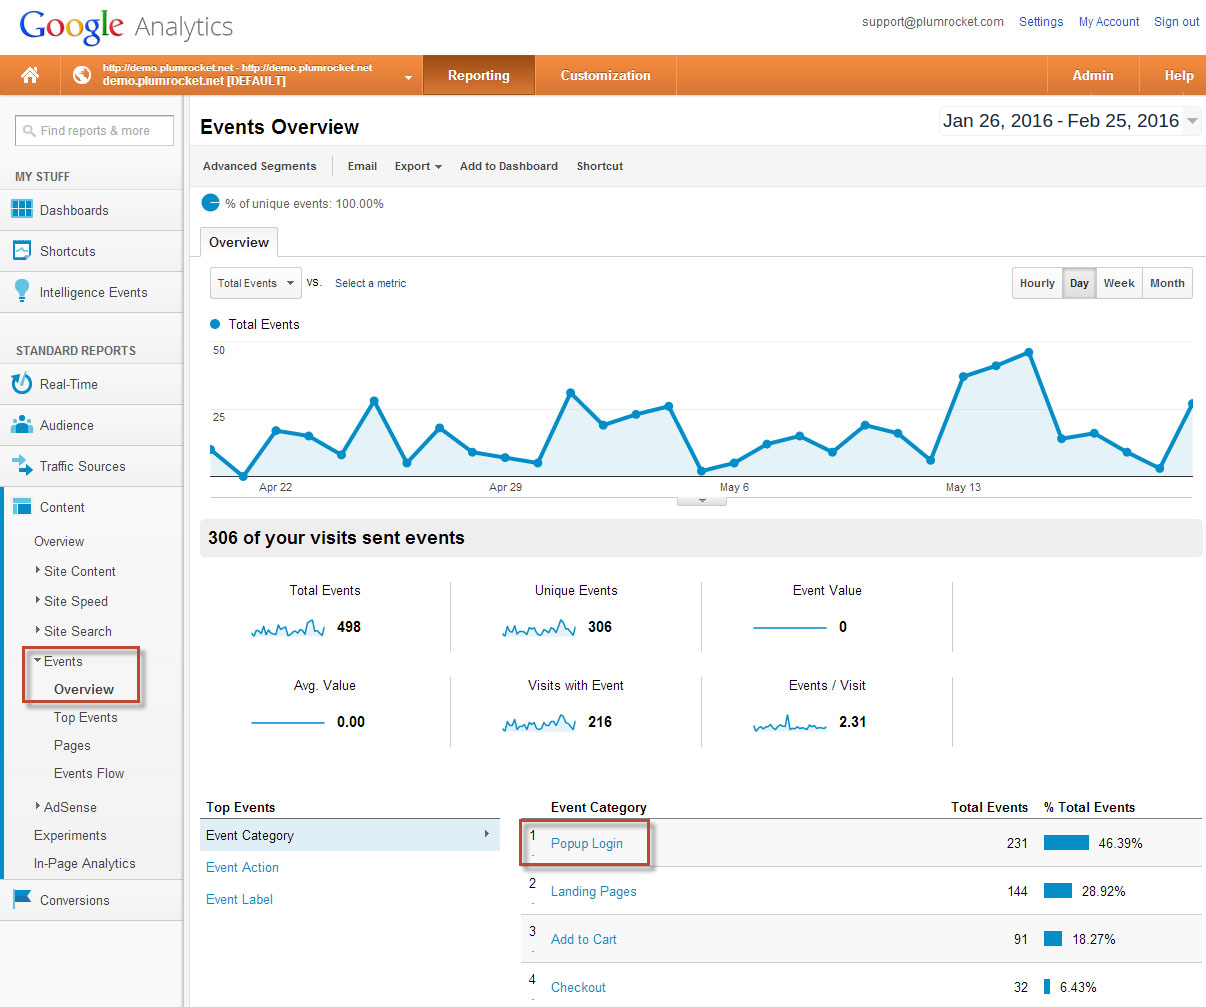
- The “Popup Event Tracking” functionality allows you to enable Google Analytics Event Tracking. This will let you track clicks on all buttons in registration, login, and forgot password forms.
- In the “Affiliate Tracking Code” field specify the affiliate tracking code provided by your Affiliate Network. This code will be executed after each successful registration.
- When all the configurations have been done, do not forget to save your changes by pressing on the “Save” button.

Using this Magento 2 Popup Login Extension you will be able to track users’ activity via Google Analytics. The screenshot below displays the Event tracking via Google Analytics:
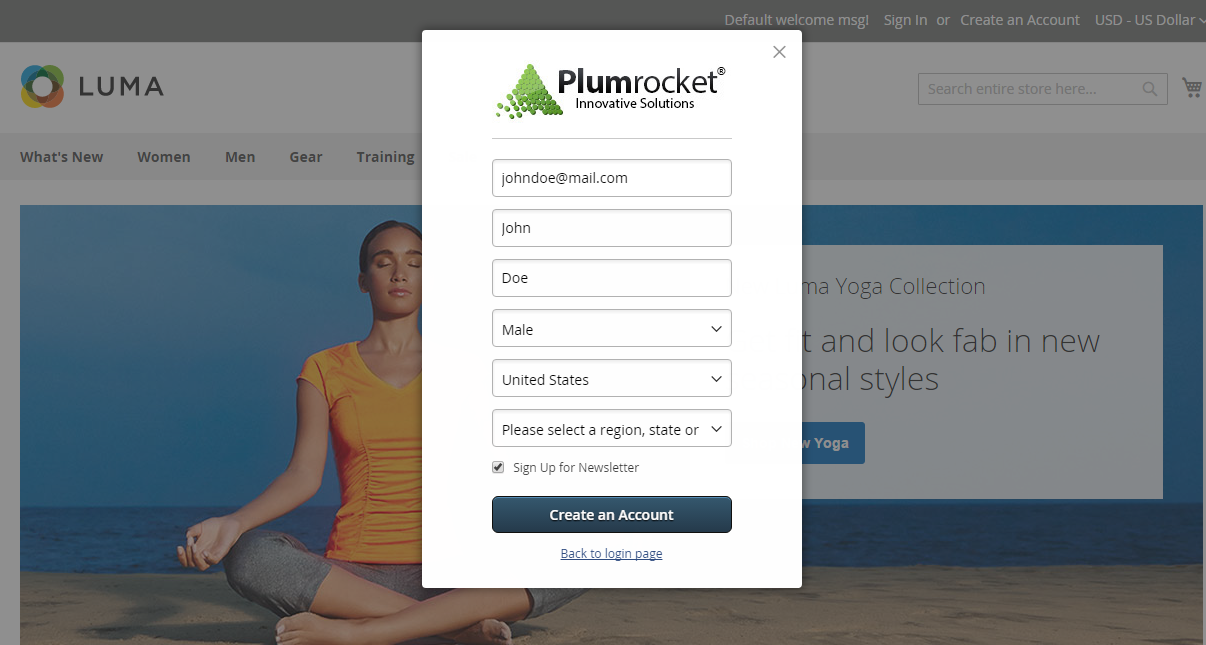
This is how the Magento 2 Popup Login Extension is displayed on the frontend.
Twitter & Facebook Login buttons in Popup Login Magento 2 Extension by Plumrocket
In case you want to allow users to log in with their Facebook and Twitter accounts, we have added our free Twitter & Facebook Login extension to Popup Login for Magento 2. To enable and configure the social login buttons for Popup Login, please follow the information outlined in Magento 2 Twitter & Facebook Login Installation article. We also offer Social Login Pro extension for Magento 2 that supports about 50 social networks.
After you finish with the configuration, both Popup Login and social network extension will appear on your Magento 2 frontend as displayed below.
