Hi! and welcome to Plumrocket tutorials! In 10 simple steps, you should learn how to launch any website on your local machine quickly. You will be able to enjoy the speed of Linux tools and the convenience of Windows.

We believe that this setup is the easiest and the fastest way to start developing your first Magento Extension or WordPress project on Windows.
In this article, we will show you how to install Docker and Devilbox in Ubuntu for WSL2. Once our development environment is ready, we can begin installing Magento 2 and WordPress inside a docker container.
Step 1. Check if your Windows 10 is updated to version 2004, Build 19041, or later
We need to make sure that our Windows 10 is updated to Build 19041 or later to use WSL 2.
- Open windows terminal by typing “cmd” in Windows Search Box and pressing Enter
- Check your windows version.
ver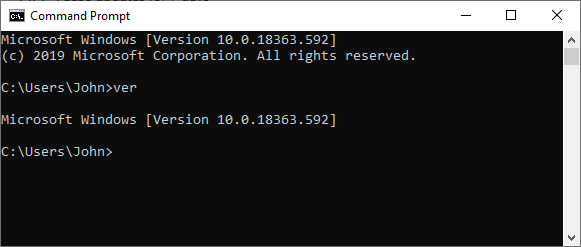
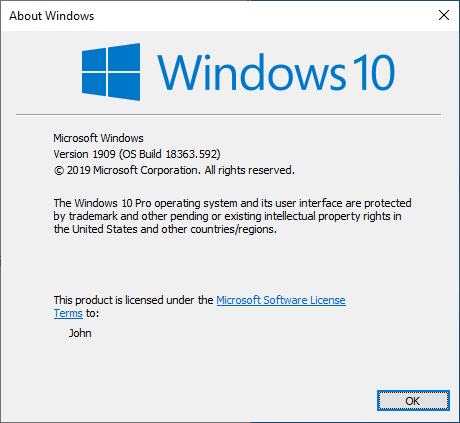
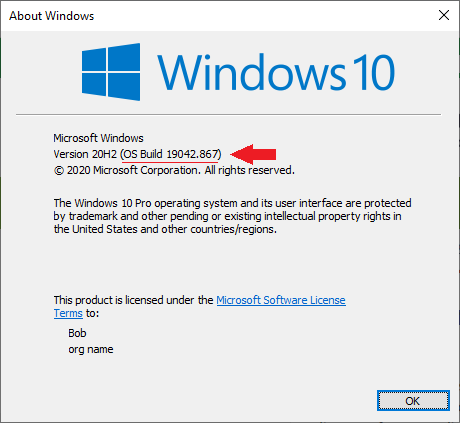
- You can also check the Windows version by typing “winver” in the Windows search box:
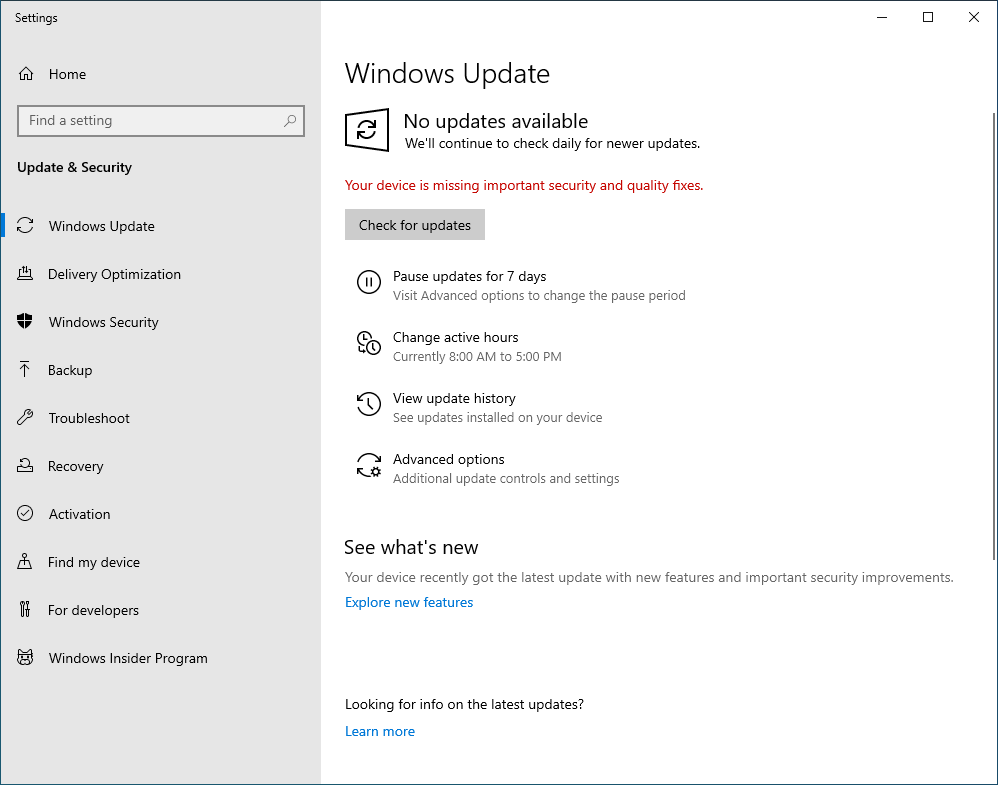
- As you can see, our Windows 10 Build is “18363”. This means we have to update Windows to Build 19041 or higher. To do so, type “check for updates” in Windows Search Box. Then click on the “Check for updates” button to download and install the latest updates. You may need to do this process a couple of times until you reach the desired version.
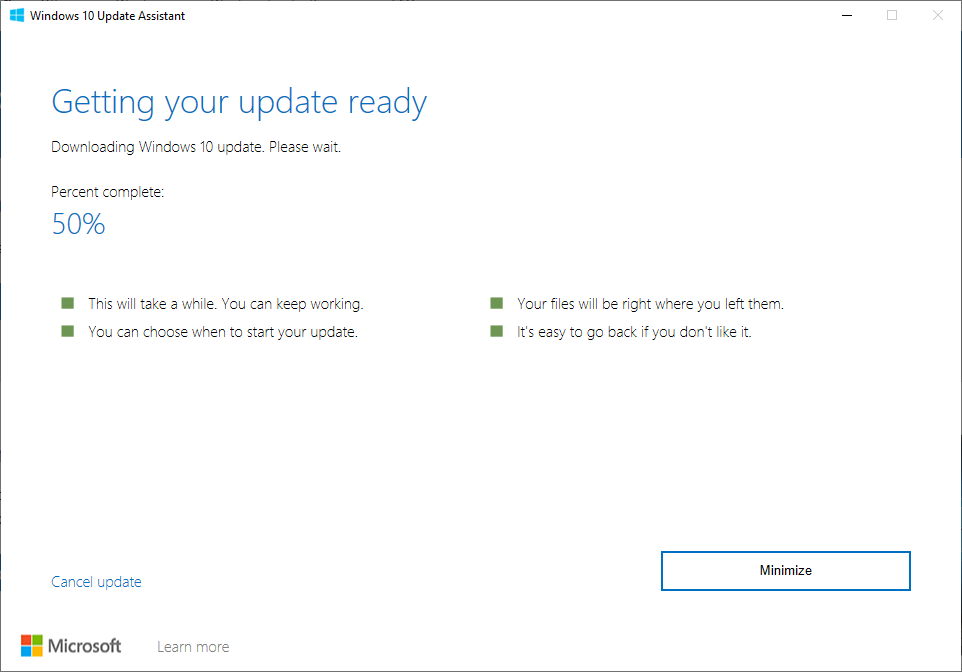
Please note: Sometimes windows updates will get stuck and won’t update automatically. It may be easier to go to Microsoft website and download the latest update from the website directly in such cases.
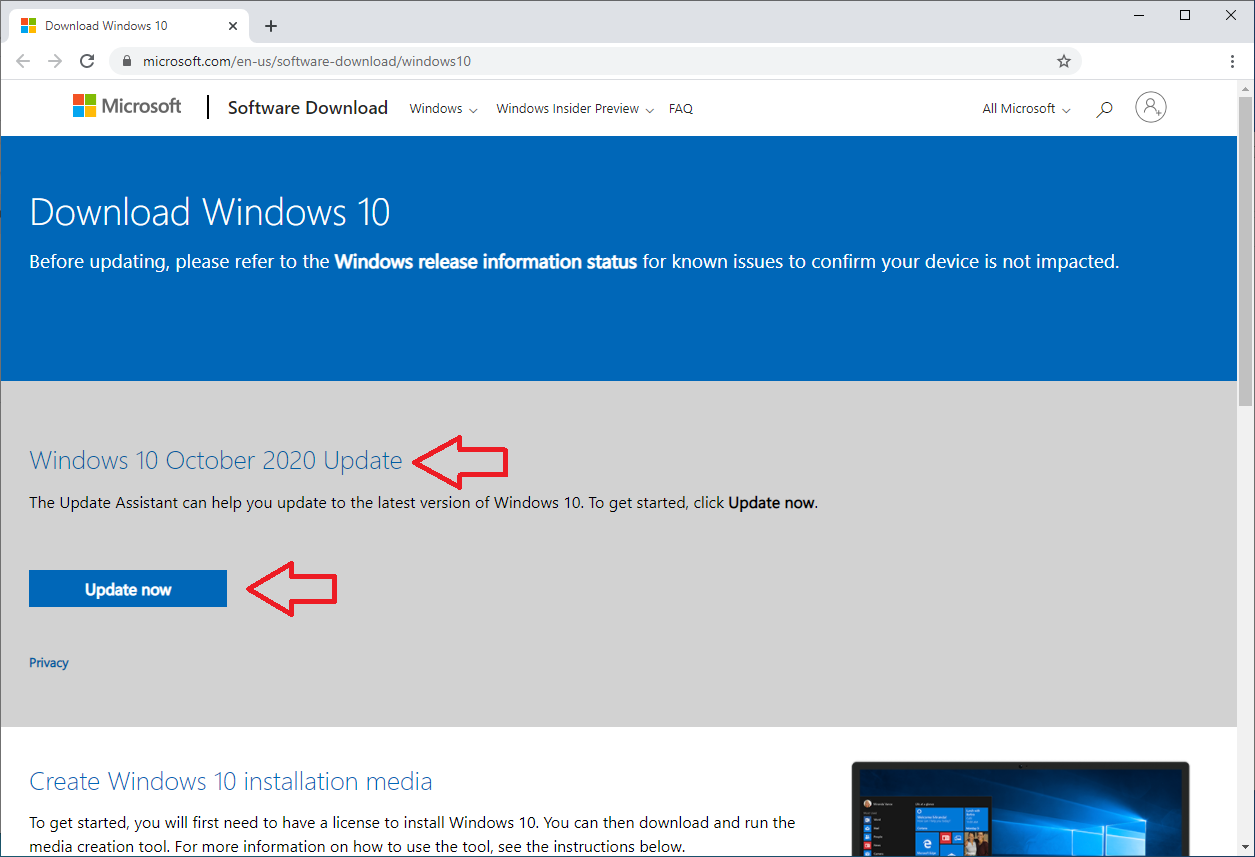
After downloading the Windows Update tool, launch it and proceed with the update.
- After you are done with the update, recheck your Windows version. Just type the “winver” in the Windows search box to see your build number:
Step 2. Enable Windows Subsystem for Linux (WSL2)
Now we need to enable the WSL. We can do this via GUI or PowerShell.
To enable WSL using Windows Interface:
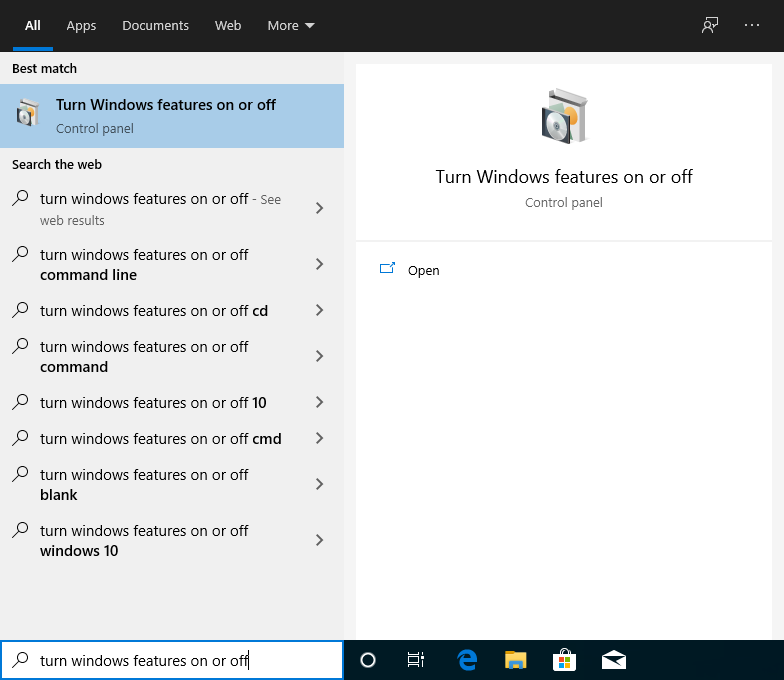
- Enter “Turn Windows features on or off” in the Search Box:
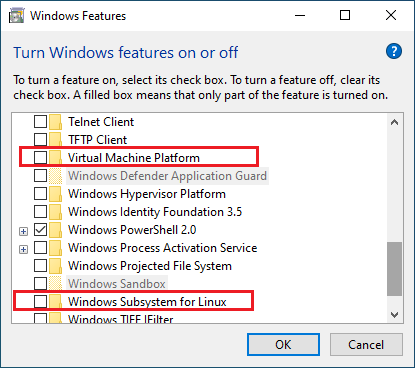
- In the new window, check two checkboxes:
- Virtual Machine Platform
- Windows Subsystem for Linux
Alternatively, you can enable the WSL from the Windows shell. Open PowerShell as an administrator, and type the following command:
dism.exe /online /enable-feature /featurename:Microsoft-Windows-Subsystem-Linux /all /norestartEnable Window’s Virtual Machine Platform:
dism.exe /online /enable-feature /featurename:VirtualMachinePlatform /all /norestartNow you need to restart your computer. After it restarted, you can use Windows GUI to check if the new features were added. Just type the “Turn Windows features on or off” in the Search Box and see if the two checkboxes listed above are checked.
Step 3. Install Ubuntu for WSL 2
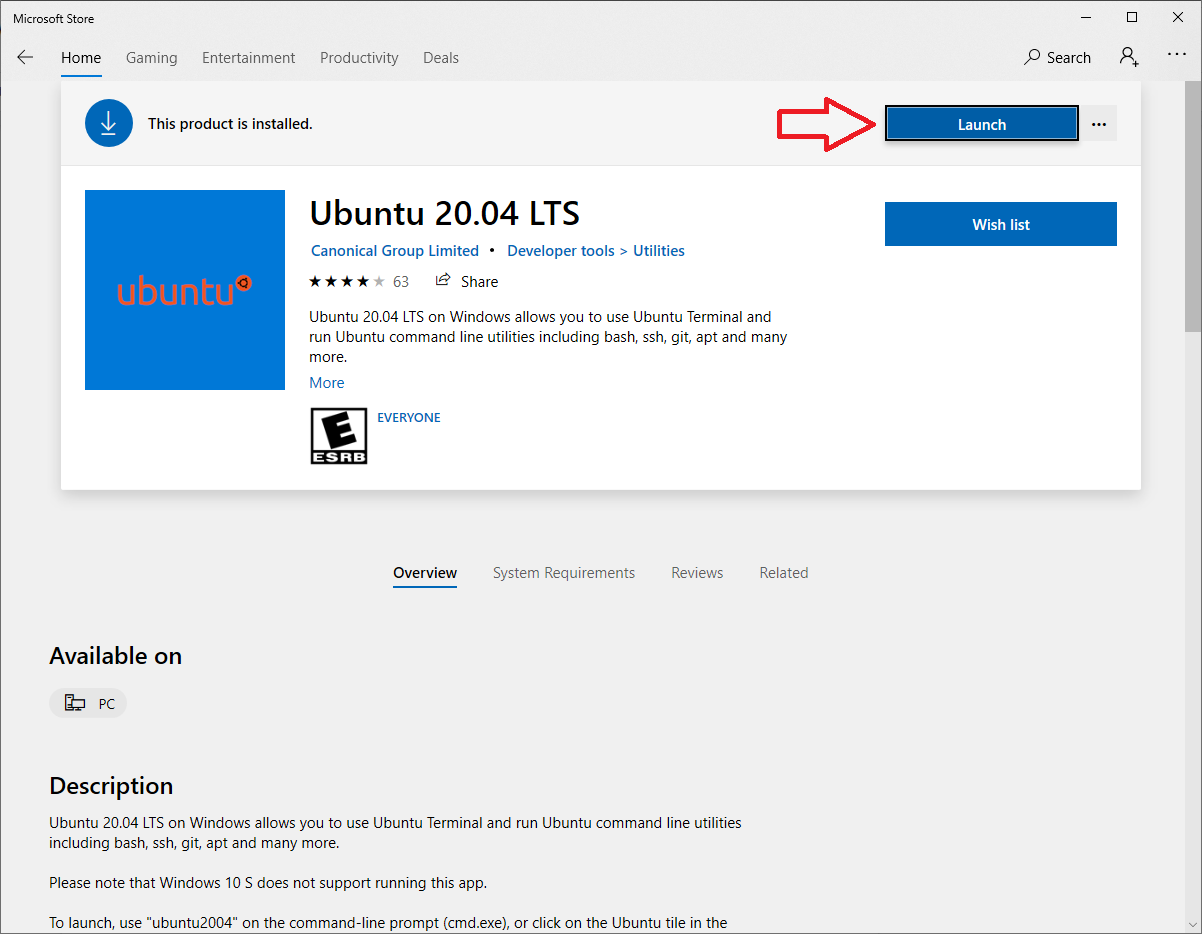
- Open Microsoft Store on your computer and search for “Ubuntu.”
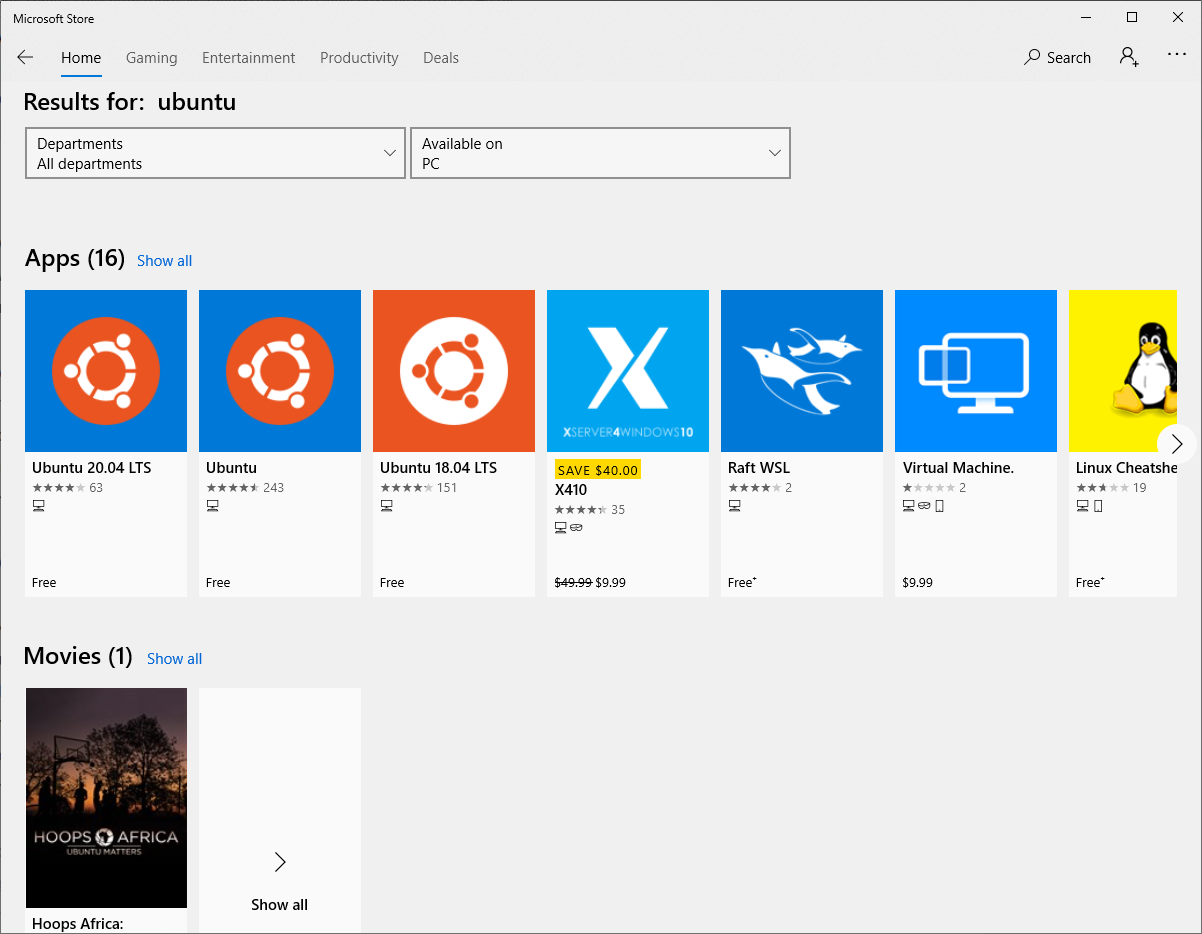
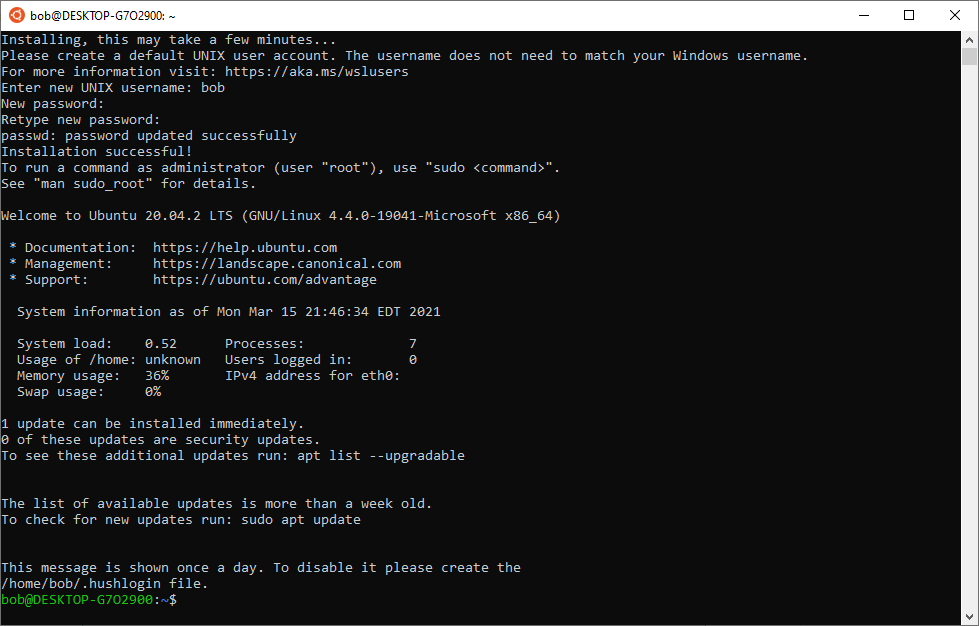
- Install Ubuntu and launch Ubuntu shell
- Provide your new root user and password
Step 4. Install the New Windows Terminal (optional)
Microsoft recently released a new Windows Terminal. It’s a new central location where you can access the traditional cmd line, PowerShell, and the Windows Subsystem for Linux (WSL).
You can install it directly from Microsoft Store.

Here is how it looks after installing:
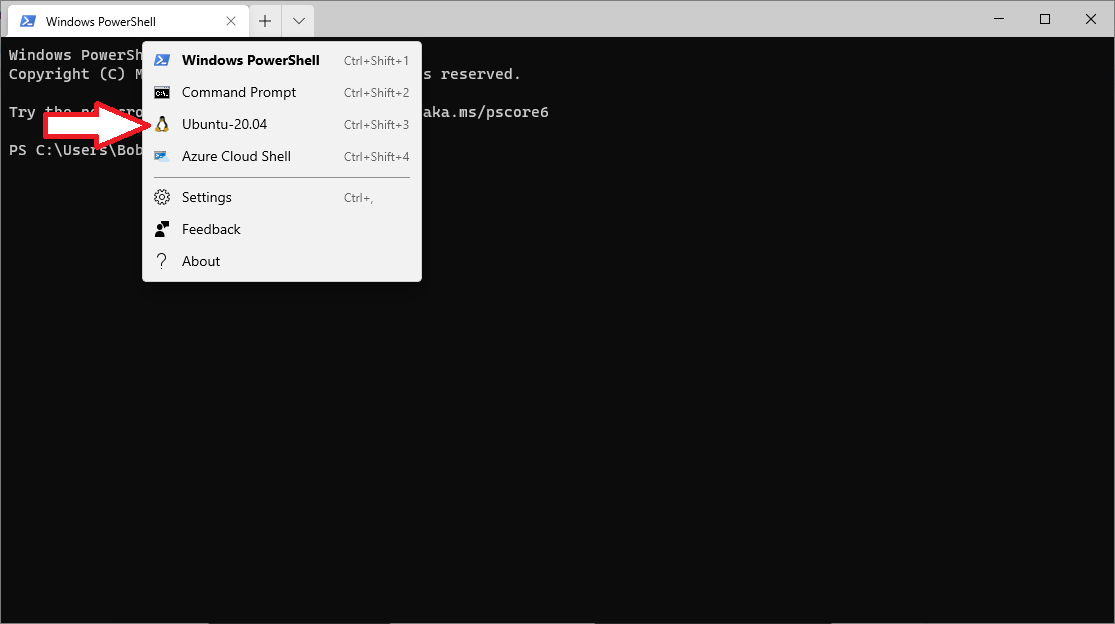
You can switch to Ubuntu shell by clicking on the top menu dropdown and selecting your Linux distribution.
Step 5. Enable WSL 2 for Ubuntu
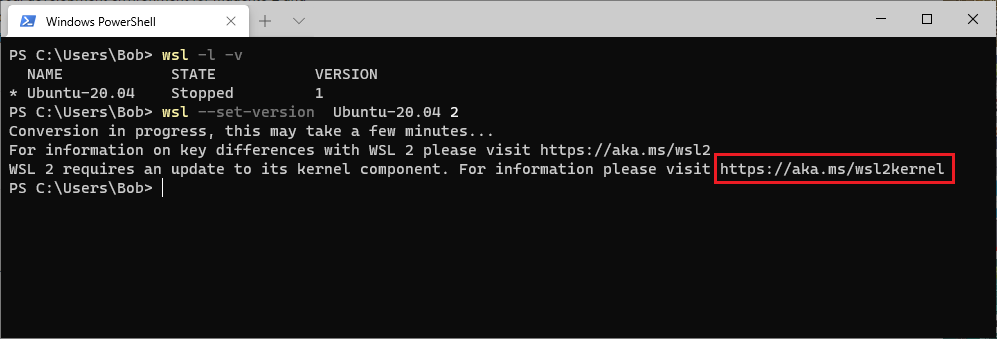
Now, let’s check which WSL version is used for Ubuntu. Open windows terminal and type the following command:
wsl -l -v
If you don’t see “2” next to Ubuntu, run the following command:
wsl --set-version Ubuntu-20.04 2If you receive a message that WSL 2 requires you to update its kernel, just follow this link to download and update the kernel.
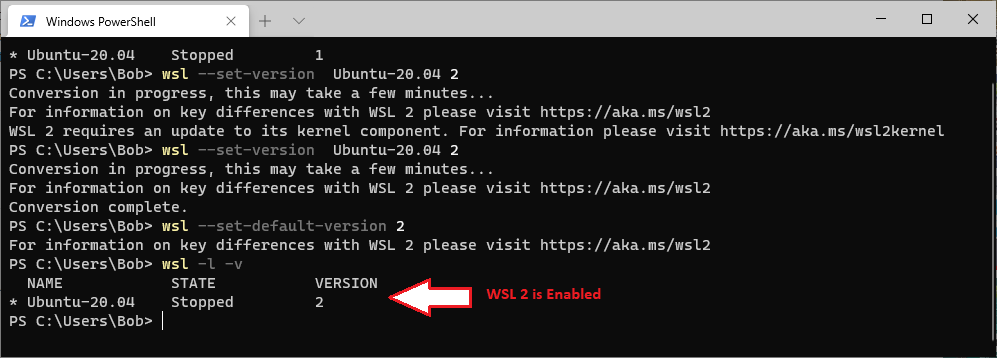
After you finish updating the kernel, re-run the same command again:
wsl --set-version Ubuntu-20.04 2Also, let’s set WSL 2 as your default version:
wsl --set-default-version 2Finally, let’s see if everything went well:
wsl -l -vNow you should have WSL enabled for your Ubuntu.
Step 6. Install Docker and Docker-Compose in Ubuntu
- Open the Linux (Ubuntu) terminal and type the following commands to update the list of packages and install available upgrades:
sudo apt update
sudo apt upgrade
sudo apt install build-essential
2. Install GIT
Most likely, GIT will be already installed in your Ubuntu, but just to make sure, type the following command:
sudo apt install gitThe next global setting helps you avoid issues with checkouts. As files that you have not edited may appear modified due to line ending differences (Ubuntu vs Windows).
git config --global core.autocrlf input3. Install Docker
Note: you can learn more info about the Docker installation in the official Docket documentation.
Begin Installation:
Update local database
sudo apt updateAllow accessing the Docker repositories over HTTPS
sudo apt install apt-transport-https ca-certificates curl software-properties-commonFor security purposes add Docker’s GPG Key
curl -fsSL https://download.docker.com/linux/ubuntu/gpg | sudo apt-key add -Verify that you now have the key with the fingerprint 9DC8 5822 9FC7 DD38 854A E2D8 8D81 803C 0EBF CD88, by searching for the last 8 characters of the fingerprint.
sudo apt-key fingerprint 0EBFCD88You should see similar output:
pub rsa4096 2017-02-22 [SCEA]
9DC8 5822 9FC7 DD38 854A E2D8 8D81 803C 0EBF CD88
uid [ unknown] Docker Release (CE deb) <docker@docker.com>
sub rsa4096 2017-02-22 [S]
Use the following command to set up the stable Docker repository:
sudo add-apt-repository "deb [arch=amd64] https://download.docker.com/linux/ubuntu $(lsb_release -cs) stable"Update the list of packages again and install Docker CE
sudo apt update
sudo apt install docker-ce docker-ce-cli containerd.io
4. The next step is to add your Ubuntu user to the docker group.
Devilbox does not recommend running the following command under root user (see more info in the official Devilbox documentation)
docker-composeCreate the docker group.
sudo groupadd dockerAdd your user to the docker group.
sudo usermod -aG docker $USERRun the following command to activate the changes to groups:
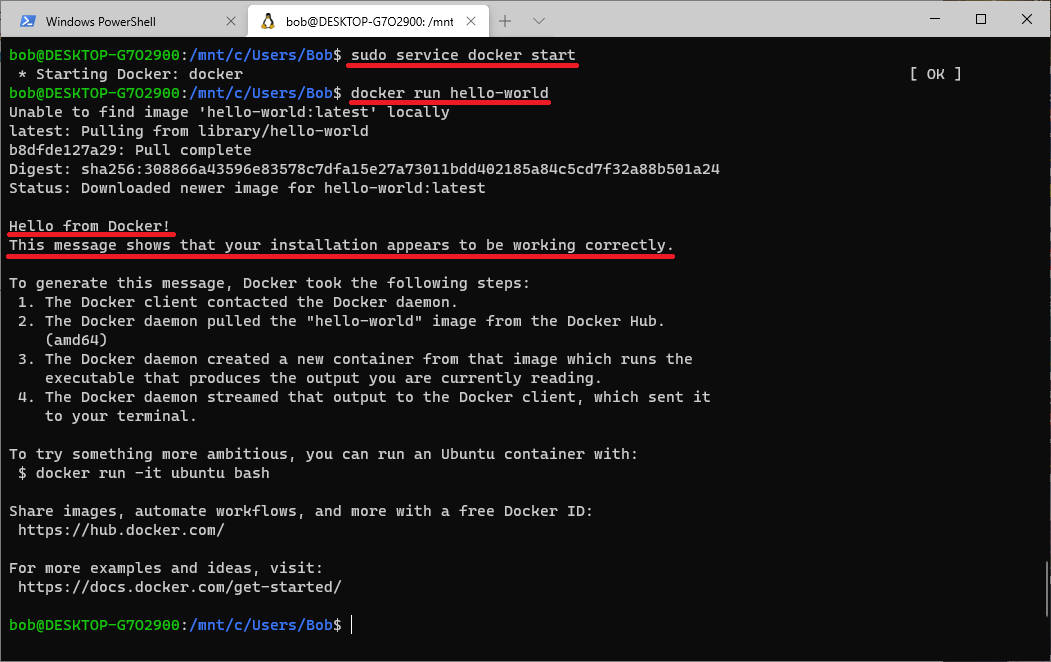
newgrp dockerNow, let’s start our docker service for the first time
sudo service docker startRun the hello-world image.
docker run hello-worldPlease note: If you experience any issues during this process, check the article from docker documentation.
Now log out and log back in so that your group membership is re-evaluated.
5. Install Docker-compose:
For more instructions about Docker compose installation, go to the Install Docker Compose documentation.
First, find the latest stable version of the docker-compose binary from the Compose repository release page on GitHub.
In our case, the latest version is 1.28.5:
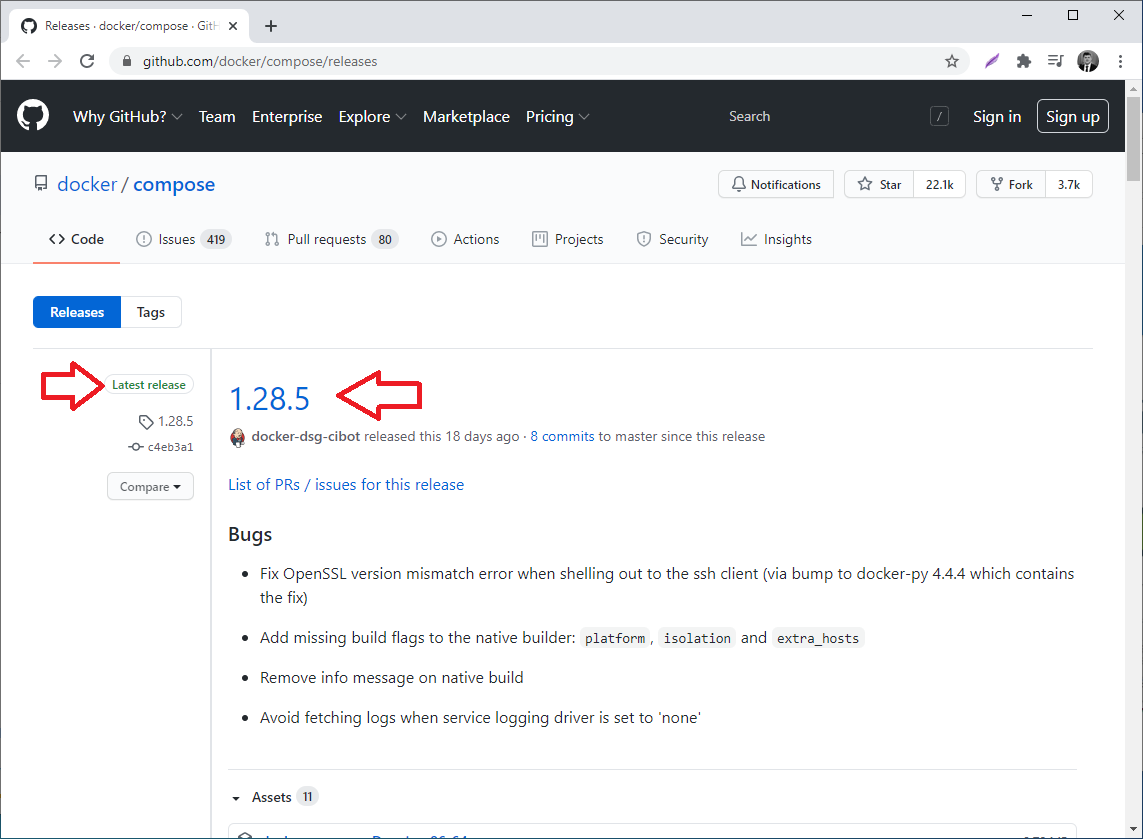
Download the docker-compose tool. Make sure to replace your latest release version with the number 1.28.5 below:
sudo curl -L
"https://github.com/docker/compose/releases/download/1.28.5/docker-compose-$(uname -s)-$(uname -m)" -o /usr/local/bin/docker-compose
Make it executable
sudo chmod +x /usr/local/bin/docker-composeCheck if it’s installed correctly
docker-compose --versionStep 7. Install & Configure DevilBox in Ubuntu
- Install Devilbox (you may also check the installation article of the official Devilbox documentation)
Open the Ubuntu shell and type the following commands:
cd ~
git clone https://github.com/cytopia/devilbox
2. Create the main configuration file (.env)
cd devilbox
cp env-example .env
3. Set config values in the Devilbox environment file
id -u
id -g
This should return you two values. In our case, we’ve got “1000” for user id and user group.
Edit main configuration file
vi .envSet your user id and group id values in the env file:
NEW_UID=1000
NEW_GID=1000
Save changes.
4. Start Devilbox containers
docker-compose up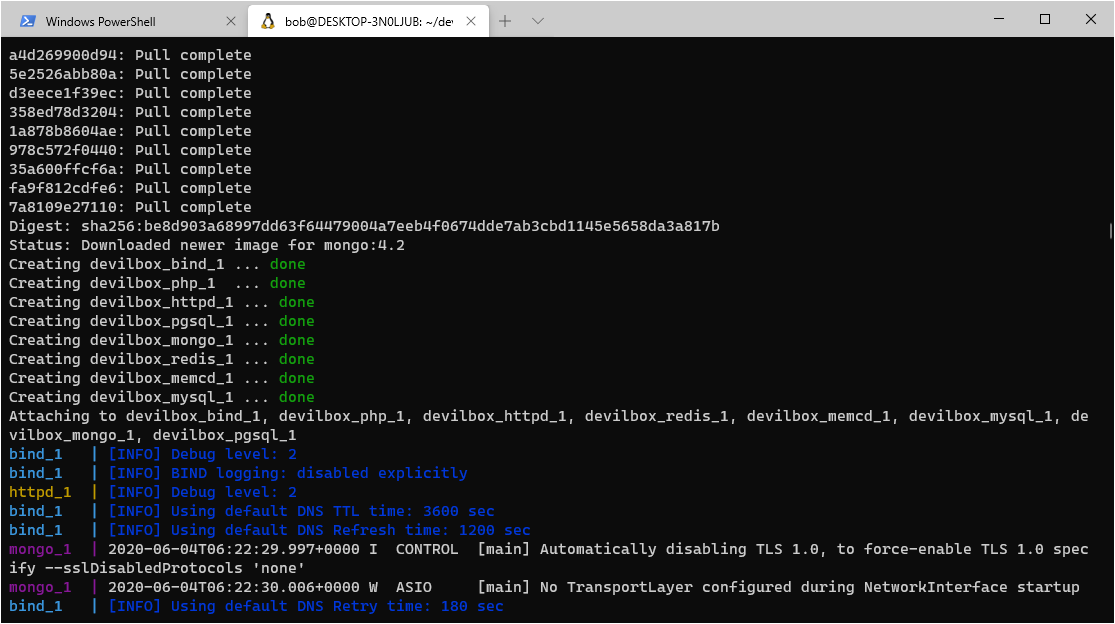
Please note, do not expect to see any type of “success message” on the terminal screen. Once you see no movement, you are good to go to the next step
5. Open http://localhost/ in your browser and you should be able to see the Devilbox Intranet

Step 8. Launch Our First Website on Devilbox
Launching your first website is also described in the official Devilbox manual, however, there are a couple of important details concerning WSL that you will not find there.
- Create a project directory:
cd ~/devilbox/
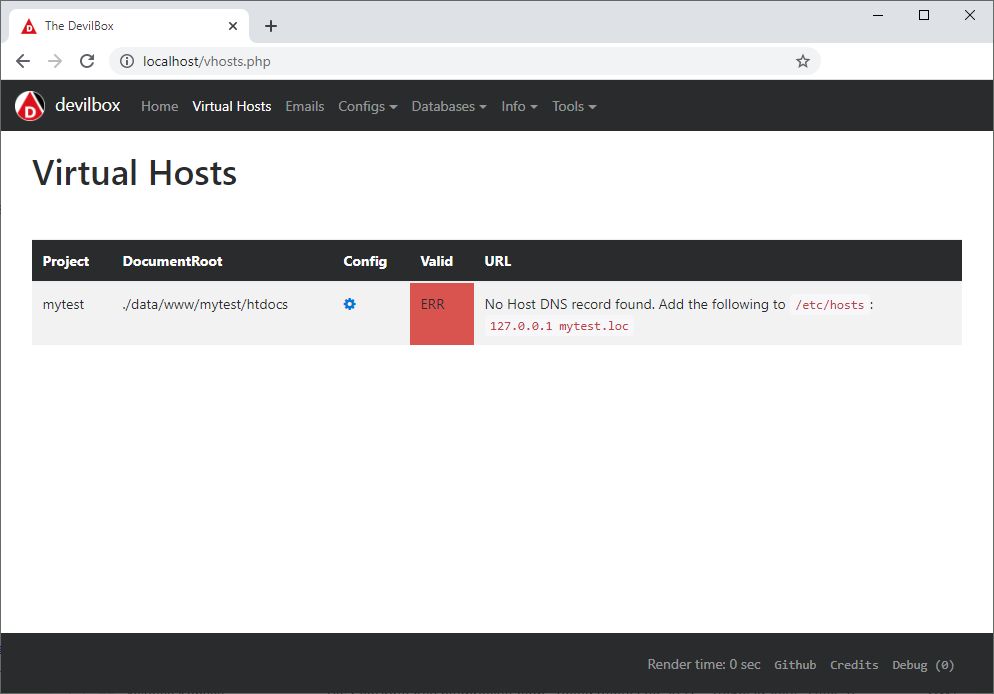
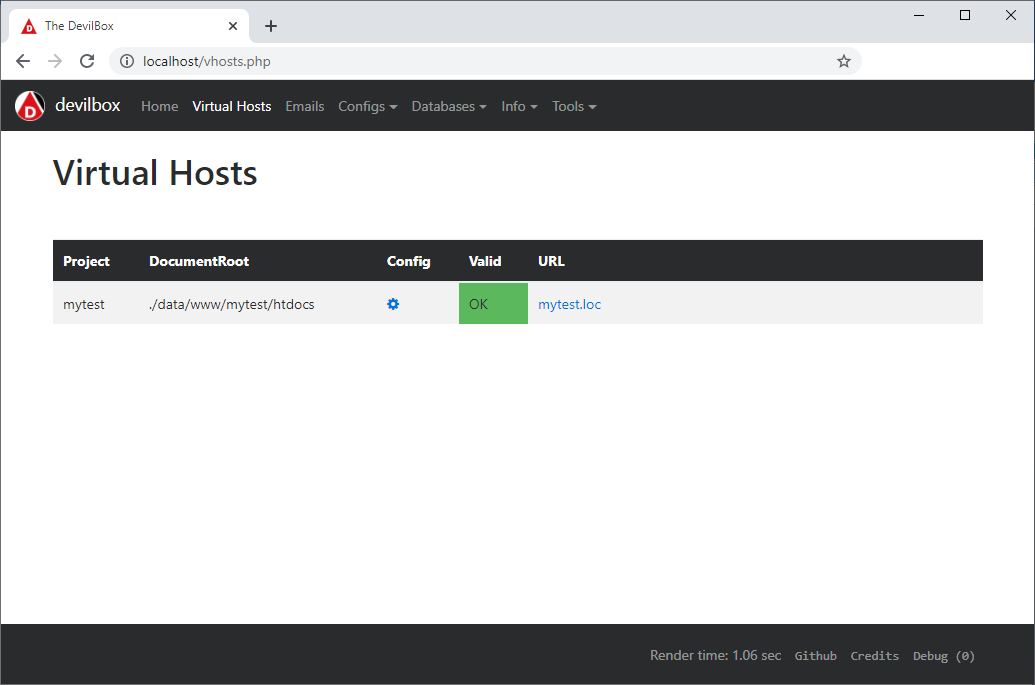
mkdir -p ~/devilbox/data/www/mytest/htdocs2. Open http://localhost/vhosts.php in your browser, and you should be able to see the list of Devilbox virtual hosts.
3. Stop Devilbox containers
Press CTRL+C in Ubuntu Terminal or run the following command:
docker-compose stopThen remove containers:
docker-compose rm -f4. Create a new DNS entry by editing the Hosts file
Typically, you would create a DNS entry on Ubuntu since Docker and Devilbox are installed there. However, with WSL, this process is slightly different. During the Ubuntu startup process, the Ubuntu hosts file is automatically synchronized with the Windows hosts file. Therefore, make sure to add your new DNS entries in the Windows file first and then restart Ubuntu to synchronize files. Or simply add the same entries in both OS.
Let’s add a new DNS entry in Windows:
- Press the Windows key.
- Type Notepad in the search field.
- In the search results, right-click on Notepad and select “Run as Administrator”.
- From Notepad, open the following file:
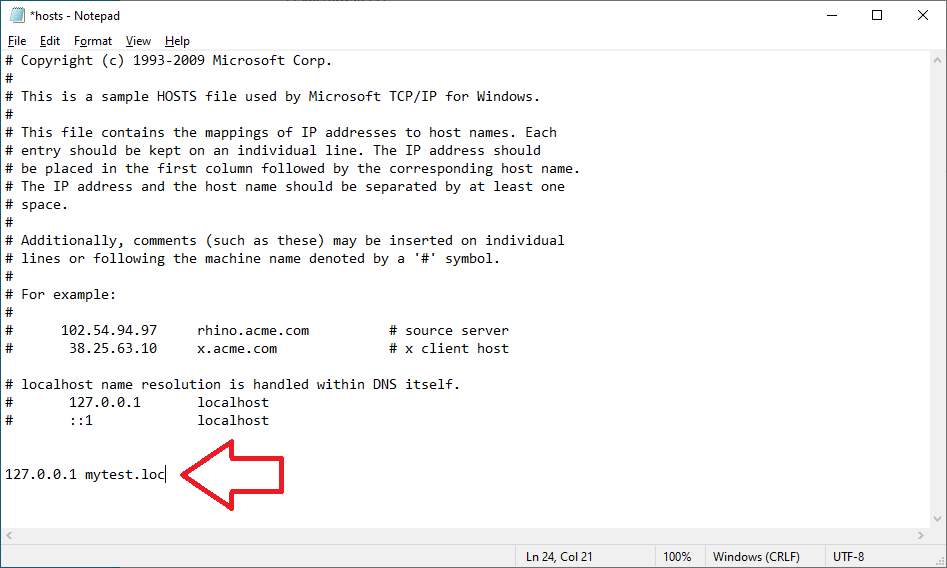
c:\Windows\System32\Drivers\etc\hosts5. Add the following line on the bottom of the file:
127.0.0.1 mytest.locWhere the “mytest.loc” is our website URL
6. Select File > Save to save your changes.
Here is how your Windows hosts file may look like after the new DNS entry was added:
5. Synchronize Ubuntu hosts file with Windows
There will be many cases when we need to restart Ubuntu. Unfortunately, Ubuntu won’t reboot once we close all bash windows. You can restart Windows to reboot Ubuntu or restart the following Windows service – “LxssManager”.
- Close all existing WSL console sessions
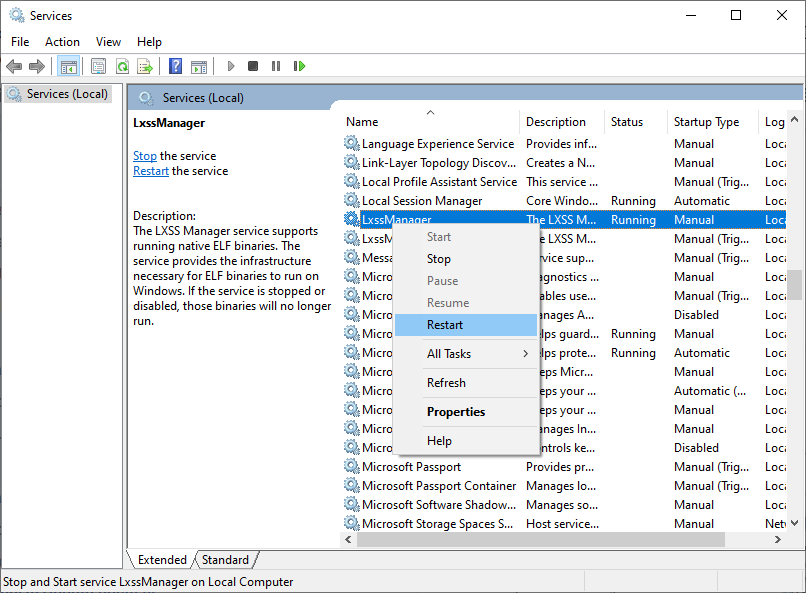
- Reboot the “LxssManager” service:
- Type the “services” in the Windows search box and hit enter:
- Find “LxssManager” in the list, right-click and select “Restart” from the context menu.
6. Open a new Ubuntu session and check your /etc/hosts file to see if the DNS entries were synchronized successfully:
cat /etc/hosts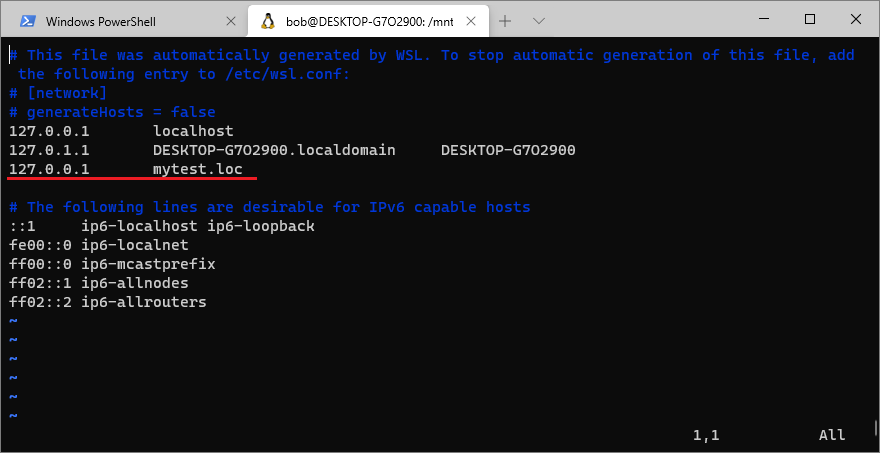
7. Edit the main configuration file
cd ~/devilbox/
vi .env
Then set the IP address of docker services on Windows machine (big thanks to user Amida for your help on this). Find “LOCAL_LISTEN_ADDR” setting, and replace it with the following:
LOCAL_LISTEN_ADDR=127.0.0.1:Save changes.
8. Create an index file
Open Ubuntu terminal and type the following command:
echo "<?php echo 'hello world';" > ~/devilbox/data/www/mytest/htdocs/index.php9. Start Devilbox containers
sudo service docker start
docker-compose up
10. Now head back to http://localhost/vhosts.php in your browser and you should be able to see “OK” message next to “mytest.loc” host.
Open http://mytest.loc/ to see a “Hello World” message
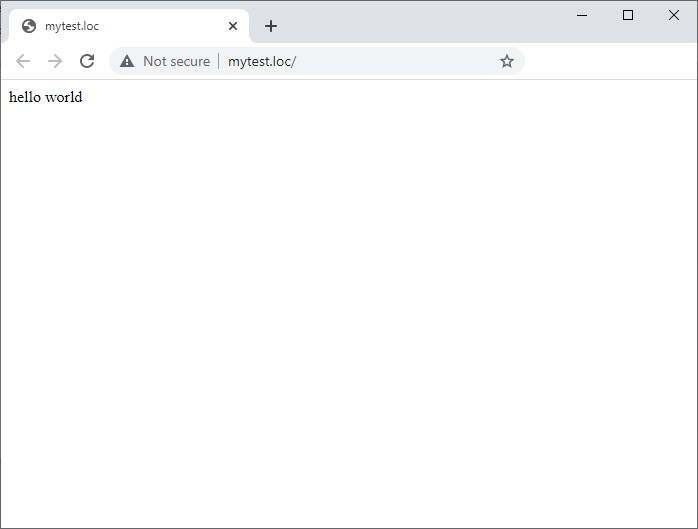
Congratulations! Your first website on Devilbox is running successfully.
11. Automatically start the Docker daemon on Login (Optional step)
The WSL doesn’t launch at Windows boot, but only when the user establishes a login session. So without any real “system start”, the init.d or systemd startup doesn’t happen. The following commands help to start the docker service on each login.
Edit sudoers on Ubuntu
sudo visudoAdd the following line by changing the “UserName” to your Ubuntu username.
UserName ALL = (root) NOPASSWD: /usr/sbin/service docker *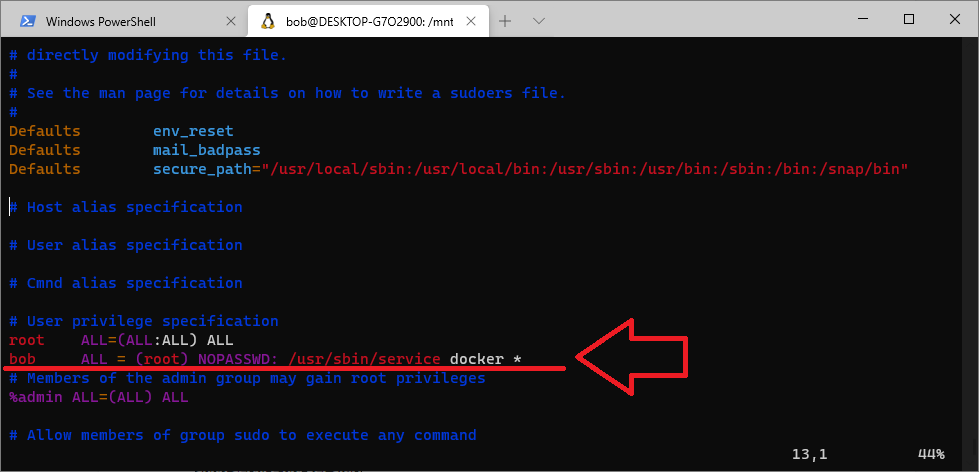
Edit your user startup scripts
vi ~/.profileAdd the following lines:
# start docker service
sudo service docker start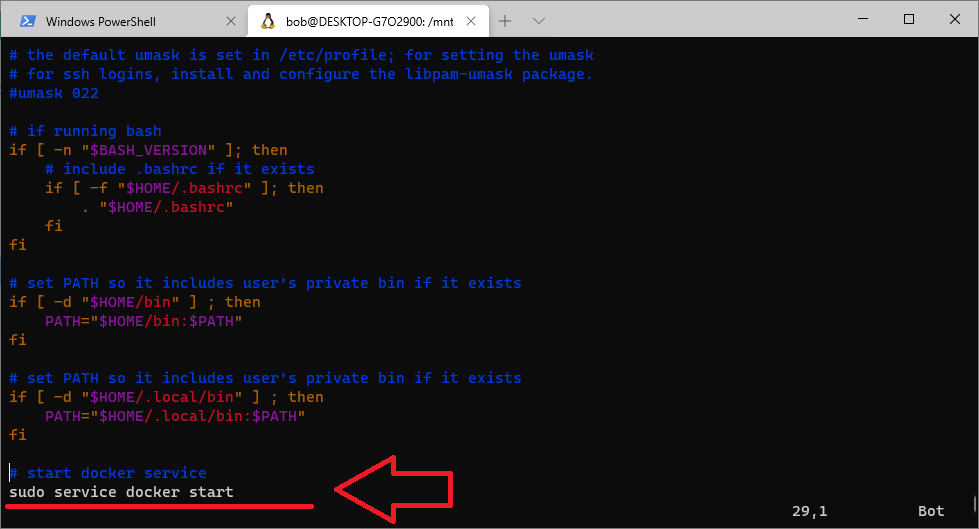
Now, each time you log in to Ubuntu, you will be prompted for your password, and the Docker service will start.
Step 9. Install Magento 2 on Devilbox
The official Devilbox documentation is located here. Feel free to use it as your main guide. We will add only a slight change to the installation process.
Note:
This tutorial provides instructions on how to install Magento 2.3.6 with Docker. If you need a newer version of Magento, please follow the updated guide – to Install Magento 2.4.x with Docker and Devilbox.
First, it’s important to make sure that our configuration file meets all Magento 2.3 system requirements. The following configuration will be set in the environment file:
- Apache v2.4
- PHP v7.3
- MariaDB v10.4
- Stop Devilbox containers if they are running
Press “CTRL+C” in Ubuntu Terminal or
docker-compose stopThen remove all containers:
docker-compose rm -f2. Edit the main configuration file
cd ~/devilbox/
vi .env
Comment out the Nginx web server line and uncomment Apache
HTTPD_SERVER=apache-2.4
#HTTPD_SERVER=nginx-stable
Comment out the PHP7.4 and uncomment PHP7.3
PHP_SERVER=7.3
#PHP_SERVER=7.4
Optionally, you can disable xdebug to speed up your webserver
PHP_MODULES_DISABLE=oci8,PDO_OCI,pdo_sqlsrv,sqlsrv,rdkafka,swoole,xdebugSave changes.
3. Create DNS records in Windows & Ubuntu
In the terminal, edit the Ubuntu hosts file:
sudo vi /etc/hostsAdd this line and save changes:
127.0.0.1 my-magento.loc
In Windows, open Notepad as administrator and edit the following file:
c:\Windows\System32\Drivers\etc\hostsAdd the same line as in Ubuntu and save changes:127.0.0.1 my-magento.loc
4. Enter the PHP Docker container
Start Devilbox containers
sudo service docker start
docker-compose up
Open a new tab in the Windows terminal and enter the following
cd ~/devilbox/
./shell.sh
5. Create new Virtual Host directory
cd /shared/httpd
mkdir my-magento
6. Install Magento 2
We will be installing the latest stable 2.3.x version of Magento using composer v1.x.
cd my-magento
git clone https://github.com/magento/magento2
cd magento2
git checkout 2.3.6
composer-1 install
composer-1 update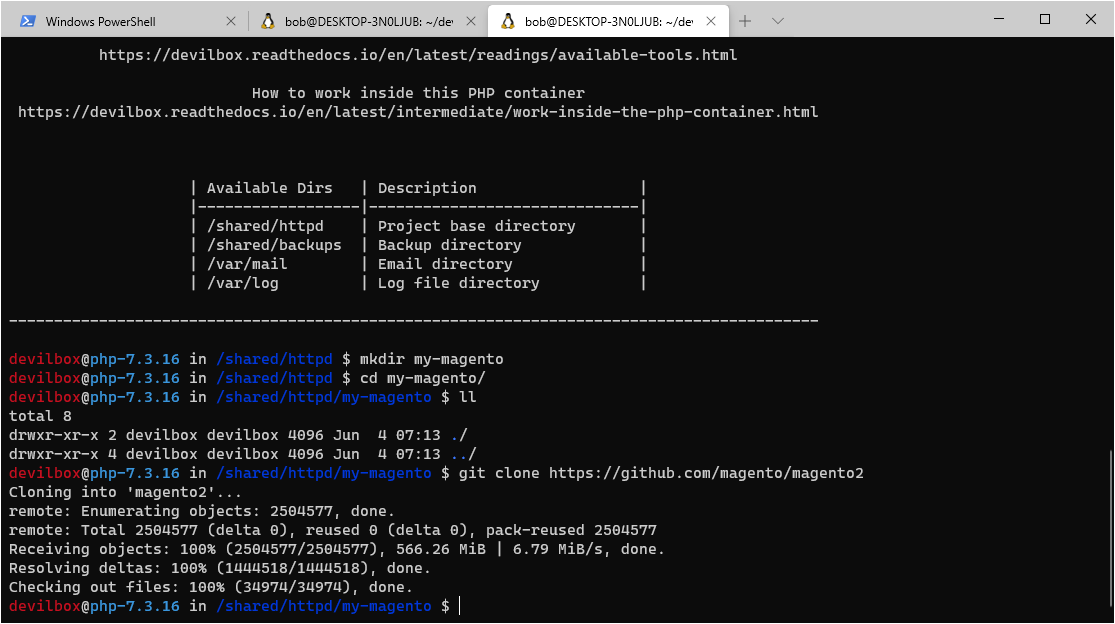
Symlink webroot
cd /shared/httpd/my-magento/
ln -s magento2/ htdocs
Create MySQL Database
mysql -u root -h 127.0.0.1 -p -e 'CREATE DATABASE my_magento;'* Please note: in default Devilbox configuration, the Mysql root password is not set. Just hit “enter” when asked for a password.
7. Set file permissions.
cd /shared/httpd/my-magento/htdocs
find var generated vendor pub/static pub/media app/etc -type f -exec chmod g+w {} +
find var generated vendor pub/static pub/media app/etc -type d -exec chmod g+ws {} +
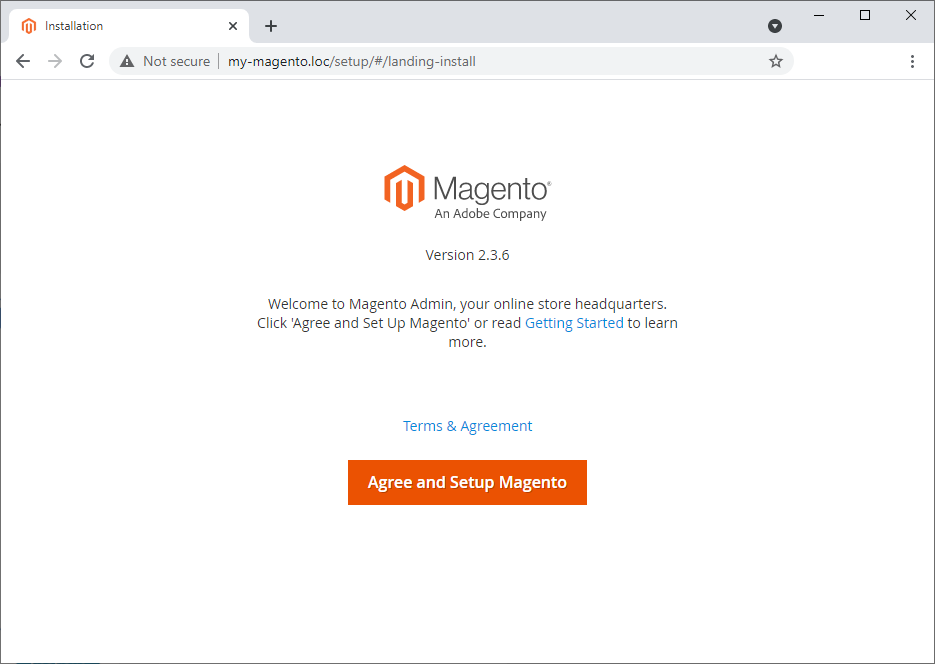
chmod u+x bin/magento8. Run Web Installer
Go to http://my-magento.loc in your browser and follow the installation steps.
Make sure to enter the following information during installation:
Database Server Host: 127.0.0.1
Database Server Username: root
Database Server Password: (leave it empty)
Database Name: my_magento
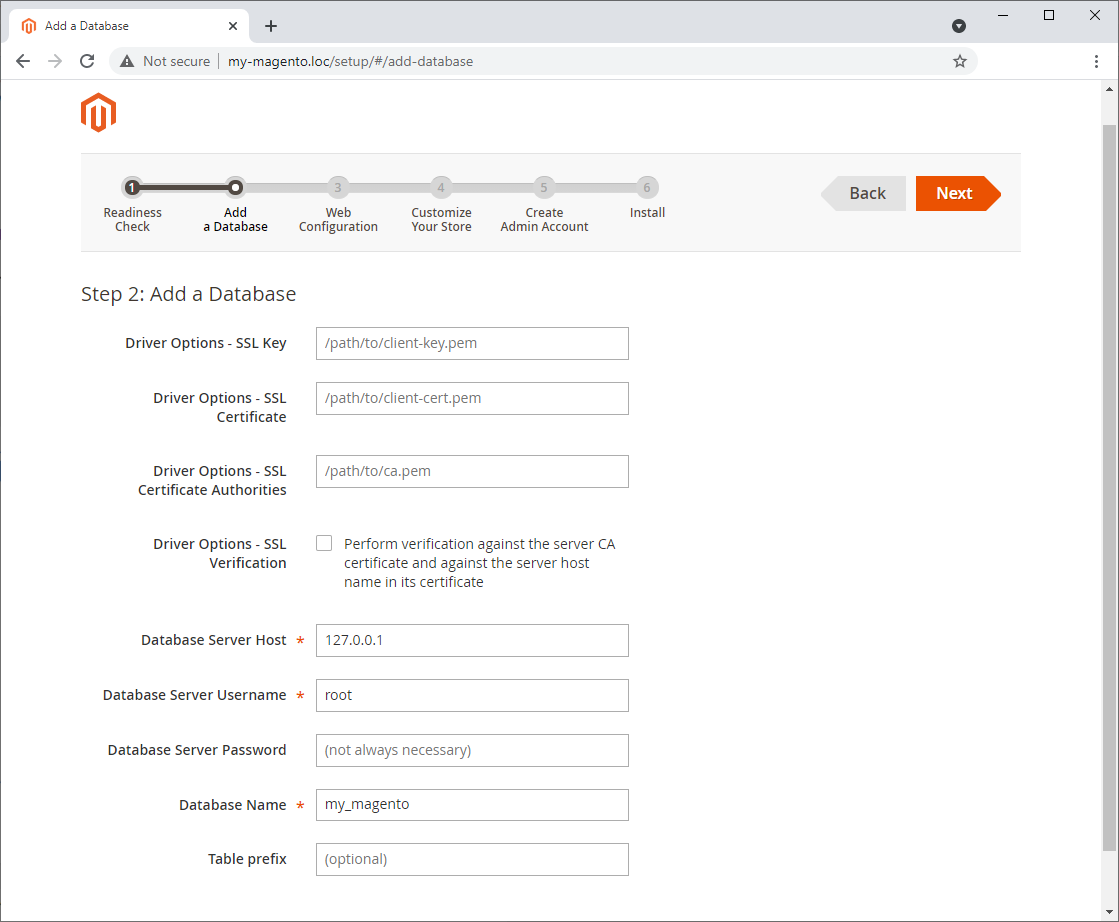
After completing a few simple steps, the Magento will be installed successfully.
Step 10. Install WordPress
This is going to be the last step in our tutorial. Installation of WordPress is also described in the Devilbox documentation.
- Create DNS records in Windows & Ubuntu
In the terminal, edit the Ubuntu hosts file:
sudo vi /etc/hostsAdd this line and save changes:127.0.0.1 my-wp.loc
In Windows, open Notepad as administrator and edit the following file:
c:\Windows\System32\Drivers\etc\hostsAdd the same line as in Ubuntu and save changes:127.0.0.1 my-wp.loc
2. Enter the PHP Docker container
Start Devilbox containers
sudo service docker start
docker-compose up
Open a new tab in the Windows terminal and enter the following
cd ~/devilbox/
./shell.sh
3. Create a new Virtual Host directory
cd /shared/httpd
mkdir my-wp
4. Install WordPress in Devilbox
cd my-wp
git clone https://github.com/WordPress/WordPress wordpress.git
Symlink webroot
cd /shared/httpd/my-wp/
ln -s wordpress.git/ htdocs
Create MySQL Database
mysql -u root -h 127.0.0.1 -p -e 'CREATE DATABASE my_wp;'* Please note: in the default Devilbox configuration, the Mysql root password is not set. Just hit “enter” when asked for a password.
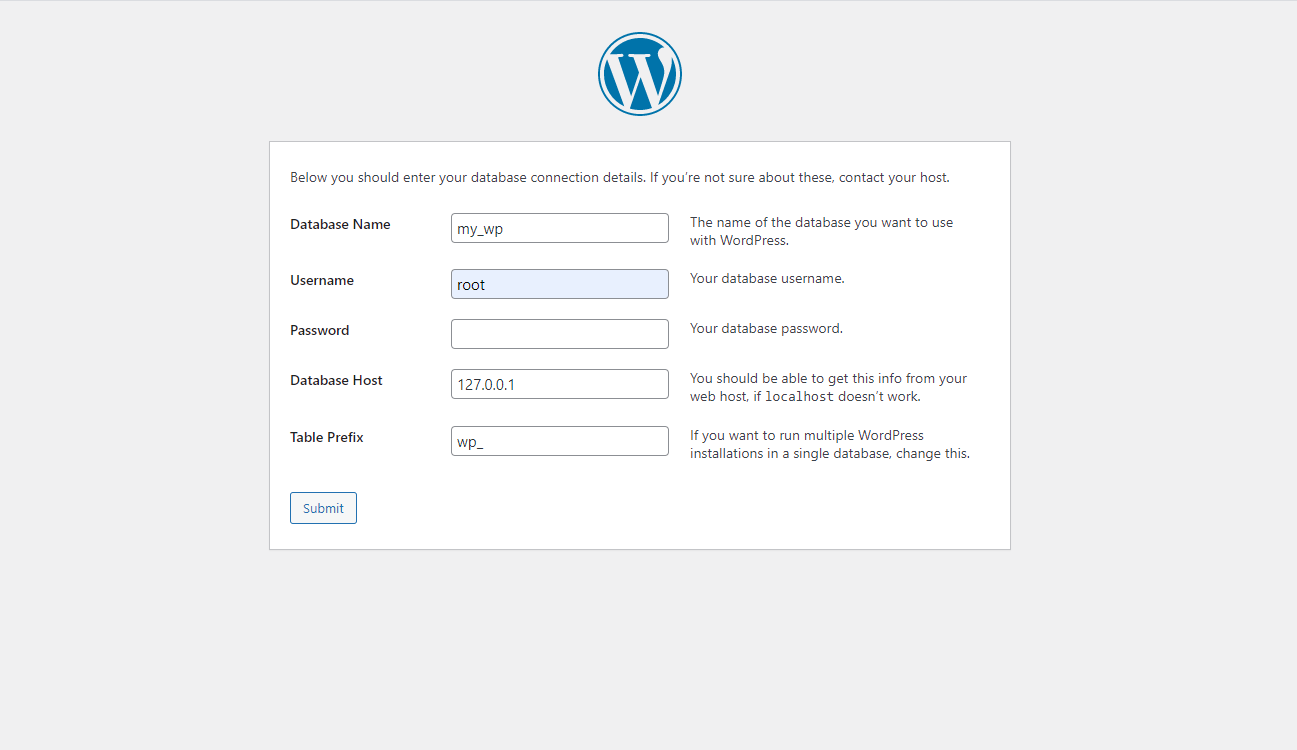
5. Run Web Installer
Go to http://my-wp.loc in your browser and follow the installation steps. Just make sure to enter 127.0.0.1 as the database host during installation.
After completing a few simple steps, the WordPress will be installed successfully.
We hope you found this article useful. Please comment and share. Thanks for reading!