In this article, you will learn how to install the Plumrocket extension using the native Magento 2 Component Manager.
Step-by-Step action:
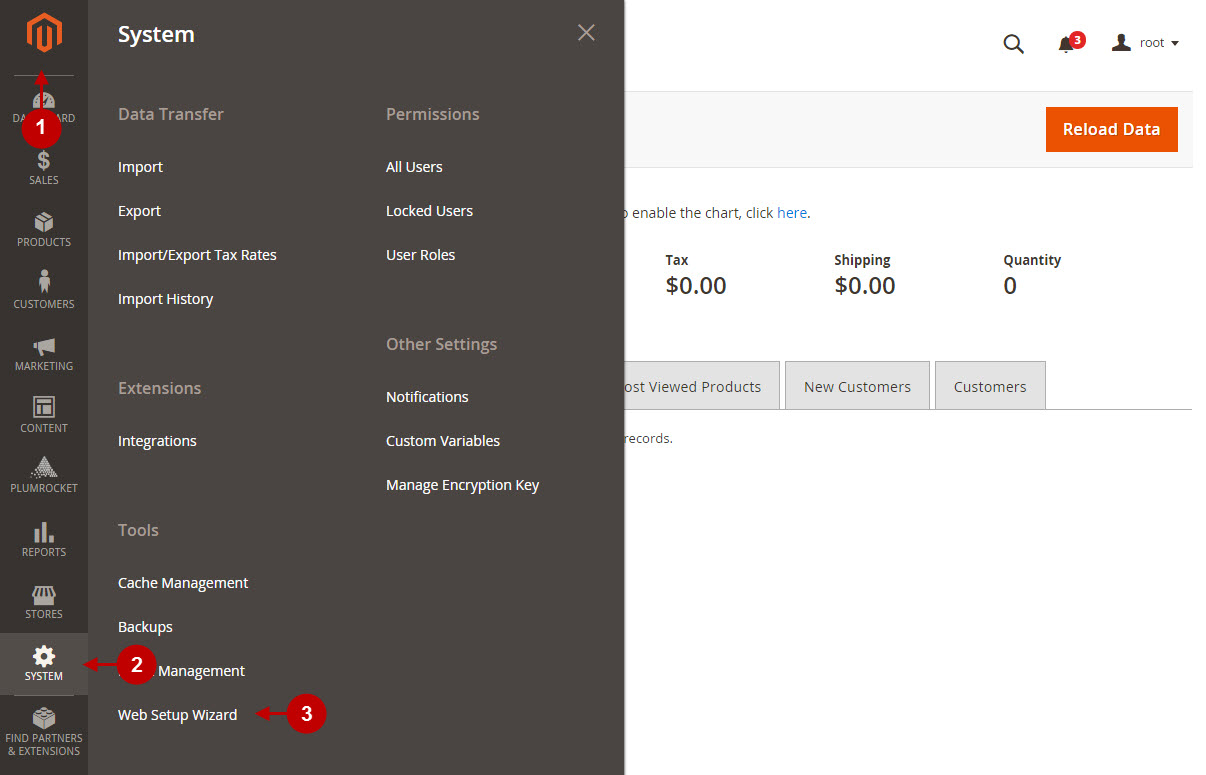
- Log into your Magento 2 Admin Panel.
- Navigate to the System tab.
- Choose the Web Setup Wizard option.
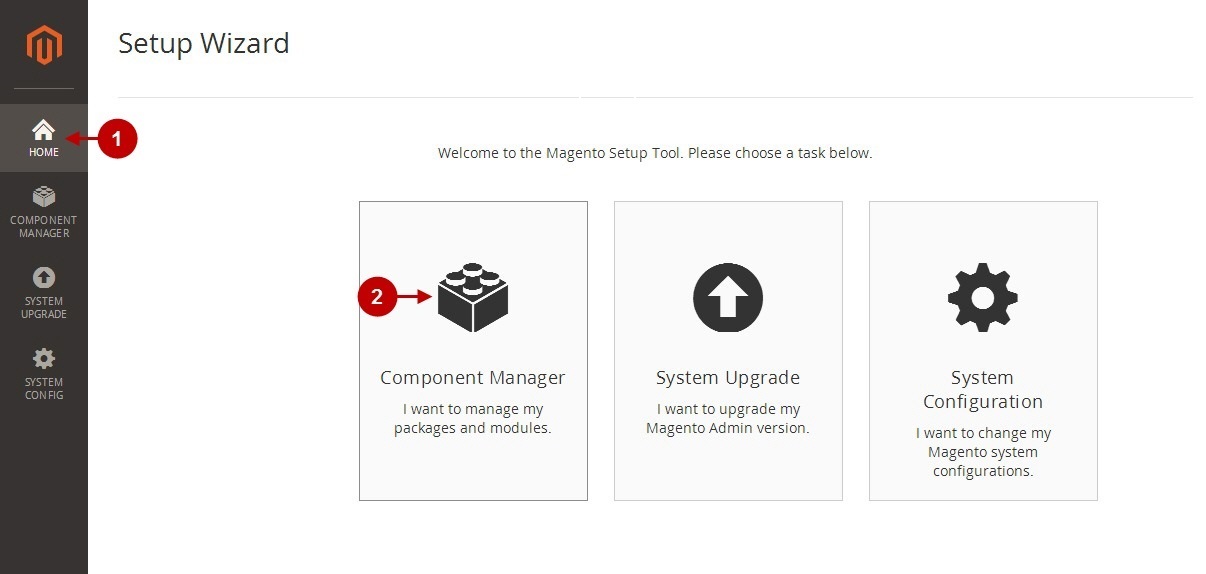
Step-by-Step action:
- Having opened Setup Wizard interface – navigate to the Home tab.
- Select the Component Manager option.
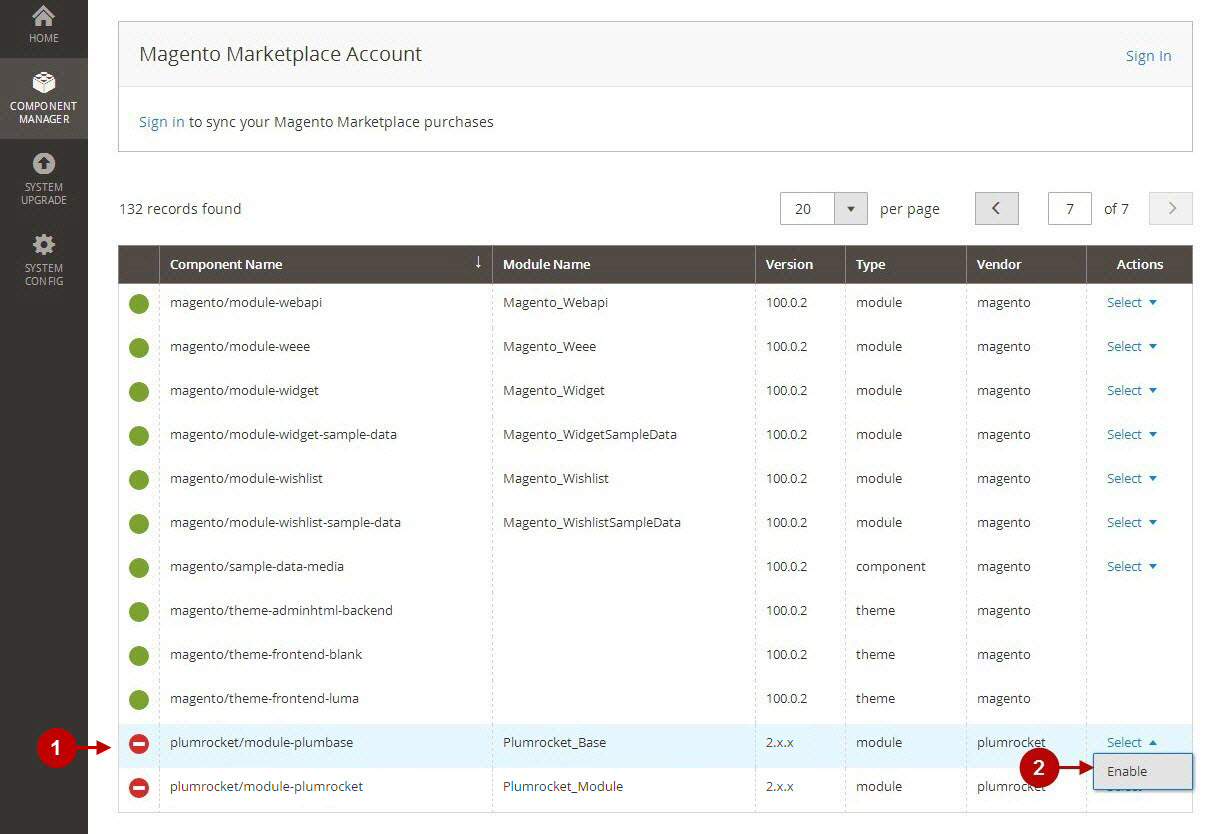
Step 1. Base extension installation
Before you proceed with Plumrocket Extension for Magento 2 installation – please, install the Plumrocket Base extension. This is a system extension required for the correct functioning of all Plumrocket Inc extensions. Note: You may skip Step 1 and proceed with Step 2 if you have already installed the Base extension by Plumrocket Inc before.
Step-by-Step action:
- In the Component Manager tab, please find the “Plumrocket_Base” extension.
- Select the Enable option from the drop-down menu.
Step-by-Step action:
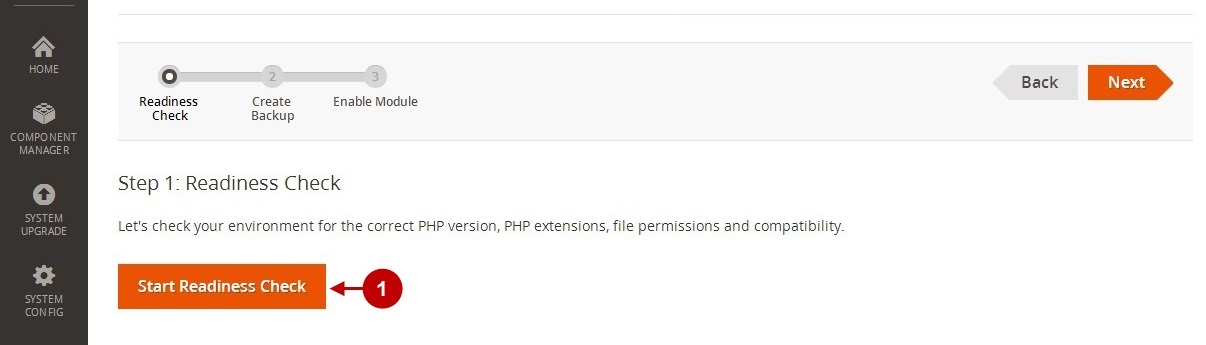
- Please, press the Start Readiness Check button on the next page.
Step-by-Step action:
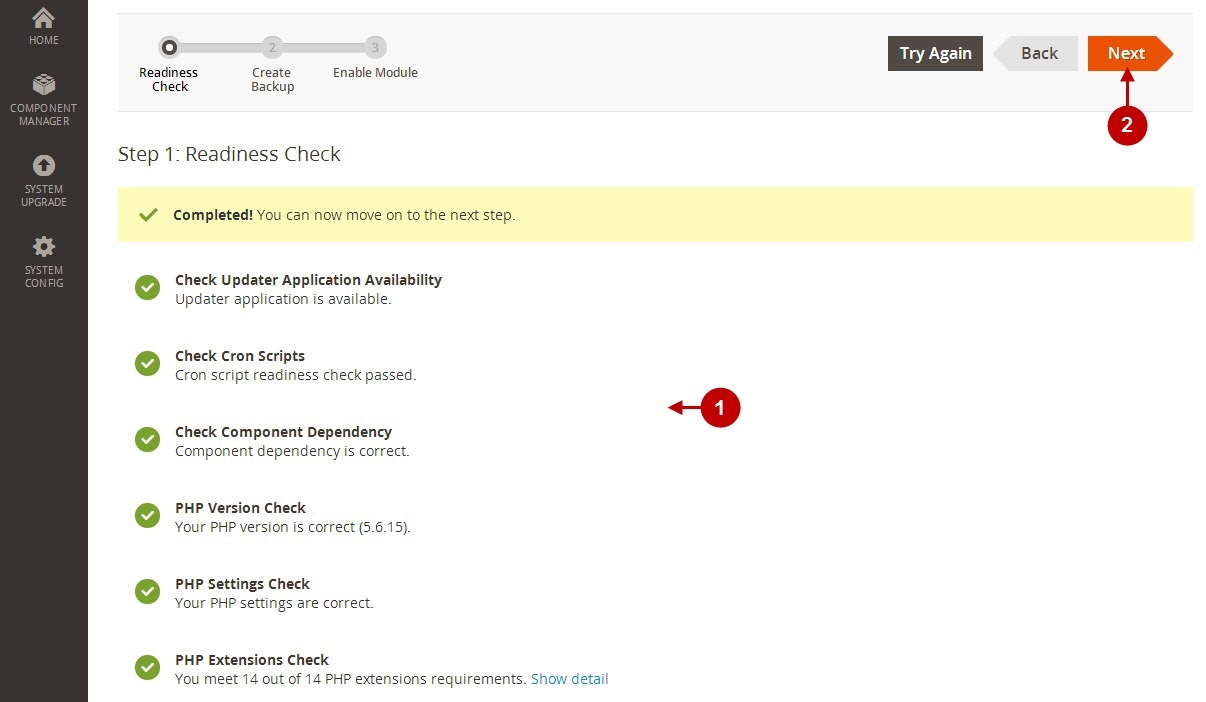
- Please, make sure all the check marks are green. This means that your system is ready to move forward with Magento 2 Base module installation.
- If the check was successful – press on the Next button.
Step-by-Step action:
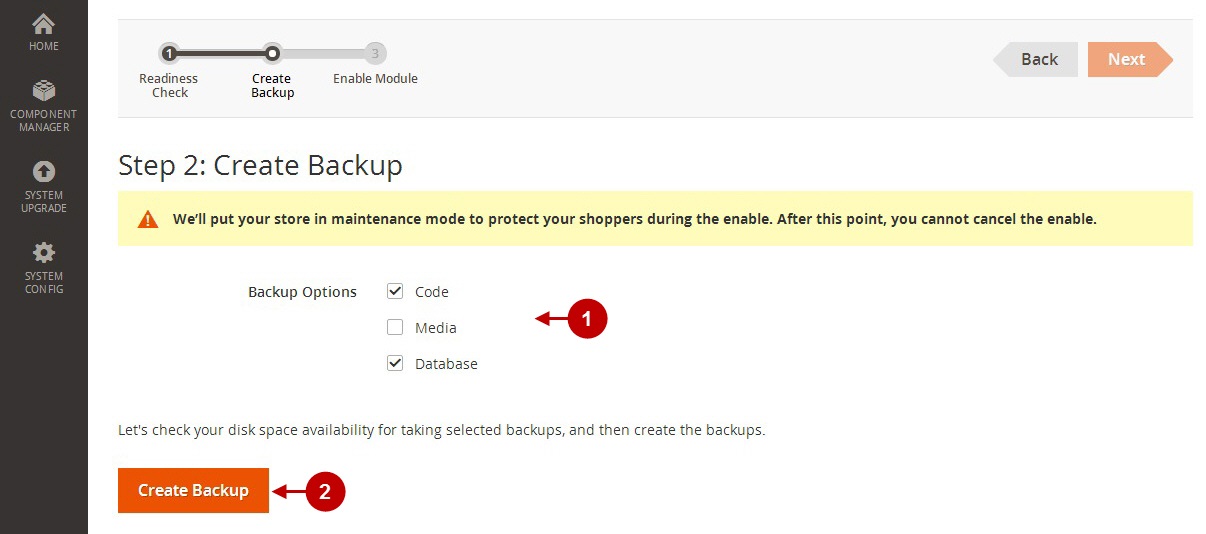
- It is important to make a backup. You can select at least the Code and Database backup options.
- Press the Create Backup button. For your the safety, this process will put your website into Maintenance mode until the Base extension is installed.
Step-by-Step action:
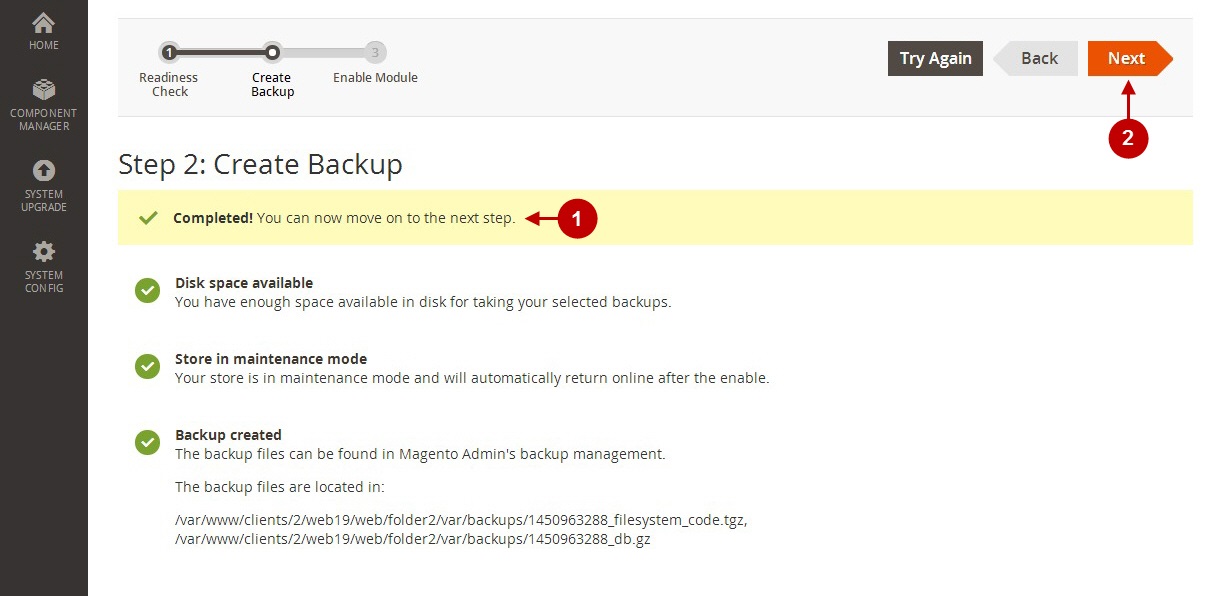
- Once the backup process is finished, the Completed notification will be displayed.
- Press on the Next button.
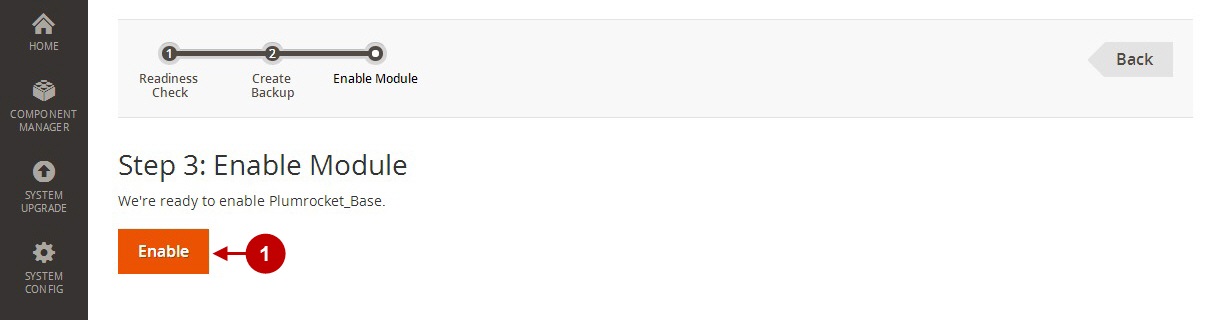
Step-by-Step action:
- Press the Enable button to activate this Magento 2 Base extension.
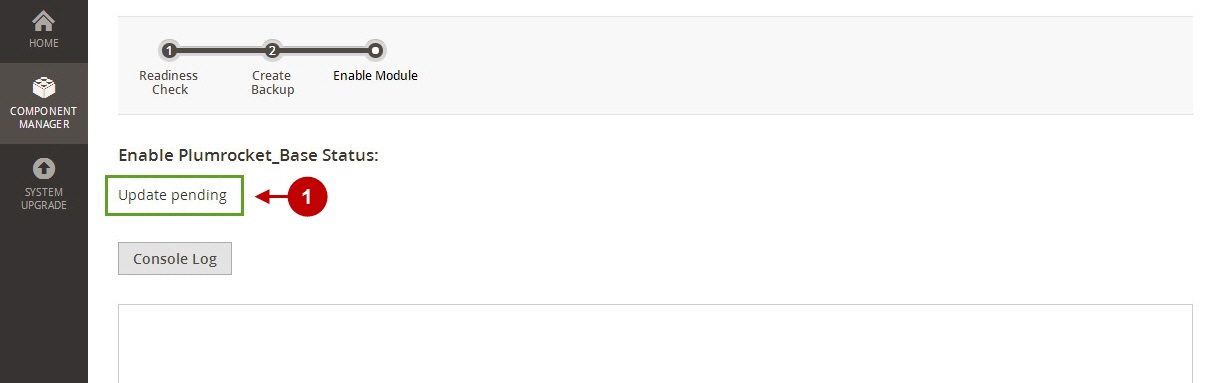
Step-by-Step action:
- The “Update pending” notification means that the activation of this extension is currently in progress. Please wait until it is completed.
Step-by-Step action:
- The “Success” notification means that Plumrocket Base Magento 2 extension has been successfully installed. At this point your website is in Live mode again.
- You can now get back to setup tool and install the Plumrcoket Extension for Magento 2.

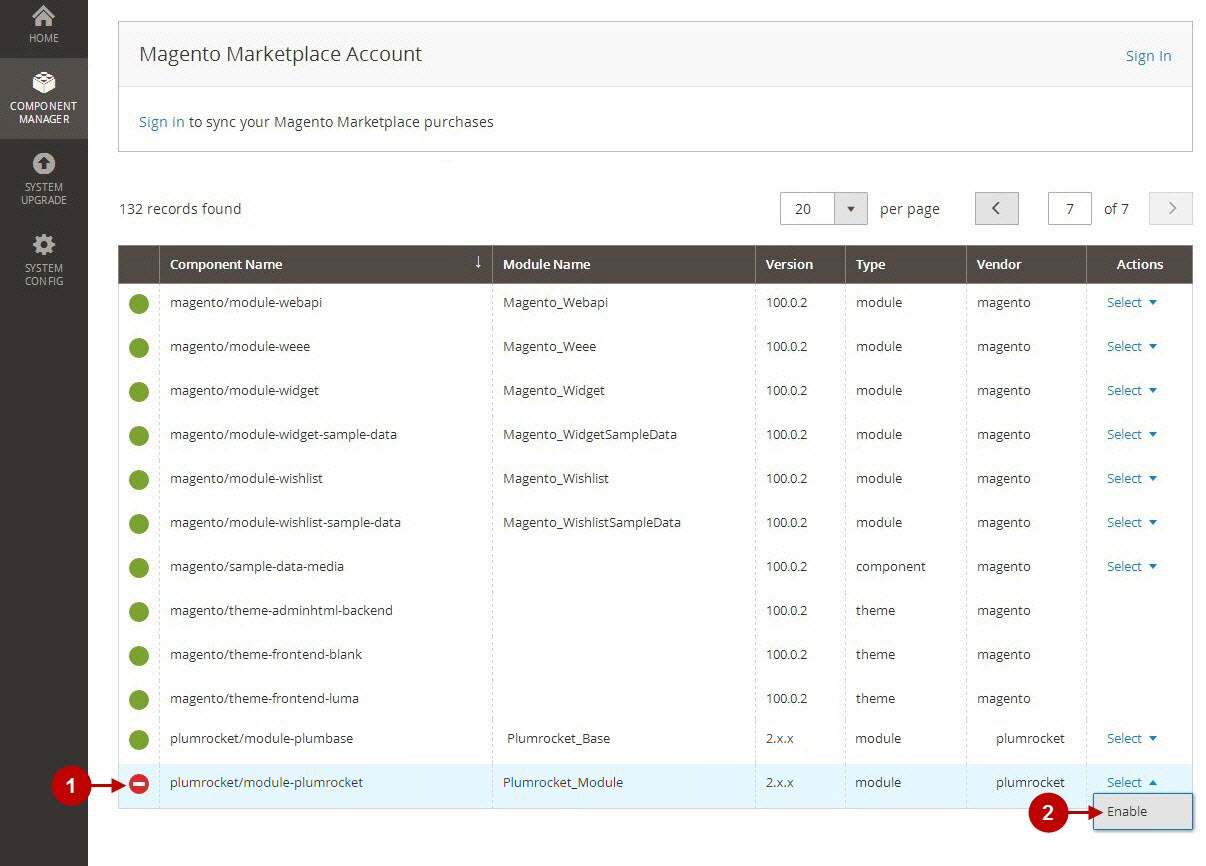
Step 2. Plumrocket Extension for Magento 2 installation
On this step, please navigate back to the Component Manager tab, and activate the Plumrocket Extension in the same way, as you did with the Base Extension:
Step-by-Step action:
- Please, find the “Plumrocket_Module” extension in the Component Manager tab.
- Select the Enable option from the drop-down menu.