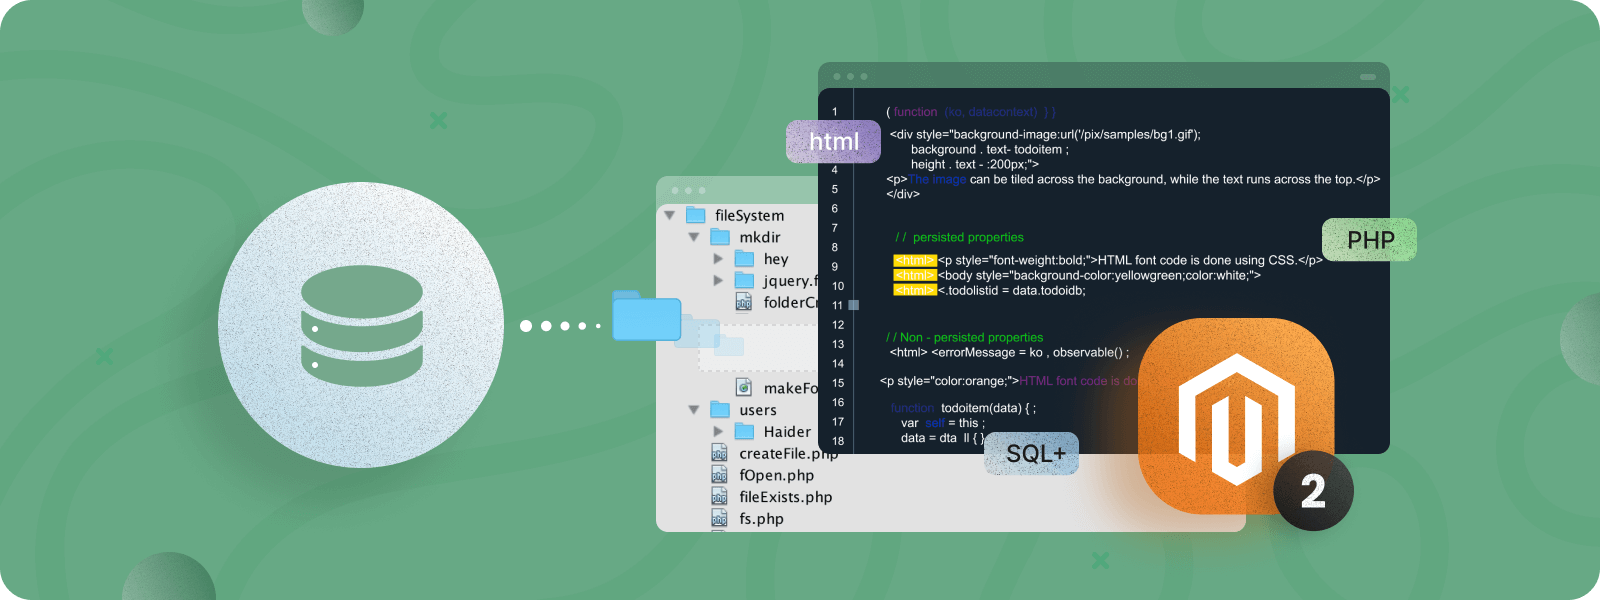
Magento 2 custom tables are helpful for managing the data on your website. They can extend the functionality of your store when coping with data. If you need unique product attributes or additional customer information that is beyond Magento’s capabilities, you can create a custom table to store and manage them.
When developing or updating a module for Magento 2, modifying the database structure is often necessary. This may include creating or deleting tables, adding or removing fields in them, and inserting data into these custom tables.
There are two approaches to inserting data into a custom table in Magento 2:
- By creating the corresponding classes (the methods in these classes will be executed during the installation or update of the module).
- Using declarative schema approach.
In this article, we will discover both methods and provide guidance on when each should be used.
Creating a Magento 2 Custom Table (Install Schema Approach)
If you are using Magento 2.2 or another older version, the only way to create a Magento 2 custom table is to use the install schema approach. For Magento versions 2.3 or later, we recommend using a new declarative approach, described in the next section.
So, let’s get it in more detail.
Create a New Table with InstallSchema.php
In order to create a new table in the database, you need to create a file InstallSchema.php in the directory app/code/CustomVendor/CustomModule/Setup/. The code below will generate a new table plumrocket_custom_table in the DB:
<?php

namespace Plumrocket\CustomModule\Setup;

use Magento\Framework\Setup\ModuleContextInterface;
use Magento\Framework\Setup\SchemaSetupInterface;

class InstallSchema implements \Magento\Framework\Setup\InstallSchemaInterface
{
   public function install(SchemaSetupInterface $setup, ModuleContextInterface $context)
   {
       $installer = $setup;
       $installer->startSetup();

       if (!$installer->tableExists(‘plumrocket_custom_table’)) {
           $table = $installer->getConnection()
               ->newTable(
               $installer->getTable(‘plumrocket_custom_table’)
               )
               ->addColumn(
                   'id',
                   \Magento\Framework\DB\Ddl\Table::TYPE_INTEGER,
                   null,
                   [
                       'identity' => true,
                       'nullable' => false,
                       'primary'  => true,
                       'unsigned' => true,
                   ]
               )
               ->addColumn(
                   'title',
                   \Magento\Framework\DB\Ddl\Table::TYPE_TEXT,
                   null,
                   [
                       'nullable' => true
                   ]
               )
               ->addColumn(
                   'test',
                   \Magento\Framework\DB\Ddl\Table::TYPE_TEXT,
                   255,
                   [
                       'nullable' => true
                   ]
               )
               ->setComment('My Table');
           $installer->getConnection()->createTable($table);
       }

       $installer->endSetup();
   }
}
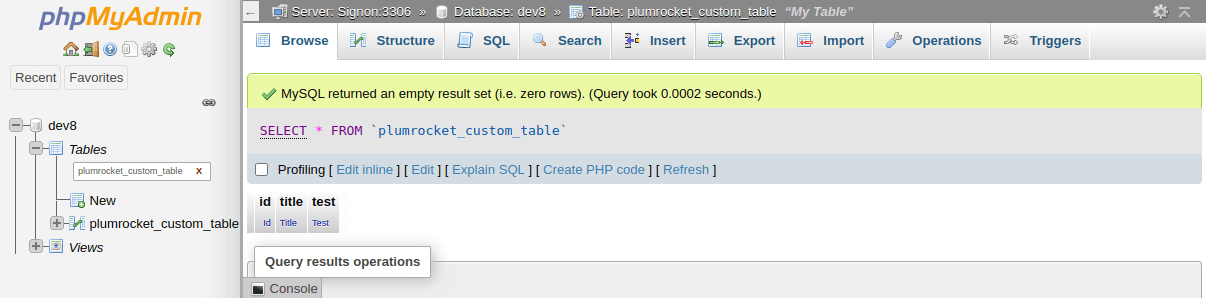
According to the code snippet above, if a table with such a name does not exist, it will be created with the columns id, title, and test.
If your module is already installed in Magento 2, it should be removed. You can do this by deleting the corresponding entry from the setup_module table in the database.
Now, the newly created table can be viewed in the list:
To update the table, you need to create the app/code/CustomVendor/CustomModule/Setup/UpgradeSchema.php file. Here is the code snippet of the created class:
<?php

namespace Plumrocket\CustomModule\Setup;

use Magento\Framework\Setup\ModuleContextInterface;
use Magento\Framework\Setup\SchemaSetupInterface;
use Magento\Framework\Setup\UpgradeSchemaInterface;

class UpgradeSchema implements UpgradeSchemaInterface
{
   public function upgrade(SchemaSetupInterface $setup, ModuleContextInterface $context)
       {
           $installer = $setup;
           $installer->startSetup();

           if(version_compare($context->getVersion(), '1.1.0', '>')) {
               $tableName = $installer->getTable('plumrocket_custom_table');
               if ($installer->getConnection()->isTableExists($tableName)) {
                   $installer->getConnection()
                       ->addColumn(
                           $tableName,
                           'number',
                           [
                               'type' => \Magento\Framework\DB\Ddl\Table::TYPE_INTEGER,
                               'nullable' => true,
                               'comment' => 'Update table'
                           ]
                       );

                   $installer->getConnection()
                       ->dropColumn($tableName, 'test');
               }
           }

           $installer->endSetup();
       }
}
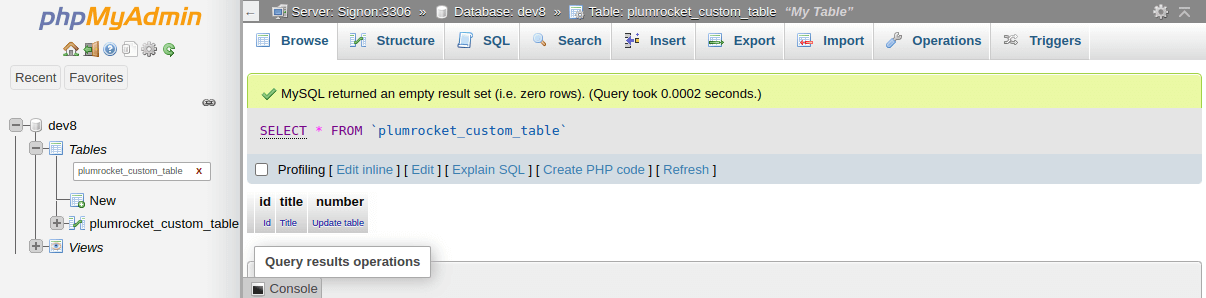
This snippet will add a new column Number, and remove the column Test.
Also, don’t forget to change the module’s version as well. You can do this by setting the setup_version parameter in the app/code/CustomVendor/CustomModule/etc/module.xml file:
<config xmlns:xsi="http://www.w3.org/2001/XMLSchema-instance" xsi:noNamespaceSchemaLocation="urn:magento:framework:Module/etc/module.xsd">
   <module name="CustomVendor_CustomModule" setup_version="1.1.5">
   </module>
</config>
Then, execute the command php bin/magento setup:upgrade, and here’s the result:
Insert Data into a Custom Table in Magento 2
In order to insert data into the custom table in Magento 2, you should create the app/code/CustomVendor/CustomModule/Setup/InstallData.php file with the following code:
<?php
namespace CustomVendor\CustomModule\Setup;
use Magento\Framework\Setup\ModuleContextInterface;
use Magento\Framework\Setup\ModuleDataSetupInterface;
class InstallData implements \Magento\Framework\Setup\InstallDataInterface
{
public function install(ModuleDataSetupInterface $setup, ModuleContextInterface $context)
{
$installer = $setup;
$installer->startSetup();
$tableName = $installer->getTable('plumrocket_custom_table');
if ($installer->getConnection()->isTableExists($tableName)) {
$data = [
[
'title' => 'First title'
],
[
'title' => 'Second title',
],
[
'title' => 'Third title',
],
];
foreach ($data as $item) {
$installer->getConnection()->insert($tableName, $item);
}
}
$installer->endSetup();
}
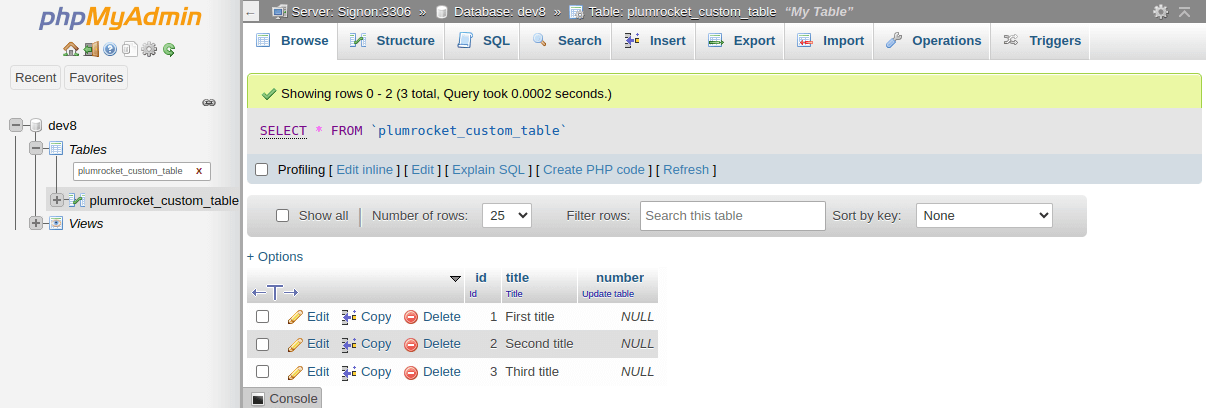
}In this example, you can see the simple data that has been inserted into our custom table. Please note: if it exists, you should remove the module from the setup_module table.
The next step is to execute a command bin/magento s:up and check the content of the custom table:
To insert data into the custom table during the Magento 2 module upgrade, you should create a file similar to the one used for updating the table structure. So, create the UpgradeData.php file in the app/code/CustomVendor/CustomModule/Setup directory.
Here is an example of file content:
<?php

namespace CustomVendor/CustomModule\Setup;

use Magento\Framework\Setup\ModuleContextInterface;
use Magento\Framework\Setup\ModuleDataSetupInterface;
use Magento\Framework\Setup\UpgradeDataInterface;

class UpgradeData implements UpgradeDataInterface
{
   public function upgrade(ModuleDataSetupInterface $setup, ModuleContextInterface $context)
   {
       $installer = $setup;
       $installer->startSetup();

       if (version_compare($context->getVersion(), '1.1.0', '>')) {
           $tableName = $installer->getTable(‘plumrocket_custom_table’);
           if ($installer->getConnection()->isTableExists($tableName)) {
               $data = [
                   [
                       'number' => 5
                   ],
                   [
                       'number' => -10,
                   ],
                   [
                       'number' => null,
                   ],
               ];
               foreach ($data as $item) {
                   $installer->getConnection()->insert($tableName, $item);
               }
           }
       }

       $installer->endSetup();
   }
}
In this very instance, we inserted data into the Number field of our custom table. Remember to update the module version in module.xml. Then, run php bin/magento s:up command and keep track of the result:

Creating a Magento 2 Custom Table (New Declarative Schema Approach)
In Magento versions 2.2 or earlier, the only way to create the custom table was via the install schema approach we discussed in the previous section. It included writing complex codes to frame out the table structure.
With the release of Magento 2.3, a new declarative approach was introduced, often preferred for its flexibility and maintainability. It’s important to proceed with caution, though. Choosing the right approach and implementing it without adhering strictly to Magento best practices can introduce technical issues or performance bottlenecks. To ensure a robust solution, careful consideration is needed, and partnering with Magento specialists is often recommended.
Let’s take a closer look at this new approach.
Create a New Table with db_schema.xml
First, create a db_schema.xml file in the app/code/CustomVendor/CustomModule/etc directory. Here is the code snippet from the created file:
<?xml version="1.0"?>
<schema xmlns:xsi="http://www.w3.org/2001/XMLSchema-instance"
       xsi:noNamespaceSchemaLocation="urn:magento:framework:Setup/Declaration/Schema/etc/schema.xsd">
   <table name="new_custom_table" resource="default" comment="My table using db_schema">
       <column xsi:type="int" name="id" unsigned="false" nullable="false" identity="true" comment="Some ID" />
       <column xsi:type="int" name="random_integer" comment="Some random integer" />
       <column xsi:type="timestamp" name="created_at" nullable="false" default="CURRENT_TIMESTAMP" comment="Created At" />
       <constraint xsi:type="primary" referenceId="PRIMARY">
           <column name="id" />
       </constraint>
   </table>
</schema>
As you can see from the code, we are creating a new table ‘new_custom_table’, utilizing the table node. Within the table node, there are column subnodes that define the columns in the new table. In this case, the table will contain the id, random_integer, and created_at fields.
In the constraint subnode, we specified the id field as the primary key. Also, the type attribute of this subnode can have a unique or foreign value.
Before updating the database structure, you need to add a new table schema to the db_whitelist_schema.json file by running the following command:
php bin/magento setup:db-declaration:generate-whitelist --module-name=CustomVendor_CustomModule
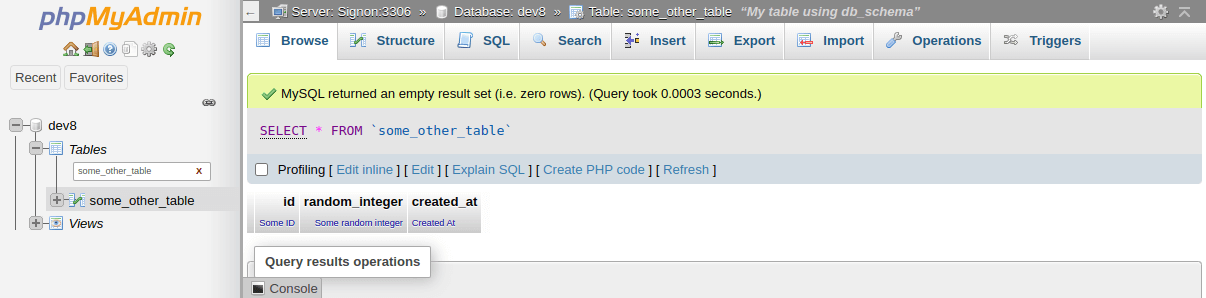
To generate a new table, run the following command in the console:
php bin/magento setup:upgradeOr its shortened version:
php bin/magento s:upHere is the result of the executed command:
Insert Data into Custom Table in Magento 2
Using the new declarative schema approach, you can insert data into a custom table using the Patch system. This method differs in that you need to create a Model, ResourceModel, and Collection.
Model class:
se Magento\Framework\Model\AbstractModel;

class CustomModel extends AbstractModel
{
   protected function _construct()
   {
       $this->_init(CustomVendor\CustomModule\Model\ResourceModel\CustomModel');
   }
}
ResourceModel class:
use Magento\Framework\Model\ResourceModel\Db\AbstractDb;

class CustomModel extends AbstractDb
{
   public function __construct(\Magento\Framework\Model\ResourceModel\Db\Context $context)
   {
       parent::__construct($context);
   }

   protected function _construct()
   {
       $this->_init(‘plumrocket_custom_table’, 'id');
   }
}
Collection class:
use Magento\Framework\Model\ResourceModel\Db\Collection\AbstractCollection;

class Collection extends AbstractCollection
{
   protected function _construct()
   {
       $this->_init(‘CustomVendor\CustomModule\Model\CustomModel’,’CustomVendor\CustomModule\Model\ResourceModel\CustomModel’);
   }
}
To insert data into a Magento 2 custom table, create a new AddData.php class in the CustomVendor/CustomModule/Setup/Patch/Data directory and insert the following code:
<?php

namespace CustomVendor\CustomModule\Setup\Patch\Data;

use Magento\Framework\Setup\Patch\DataPatchInterface;
use Magento\Framework\Setup\Patch\PatchVersionInterface;

class AddData implements DataPatchInterface, PatchVersionInterface
{
   private $customModel;

   public function __construct(
       \CustomVendor\CustomModule\Model\CustomModel $model
   ) {
       $this->customModel = $model;
   }

   public function apply()
   {
       $modelData = [];
       $modelData['title'] = 'Model title';
       $modelData['number'] = 2024;
       $this->customModel->addData($modelData);

       $this->customModel->getResource()->save($this->customModel);
   }

   public static function getDependencies()
   {
       return [];
   }

   public static function getVersion()
   {
       return '1.0.1';
   }

   public function getAliases()
   {
       return [];
   }
}
After running the php bin/magento s:up command, a new entry will appear in the custom table:
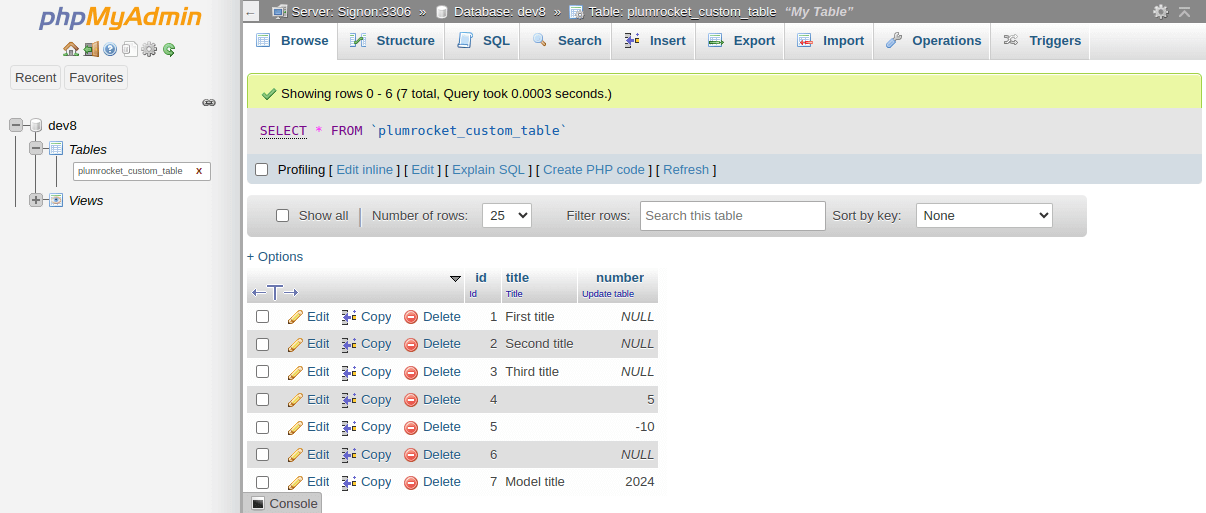
That’s it. We should also note that both methods to insert data into a custom table are valid for Magento version 2.3 or later, so you can choose the most convenient one.
If you have trouble with Magento 2 custom tables or other questions, feel free to reach out to us. Our development team will be happy to help!