The Magento 2 Social Login Pro extension provides you with various templates to display AMP banners, sliders, subcategories, and other widgets. The following guide describes creating the Social Login buttons widget using the “Content” -> “Widgets” Menu.
Adding Social Login Widget
Step-by-step guide:
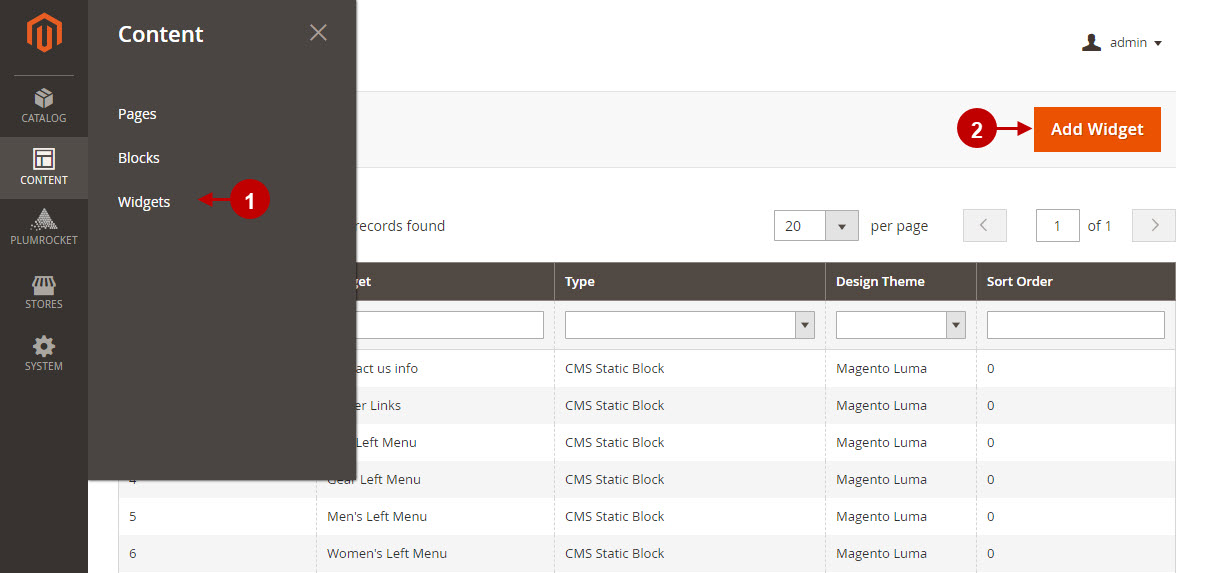
- In the main Magento menu, go to Content -> Elements -> Widgets.
- Above the Widgets grid, click Add Widget.
Step-by-step guide:
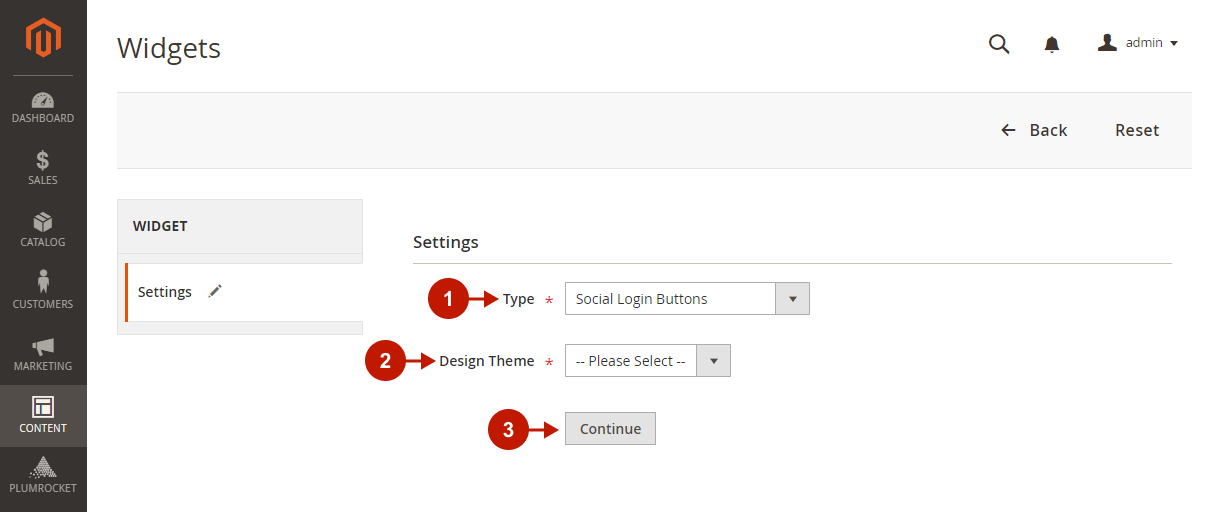
- “Type”: select the type of Social Login Buttons widget from a drop-down list.
- “Design Theme”: choose a theme to display the widget on.
- Click Continue to proceed.
Configuring Storefront Properties
Step-by-step guide:
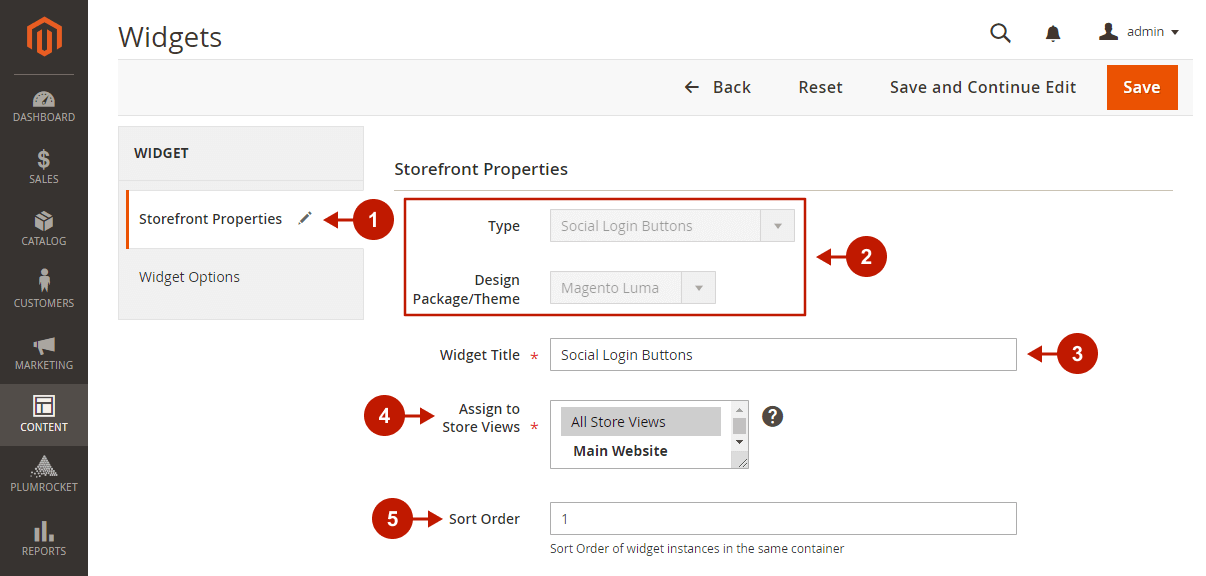
- Go to the Store Properties tab.
- You have already set the “Type” and “Design Package/Theme” options in the previous step.
- “Widget Title”: enter a descriptive title for the widget. This title is visible only from the backend.
- “Assign to Store Views”: select the store view(s) where the widget will be visible.
- (Optional) “Sort Order”: enter a number that determines the order this item appears with others in the same container.
Step-by-step guide:
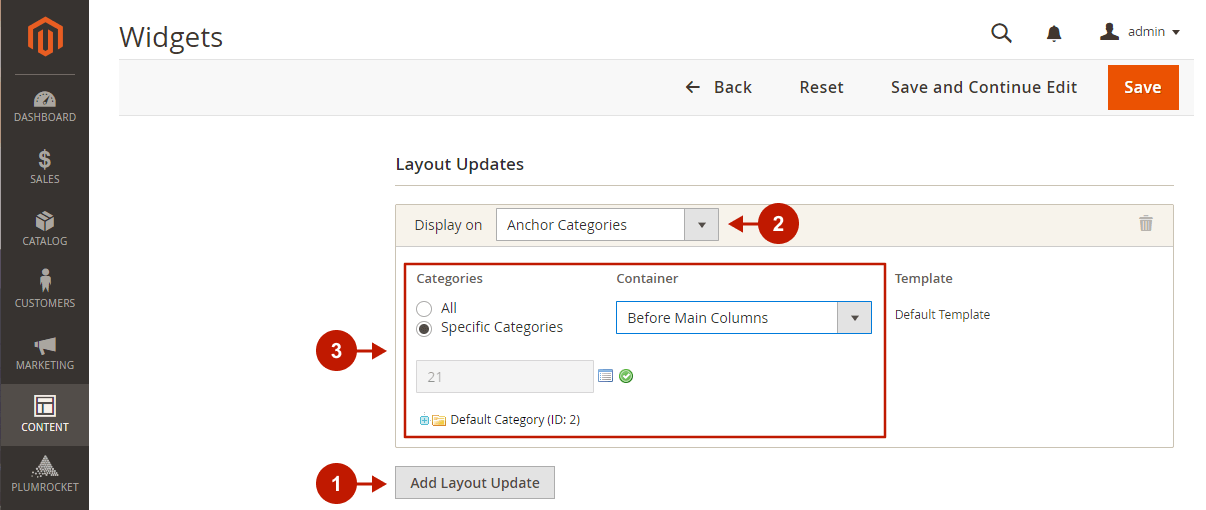
- “Add Layout Update”: press this button to configure the widget placement.
- “Display On”: select the pages, categories, or products where you want the widget to appear.
- Configure widget layout. Configurations there will differ depending on the selected Display On option.
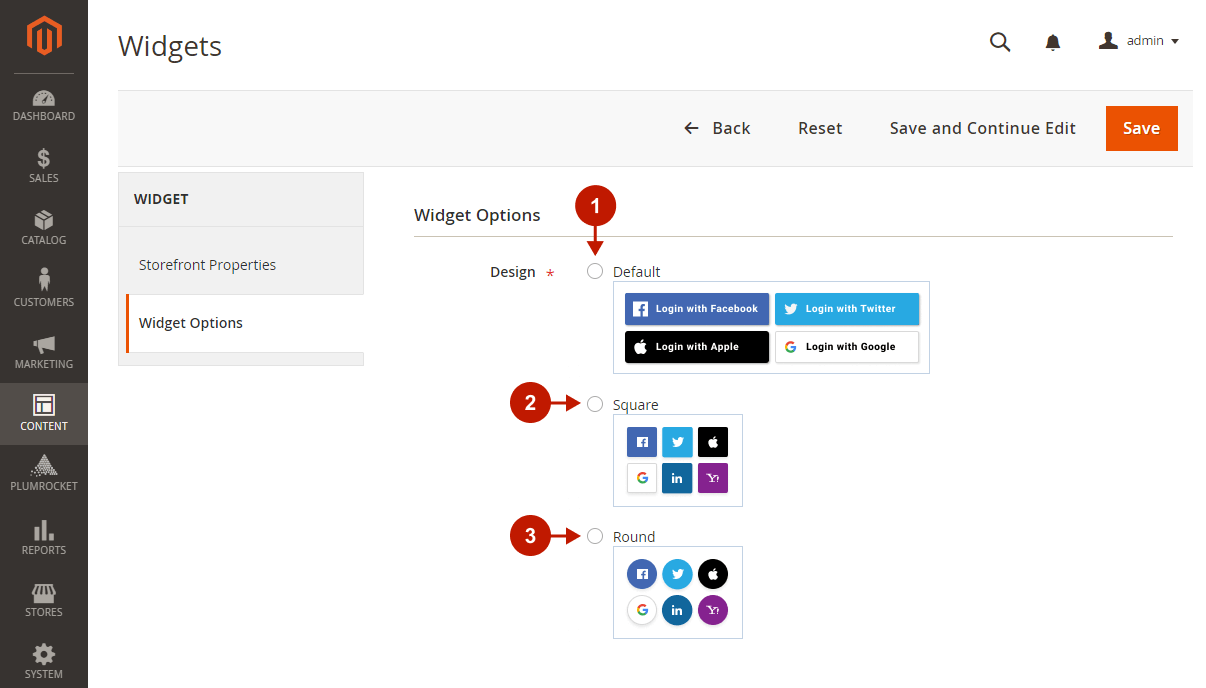
Configuring Widget Options
In the Widget Options Menu, you can choose one of three available widget designs:
Step-by-step guide:
- Default
- Square
- Round
After pressing the Save button, the widget will appear in the Widgets grid. Clear Magento cache to display the widget on the frontend.
Was this article helpful?