Configuring Magento 2 Product Labels v. 1.x
General
Here you will learn how to configure Magento 2 Product Labels v1.x extension correctly. Follow the steps below.
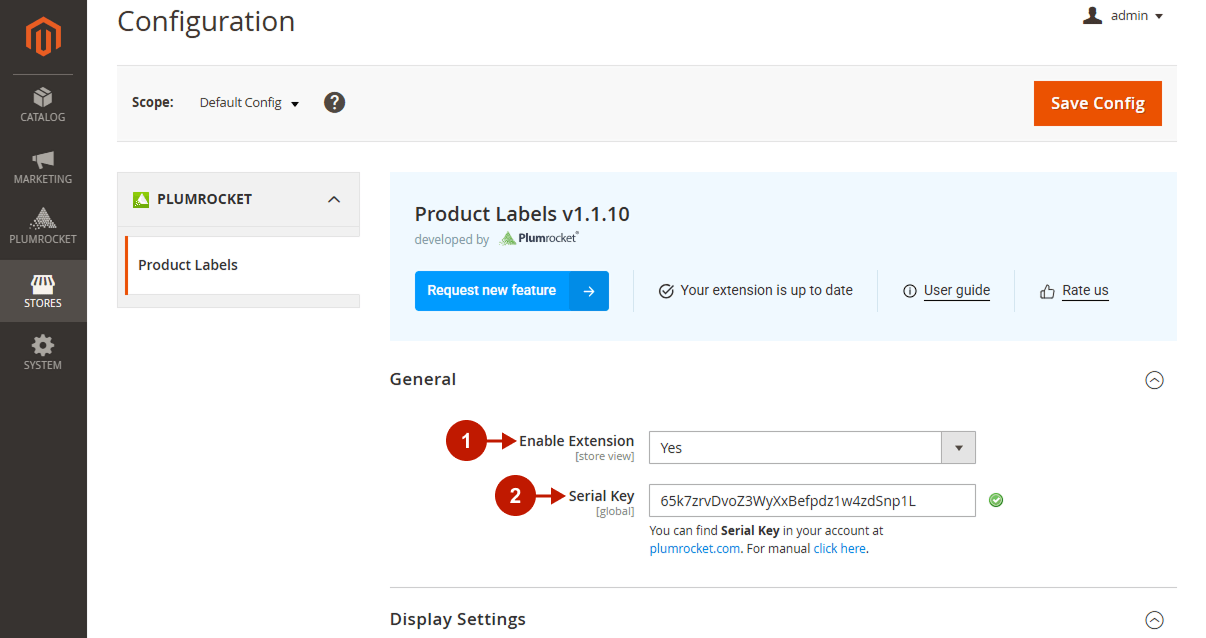
In the main menu go to “Plumrocket” tab > select “Product Labels” extension > navigate to “Configuration” section.
Step-by-Step actions:
- “Enable Extension”: this option allows you to enable or disable this Product Labels extension.
- “Serial Key”: enter the unique serial key provided to you after purchasing the extension. Note: In most cases, this field will be pre-filled with a serial key automatically, and the green checkmark will be displayed. To find and paste your serial key manually, read the Serial Key Activation article.
Display Settings
Step-by-Step actions:
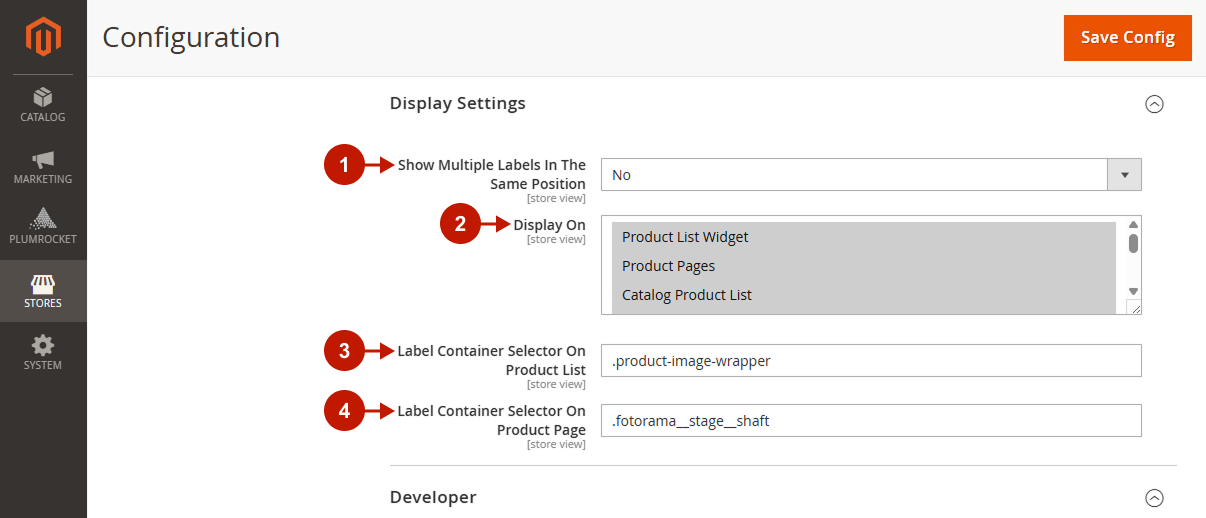
- “Show Multiple Labels In The Same Position“: this option allows you to manage multiple labels over a selected product. Set to “No” to display them in different positions, so all of them will be visible to a customer. Set to “Yes” if you want to display them in the same place. In this case, labels will overlap. Note: remember to prioritize labels in the “Edit Label Rule” section. When overlapping, only labels with higher priorities will remain visible to a customer.
- “Display On“: choose one or more areas to display product labels there.
- “Label Container Selector On Product List“: enter the selector for the label container. It is useful if you use third-party themes, and labels are not displayed on the Product List.
- “Label Container Selector On Product Page“: enter the selector for the label container. It is useful if you use third-party themes, and labels are not displayed on the Product Page.
Important Note for Hyvä Theme Users:
If you plan to use the Magento 2 Product Label extension on the Hyvä theme, please be aware that the Label Container Selector On Product List and Label Container Selector On Product Page configurations should be as follows:
– Label Container Selector On Product List: form.product .product-item-photo
– Label Container Selector On Product Page: .grid.grid-rows-auto #gallery [aria-live=’polite’]
Developer
Step-by-step guide:
- “Improved Label Initialization“: enable (recommended) to add JavaScript only to the first rendered label. This ensures better optimization.
- Save the changes.

Managing Labels
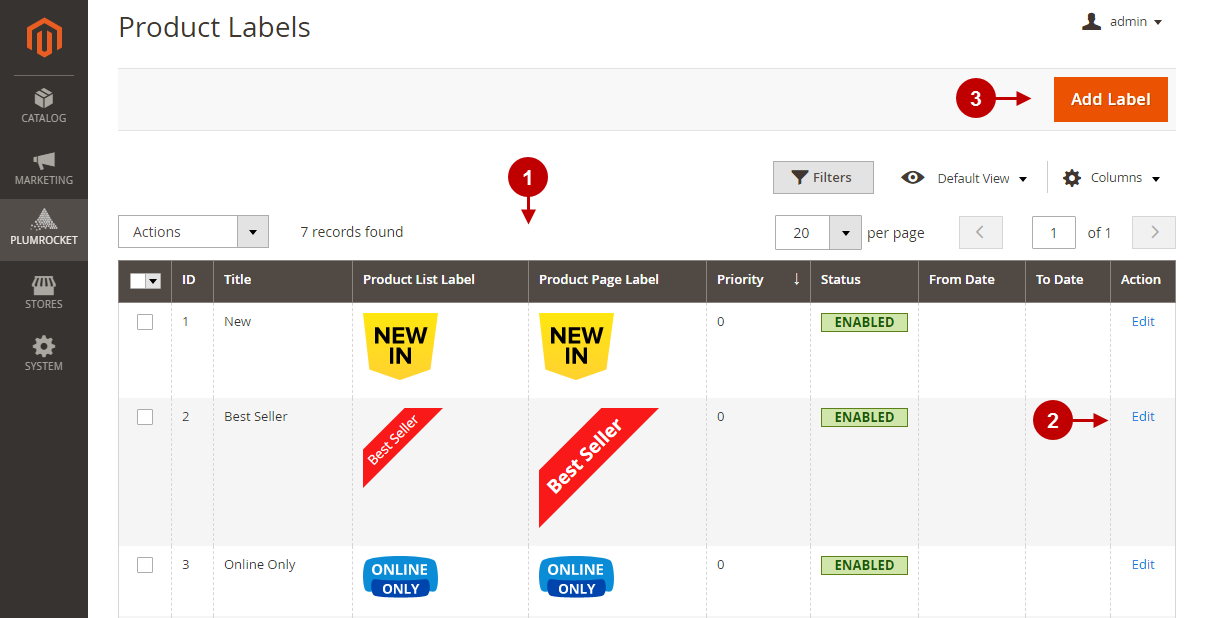
In the main menu go to “Plumrocket” tab > select “Product Labels” extension > navigate to “Manage Labels” section.
Product Labels
Edit Lable Rule or Add Label
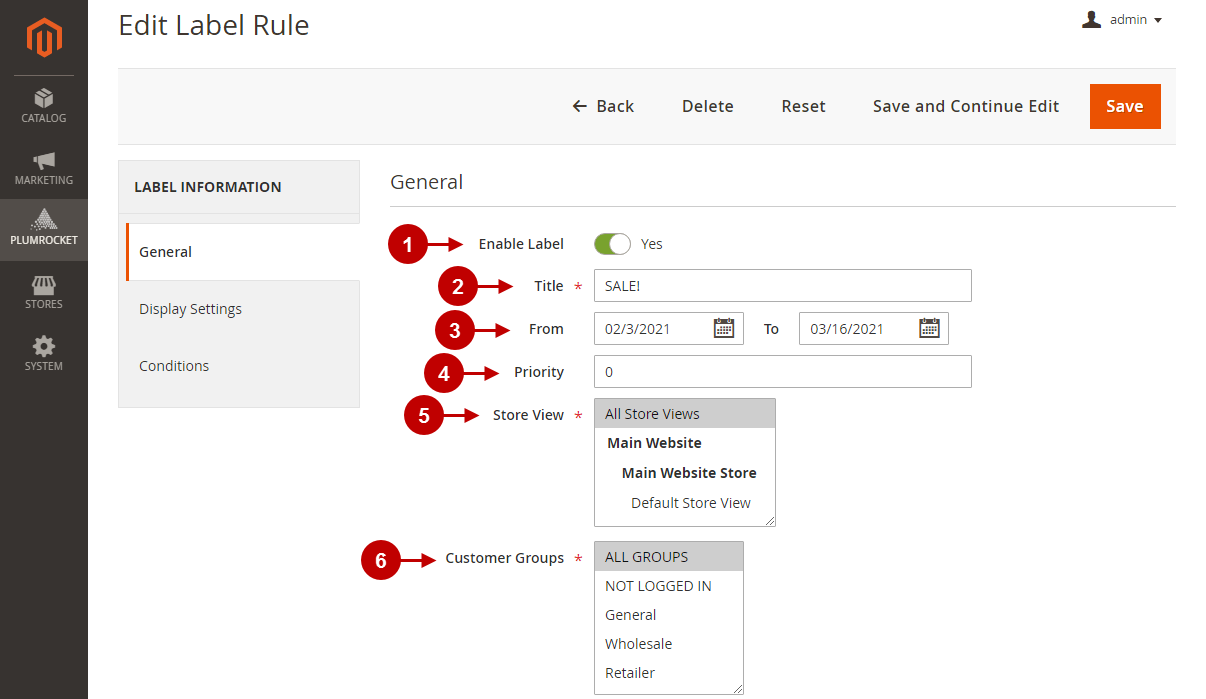
Open this section by clicking on the “Edit” button in the “Product Labels” section. The same configurations are displayed when you click on “Add Label” in the same section. Follow the steps below to learn how to configure product labels.
Step-by-Step actions:
- “Enable Label“: click to enable the product label.
- “Title“: enter the title of the label. This text will appear on the product label.
- “From“, “To“: click on the calendar icon and specify the date when you want the label to start and stop displaying on product images respectively.
- “Priority“: set a priority to manage the order in which the labels are applied to products. The highest priority is zero.
- “Store View“: here you can select one or more store views that should display the label.
- “Customer Groups“: here you can select one or more customer groups that will see the product label.
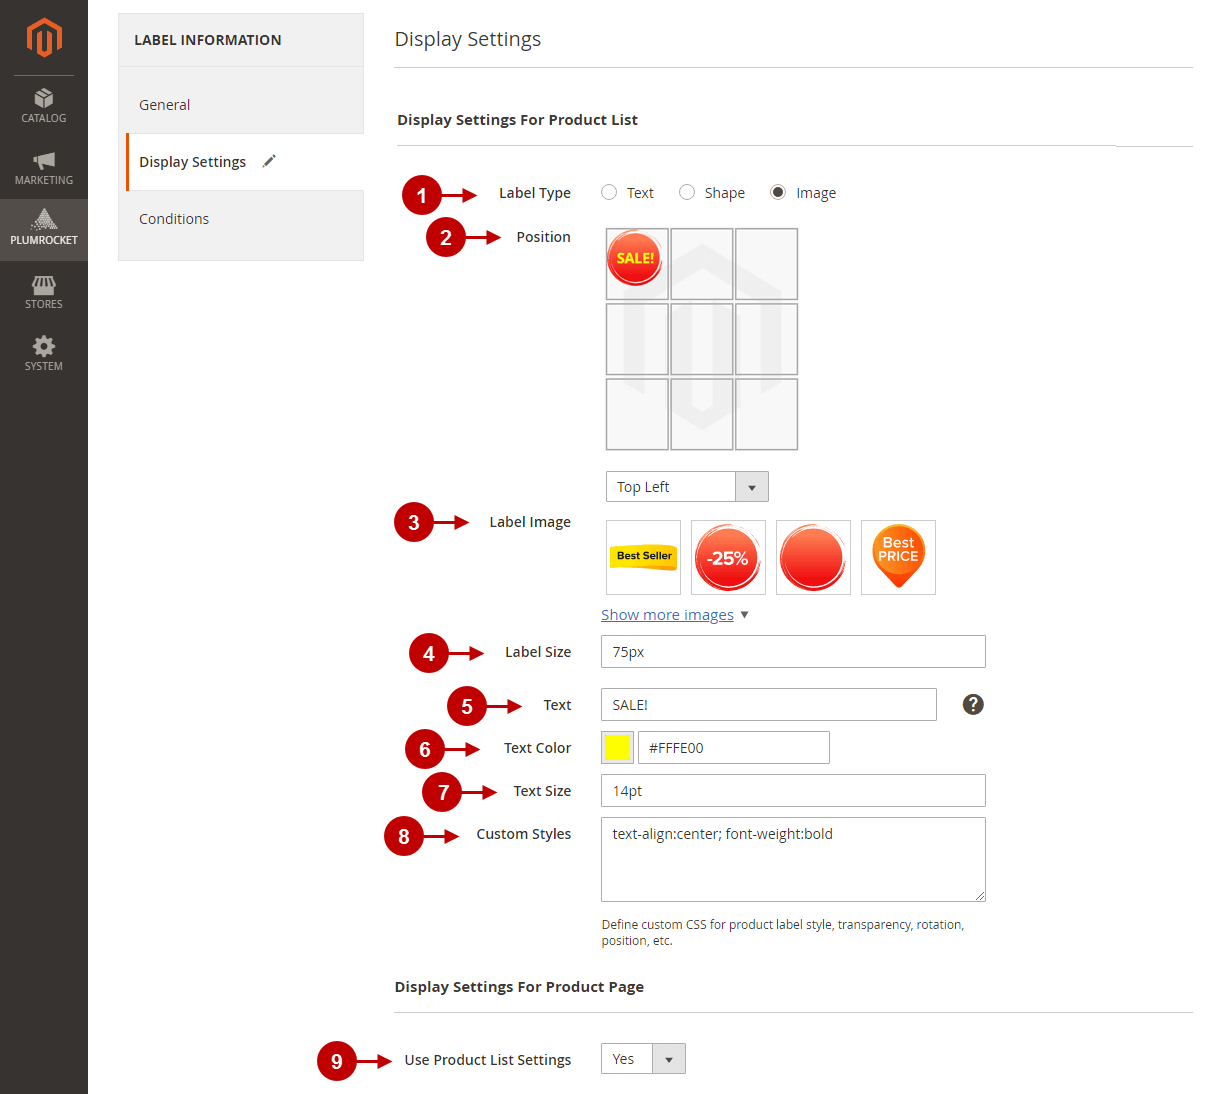
Step-by-Step actions:
- “Label Type“: choose the type of the label: Text, Shape, or Image.
- “Position“: to decide on label placement over the product image, click on the positions indicated by the squares. There is another way to do this: select the appropriate value from the drop-down list below. Note: you can set a custom position using CSS styles in the “Custom Styles” box below.
- “Label Image“: select a label image out of 40+ available in the extension.
- “Label size“: enter the width of the product label image.
- “Text“: type the text of the label here.
- You can also use variables:
{{discount_amount}} – to output the discount in store currency (e.g. Save $25, $10 OFF), for Bundle products will show max price discount;
{{discount_percent}} – to output the discount in percentage (e.g. 15% OFF; Save 25%);
{{attribute_code}} – to output the value of the specific product attribute. (e.g., if you want to output the product brand name on the label, just enter {{brand}} and attribute brand value will output. - Allowed HTML tags are:
b, i, cite, code, em, dfn, ins, mark, q, pre, s, span, small, strong, sub, sup, u, br
- You can also use variables:
- “Text color“: choose the color of the label by selecting it from the color picker or by typing hex color code in the field.
- “Text size“: specify the size of the text.
- “Custom styles“: Define custom CSS for product label style, transparency, rotation, position, etc.
- “Use Product List Settings“: set to “Yes” if you want to display these settings on the Product Page. Otherwise, set to “No” and configure the same settings for Product List.
Step-by-Step actions:
- “Conditions“: skip this step if you want to show this product label on all products. Otherwise, specify conditions when the product label should be displayed automatically.
- “Save“: press the “Save” button to save all changes made to this label.

