Splash Page Configuration
In this section you will find a detailed description of Magento Private Sales Extension features and settings that can be reached at the admin panel following the access path Plumrocket -> Private Sales -> Splash Page.
First, open the Splash Page Configuration menu as shown below.
Step-by-Step action:
- Click on the “Plumrocket” tab in main menu.
- Select “Private Sales”.
- Select “Splash Page”.

GENERAL
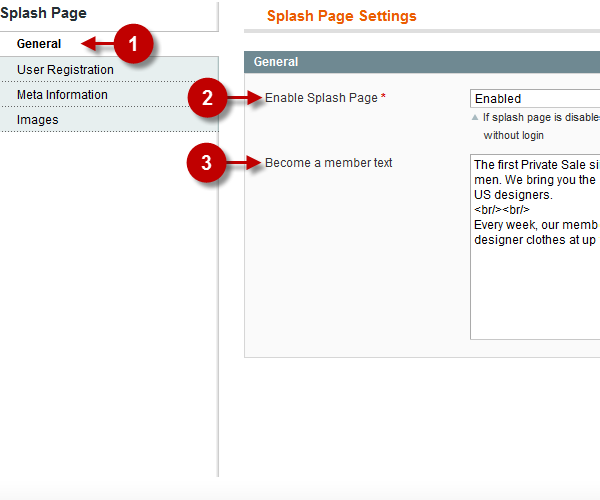
The tab “General” allows the administrator to enable or disable Splash Page and edit the content of the text block that appears next to the Log-in form.
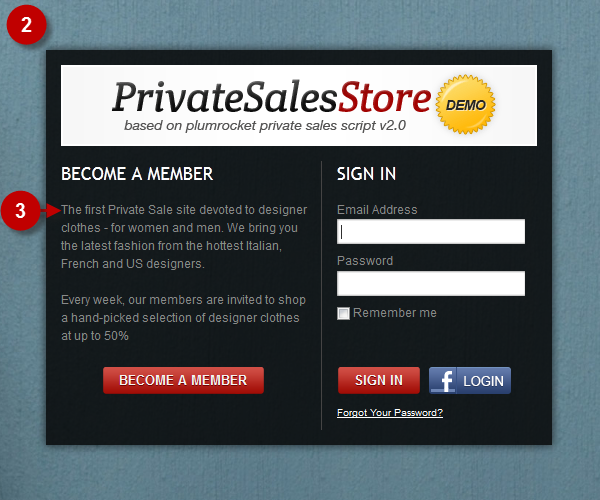
The screenshots below show the settings of this tab when the Splash is enabled. For your convenience and better understanding we have highlighted the options corresponding to different blocks in the front-end.
Enabled splash
Detailed description:
- Click on the “General” to access the tab settings.
- Option “Enable Splash Page”: enables or disables the Splash Page. Once the Splash is enabled, the users will only be able to access your website after registration.
- Option “Become a member text”: the administrator can edit the text block that appears on the splash page next to the Log-in form. As a rule, the text contains brief website description and the benefits of registration for prospective customers.
Magento Admin Panel
Website Frontend
Disabled Splash
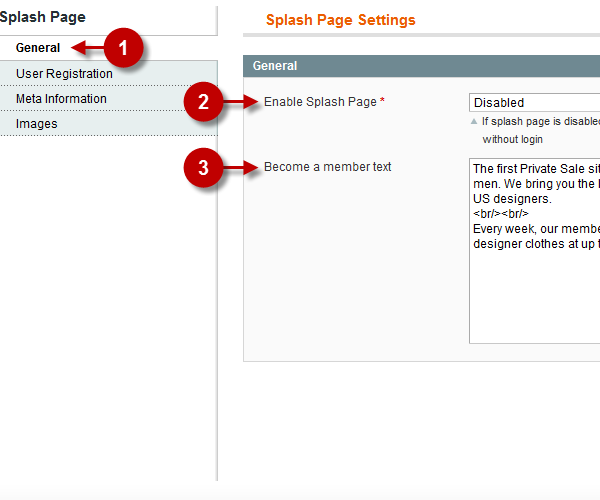
The following screenshots show the settings of this tab when the Splash is disabled.
Detailed description:
- Click on the “General” to access the tab settings.
- Option “Enable Splash Page”: enables or disables the Splash Page. Once the Splash is disabled, the users will be able to access your website without registration.
- Option “Become a member text”: the user will not see this text block since the Splash is disabled.
Magento Admin Panel
Website Frontend

USER REGISTRATION
- User Registration Enabled
- User Registration Disabled
- Launching Soon Mode Enabled
- Launching Soon Mode Disabled
The tab “User Registration” allows the administrator to control the functions of user registration, as well as “Launching Soon” mode.
User Registration Enabled
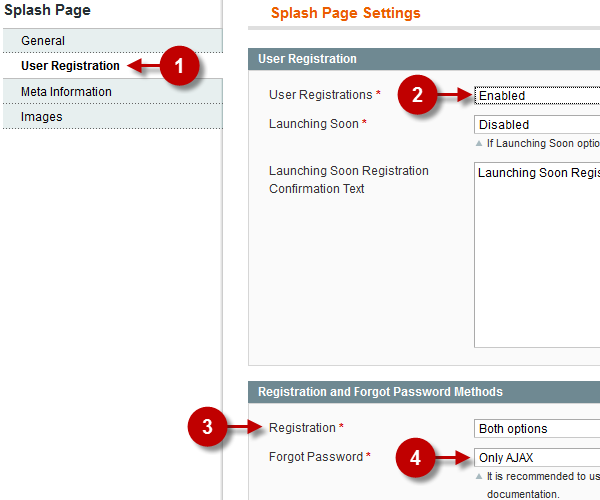
The screenshots below show the USER REGISTRATION settings when the function of user registration is enabled. For your convenience and better understanding we have highlighted the options corresponding to different blocks on the front-end.
Detailed description:
- Click on the “USER REGISTRATION” tab to access the tab settings.
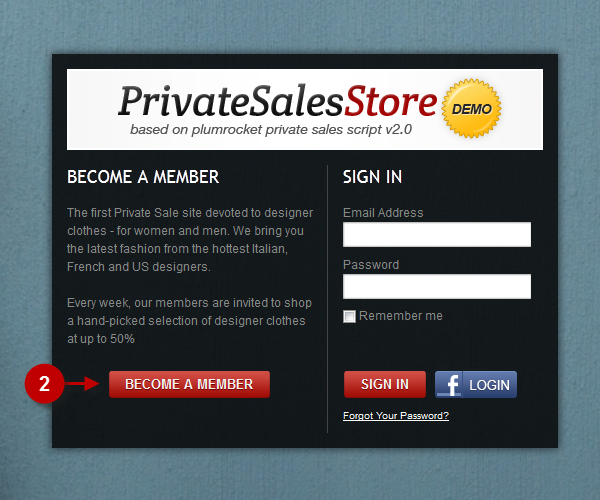
- Option “User Registrations” enables or disables registration at the website. If the registration is enabled, the users will be able to use the “Become a member” button on the Splash page to get registered.
- Option “Registration”: allows to configure the type of registration form page. The Administration can select from the following options: Only AJAX, Static Page and Both options. It is recommended to select Both options
- Option “Forgot Password” allows to configure the type of Password Recovery form. The Administration can select from the following options: Only AJAX, Static Page and Both options. It is recommended to select Both options.
Magento Admin Panel
Website Frontend
User Registration Disabled
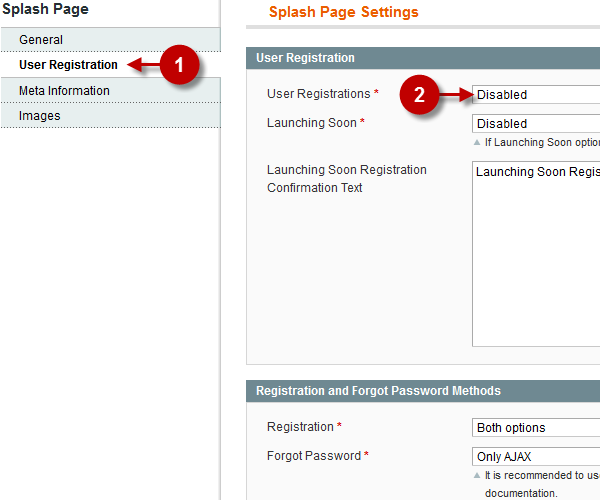
The screenshots below show the USER REGISTRATION settings when the function of user registration is disabled.
Detailed description:
- Click on the “USER REGISTRATION” tab to access the tab settings.
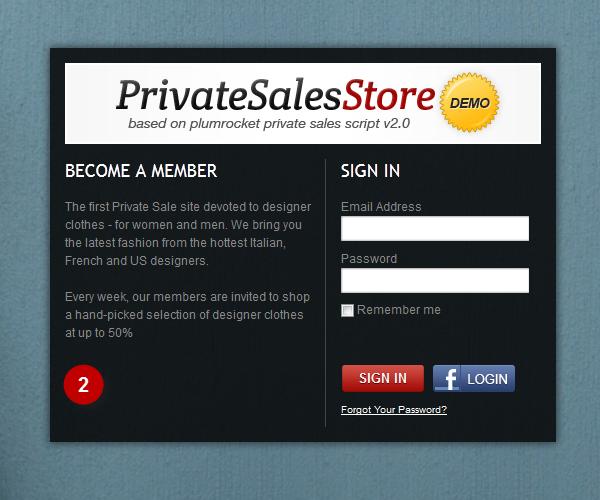
- Option “User Registrations” enables or disables user registration. If the registration is disabled the users will not be able to use the “Become a member” button on the Splash page to get registered (the button will be hidden).
Magento Admin Panel
Website Frontend
Launching Soon Mode Enabled
Launching Soon Mode is a special website mode that allows your prospective customers to get registered at the website before all of its boutiques and services are launched. The option of logging in the system is inaccessible in this mode.
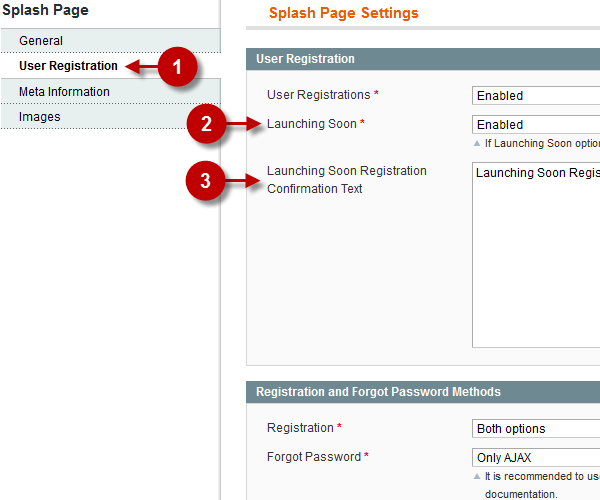
The screenshots below represent the settings of this tab, when the Launching Soon Mode is enabled.
Detailed description:
- Click on the “USER REGISTRATION” tab to access the tab settings.
- Option “Launching Soon” enables or disable the mode. If the Launching Soon Mode is enabled, the users will see only the “Become a member” button on the Splash Page. The Log in form will be visually unavailable.
- Option “Launching Soon Registration Confirmation Text”: Website administrator can edit the text that appears after successful registration when the website functions in the Launching Soon Mode. As a rule, this text block contains brief information concerning the purpose and the opening date of the website.
Magento Admin Panel
Website Frontend

Launching Soon Mode Disabled
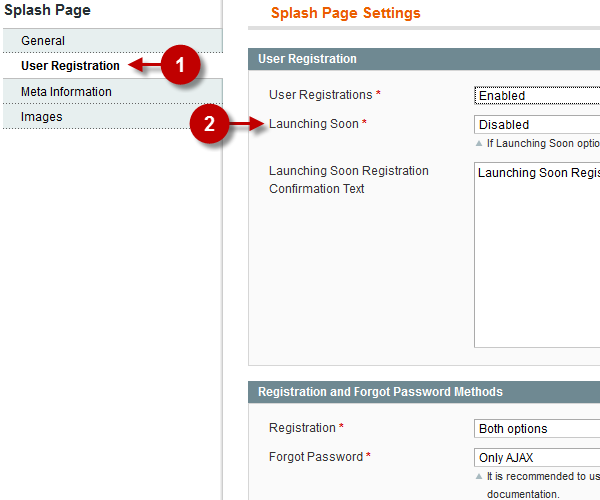
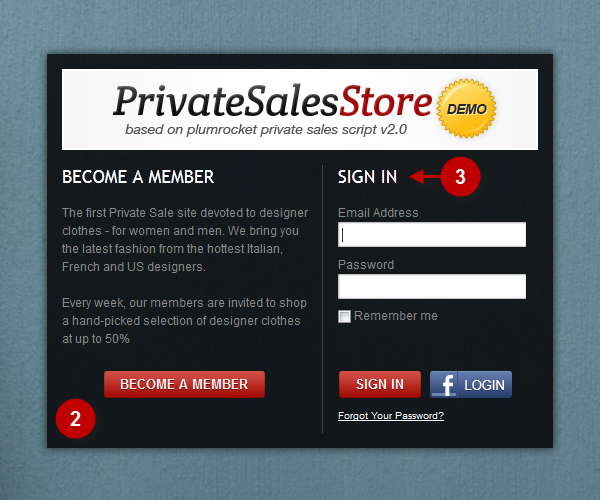
The screenshots below show the tab settings when the “Launching Soon” mode is disabled.
Detailed description:
- Click on the “USER REGISTRATION” tab to access the tab settings.
- Option “Launching Soon” enables or disables the mode.
- Option Sign In”: If the “Launching Soon” mode is disabled, the users will be able to log in after successful registration. The registration and log-in forms will be available to all users.
Magento Admin Panel
Website Frontend
META INFORMATION
The “META INFORMATION” tab allows the administrator to edit the Splash page META-tags.
Detailed description:
- Click on the “Meta Information” tab to access the tab settings.
- Option “Meta Title”: enter the title of the Splash page.
- Option “Meta Keywords”: enter the keywords for the Splash page here.
- Option “Meta Description”: provide a short description for the Splash page in this field.

IMAGES
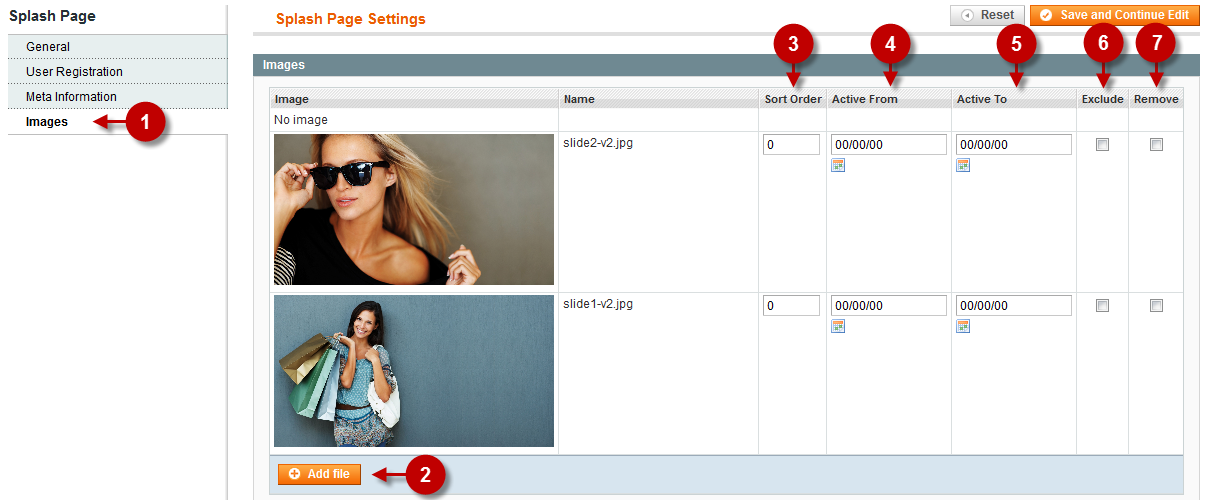
The tab “IMAGES” allows the administrator to edit the background image of the Splash page.
The screenshots below show a detailed description of the settings and options of this tab.
Detailed description:
- Click on the “Images” tab to access the tab settings.
- Option “Add File”: this button launches the interface to upload new images. Recommended size of picture: 2000px width.
- Option “Sort Order”: the parameters determining the sequence of images are set in this field.
- Option “Active From”: sets the starting date of the image display. If it is set by default (00/00/00), the image will be permanently displayed on the Splash page.
- Option “Active To”: sets the ending date of the image display. If it is set by default (00/00/00), the image will be permanently displayed on the Splash page.
- Option “Exclude”: allows you to temporarily exclude the image form the list not showing it on the website.
- Option “Remove”: deletes the image.
