Newsletter Templates
In this section you will find a detailed description of Magento Private Sales Extension features and settings that can be reached at the admin panel following the access path Plumrocket -> Private Sales -> Newsletter Templates.
First, open the Newsletter Templates Configuration menu as shown below.
Step-by-Step action:
- Click on the “Plumrocket” tab in main menu.
- Select “Private Sales”.
- Select “Newsletter Templates”.

Managing Newsletter Templates
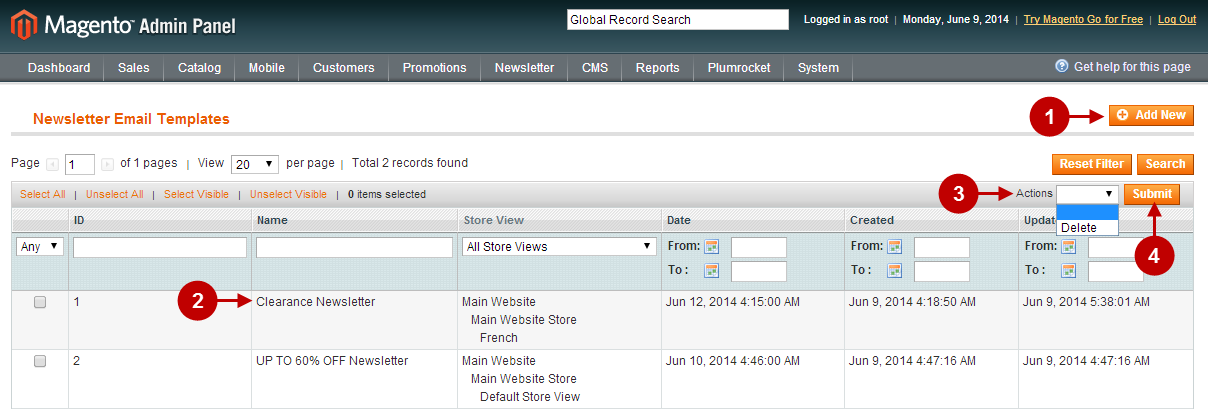
Here you can manage your Newsletter Templates. To do this, follow the steps below.
Step-by-Step action:
- Click on the “Add New” button to create Newsletter Template.
- Column “Name” indicates the Newsletter Template name.
- You can delete the selected Newsletter Template by choosing “Delete” action.
- You can submit your action by clicking on “Submit” button.
Creating Newsletter Template
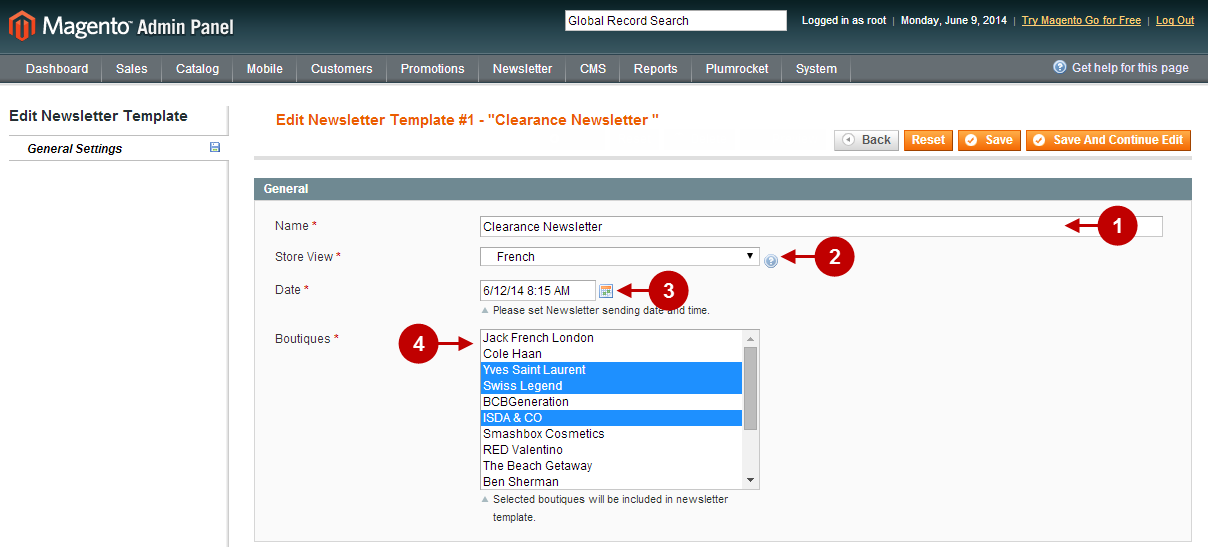
In order to create Newsletter Template, please follow the steps below.
Step-by-Step action:
- Indicate your Newsletter Template name.
- Select the storeview for your Newsletter Template.
- Set the Newsletter sending date and time. Note: Setting the date will load all the Boutiques which will be active at the date and time of sending.
- Select the Boutiques which you want to display in the Newsletter.
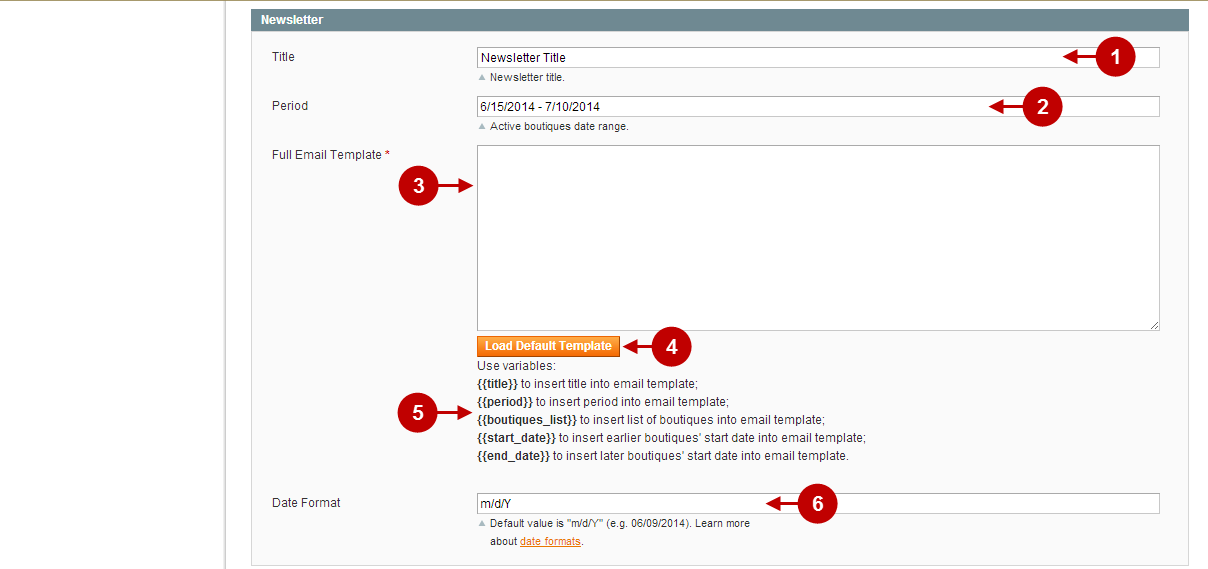
Step-by-Step action:
- Indicate your Newsletter title.
- Indicate the active Boutiques date range. There are 2 possible options here: a) You can set the date range manually; b)You can leave this field empty. in this case the system will pick up the start date of first active selected boutique and the end date of the last active selected boutique and paste these dates into the field.
- Insert your own full Email Template here. Note: In case you don’t have your own Email Template – skip this step and proceed to the next step.
- Click on “Load Default Template”. Note: This will load the default template predefined by the system which you can edit as needed.
- You can use these variables if needed.
- Indicate the “Date Format” for your Newsletter.
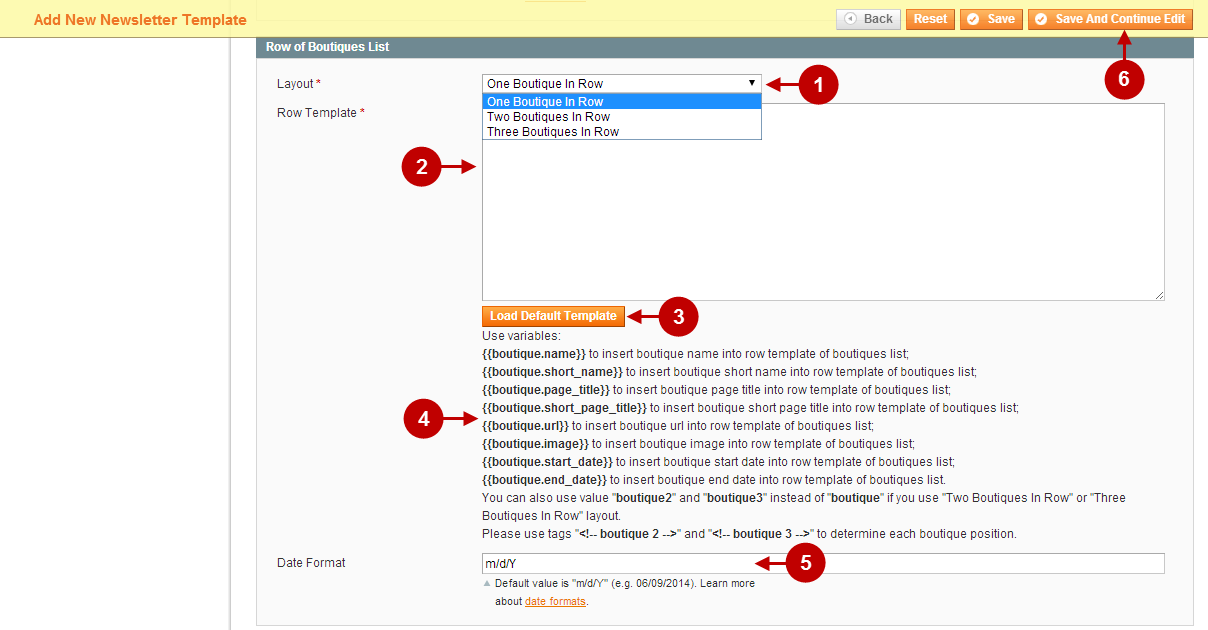
Step-by-Step action:
- Choose the needed layout for the template from the dropdown.
- Insert your own Row Template here. Note: In case you don’t have your own Row Template – skip this step and proceed to the next step.
- Click on “Load Default Template”. Note: This will load the default template predefined by the system which you can edit as needed.
- You can use these variables if needed.
- Indicate the “Date Format” for start and end dates of your Boutiques.
- Click the “”Save And Continue Edit” button to save your changes. Note: It is required because after you save your changes – the useful “Preview” and “Generate” buttons will appear.
After your Newsletter Template is ready, you can see how it looks like by following the steps below.
Step-by-Step action:
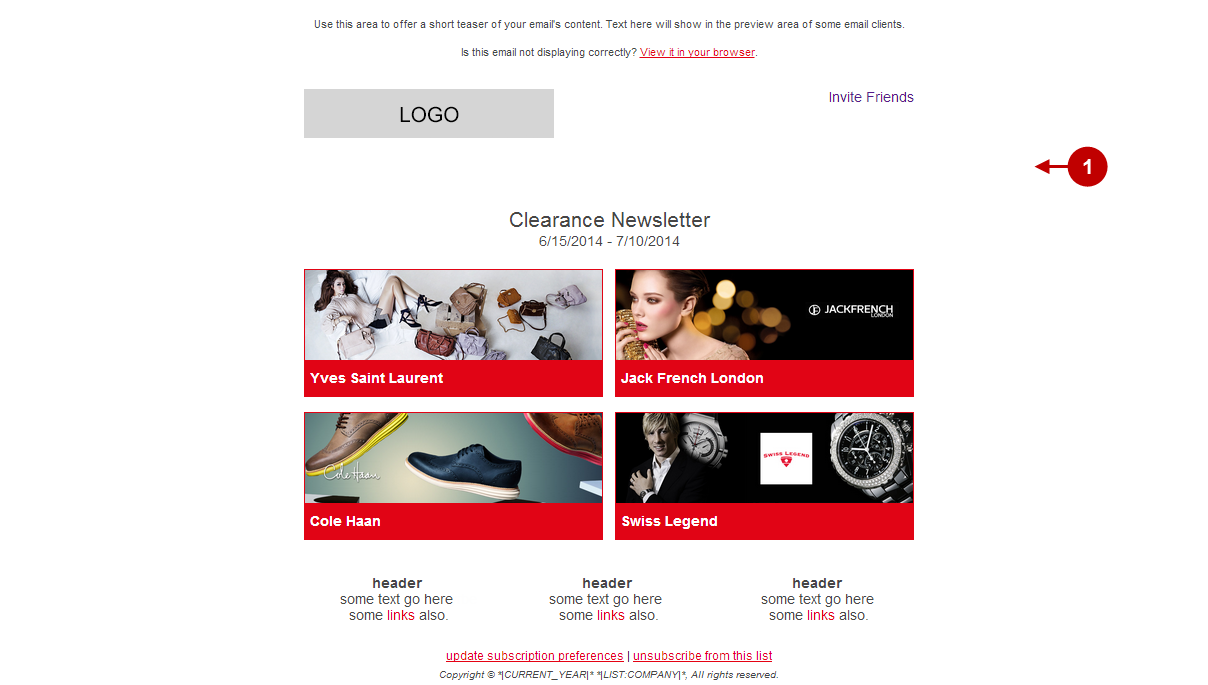
- Click the “Preview” button to see how your Newsletter Template will appear in the email.

Step-by-Step action:
- This is how the default Newsletter Template will look like in the email.
Once you are done with making changes to your Newsletter Template – you can generate its HTML code for pasting into some email sending system (e.g. MailChimp.com). To do this please follow the steps below.
Step-by-Step action:
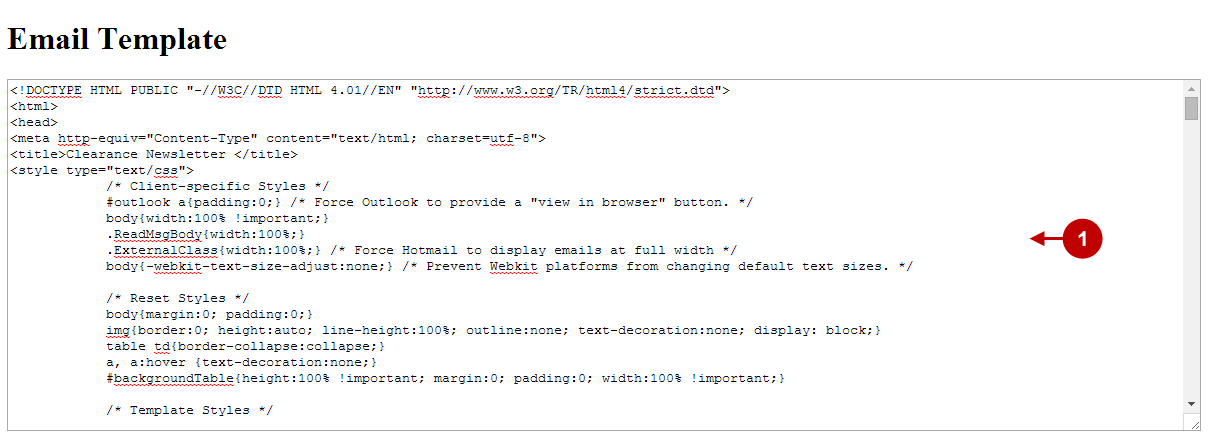
- Click the “Generate HTML” button to generate the Newsletter Template in form of HTML code.

Step-by-Step action:
- This is an example of the default Newsletter Template HTML code generated by the system for pasting into some email sending system (e.g. MailChimp.com).
