Home Page Configuration
In this section you will find a detailed description of our Magento Private Sales plugin features and settings that can be reached at the admin panel following the access path Plumrocket->Private Sales->Home Page
You will learn how to set default user pages, build their layout and manage the banners on the website.
First, open the Home Page Configuration page as shown below
Step-by-Step action:
- Click on the “Plumrocket” tab in main menu.
- Select “Private Sales”.
- Select “Home Page”.

GENERAL SETTINGS
The tab “General” allows the administrator to enable or disable the Home Page, as well as set the default pages the users will see after they log in system.
The screenshots below show the tab settings when the Home Page is enabled.
Home Page Enabled
Detailed description:
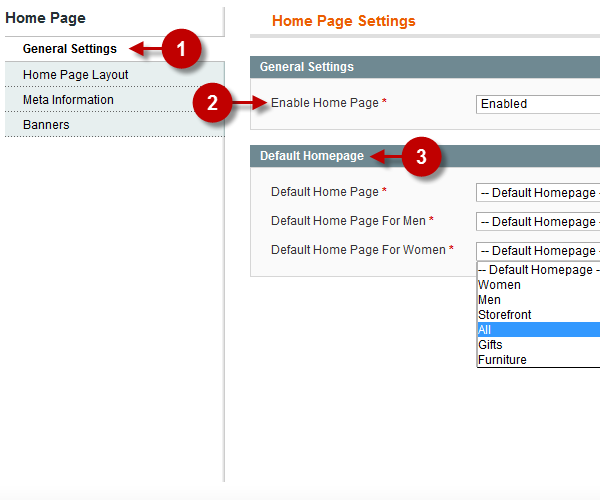
- Click on the “General Settings” tab to access the tab settings.
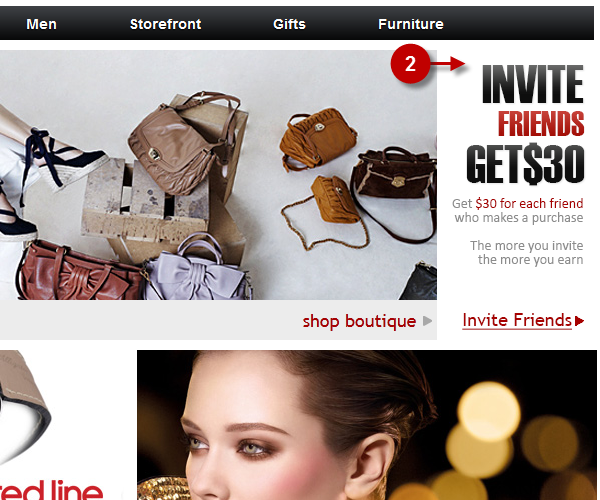
- Option “Enable Home Page” allows you to enable or disable the display of Home Pages on the website. Here the Home Page is enabled and you can see the list of boutiques on the website.
- Option “Default Home Page” allows you to configure default settings. So far, the administrator can set a general Home Page, as well as configure default settings for users of different sexes if required, i.e. when users log in the website, they will automatically be directed to the default page based on their gender.
Magento Admin Panel
Website Frontend
Home Page Disabled
Detailed description:
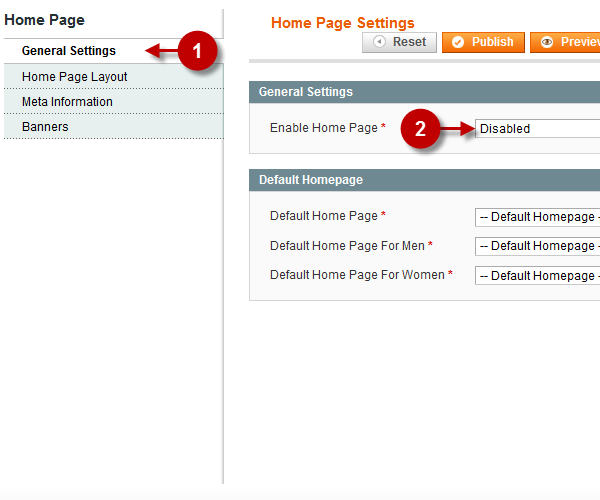
- Click on the “General Settings” tab to access the tab settings.
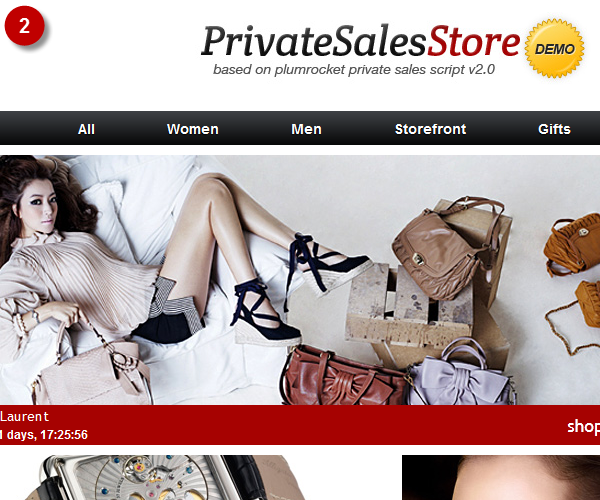
- Option “Enable Home Page” allows you to enable or disable the display of Home Pages on the website. Here the Home Page is disabled, and not a single list of boutiques will be shown on the website.
Magento Admin Panel
Website Frontend

HOME PAGE LAYOUT
Due to the options of this module and its intuitive interface the tab “HOME PAGE LAYOUT” allows the administrator to easily manage the website banners as well as the number of boutiques on the page. You can create a unique layout of the Home Page. In its turn, each Home Page can be divided into two main sections: Featured Today and Ending Soon. These also is one more section called Coming Soon, that has the same layout irrespective of the Home Page.
Below you will find the instructions how to set the above mentioned sections.
Featured Today Section
The screenshot below shows the options available at the HOME PAGE LAYOUT tab
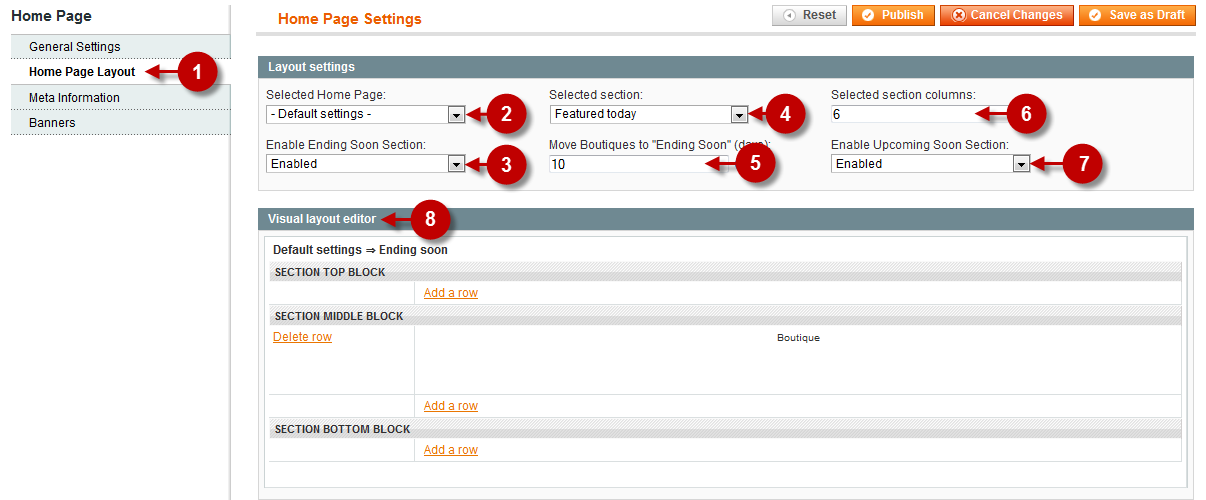
Detailed description:
- Click on the “Home Page Layout” tab to access the tab settings.
- Option “Selected Home Page”: If there are several Home Pages created for your website, this option will help you select the one you want to edit.
- Option “Enable Ending Soon Section”: allows you to enable or disable the “Ending Soon” section on your website.
- Option “Selected Section” Each Home Page is divided into two main sections: Featured Today and Ending Soon. This option will help you select the section you want to edit.
- Option “Move Boutiques to “Ending Soon”(days)”: allows you to automatically transfer the boutique from this Home Page to the Ending Soon section when the sales period is going to end in the number of days the administrator had set in this field.
- Option “Selected section columns” : allows you to set the maximum number of columns for a new line in block.
- Option “Enable Upcoming Soon Section”: allows you to enable or disable the Upcoming Soon section on your website.
- Option “Visual Layout Editor”: is a powerful tool that will help you build a unique layout of each Home Page including the sections belonging to it.
In order to learn how to edit and create new page layout follow the instructions below.
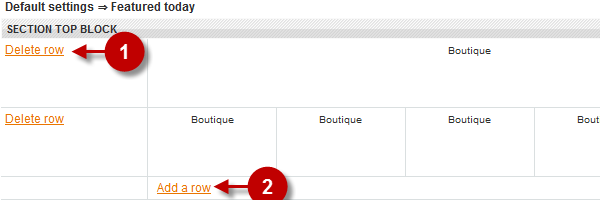
Detailed description:
- Option “Delete Row”: Use this option to delete a row.
- Option “Add a Row”: allows to add a new row with cells
- Click in the Center of the Cell in order to call the cells management menu.
- Option “Boutique”: allows you to fix a boutique for this cell.
- Option “Banner”: allows you to fix a banner for this cell (you choose the type of banner that will will be later displayed in this cell).
- Option “Blank Cell”: is used for blank cells.
- Option “Split Cells”: allows you to split previously joined cells.
Magento Admin Panel
Website Frontend

Here we will try to show you how to edit the layout of each Home Page and its sections. For your convenience we present the screenshots of both admin panel and website front-end for you to better understand the correlation between them.
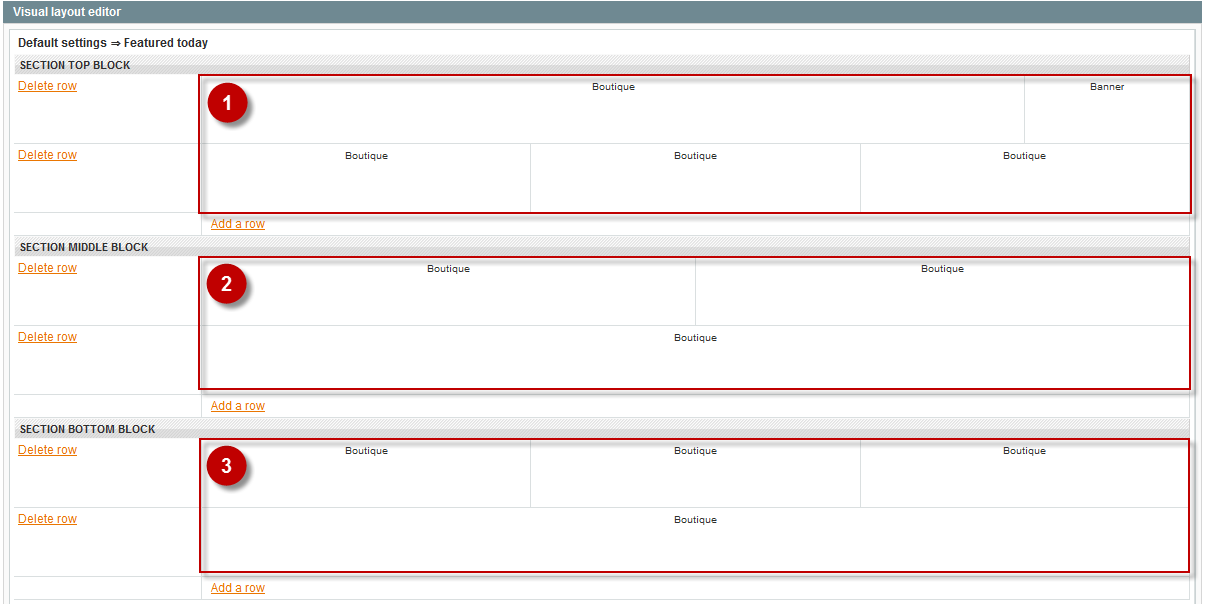
Let’s find out how to edit the layout of the main section – Featured Today.Each section is divided into three blocks as shown below:
Detailed description:
- TOP BLOCK: The boutiques and banners from this block are always located in the top of the page. The layout will totally correspond to the structure set in this tab (the number or rows and boutiques should be set here in this tab).
- MIDDLE BLOCK: This block, unlike the other ones, is characterized by cyclic display on the page. You have to set the layout (the number of rows with boutiques or banners) that will be cyclically displayed in the middle of the page. Note, this option works only if there are enough active boutiques belonging to a particular Home Page.
- BOTTOM BLOCK: This block is very similar to the “TOP BLOCK”. But the boutiques and banners from this block are always located in the bottom of the page. The layout will totally correspond to the structure set in this tab (the number or rows and boutiques should be set here in this tab).
You should keep in mind the priority of page layout setting. The boutiques should be set in such an order:
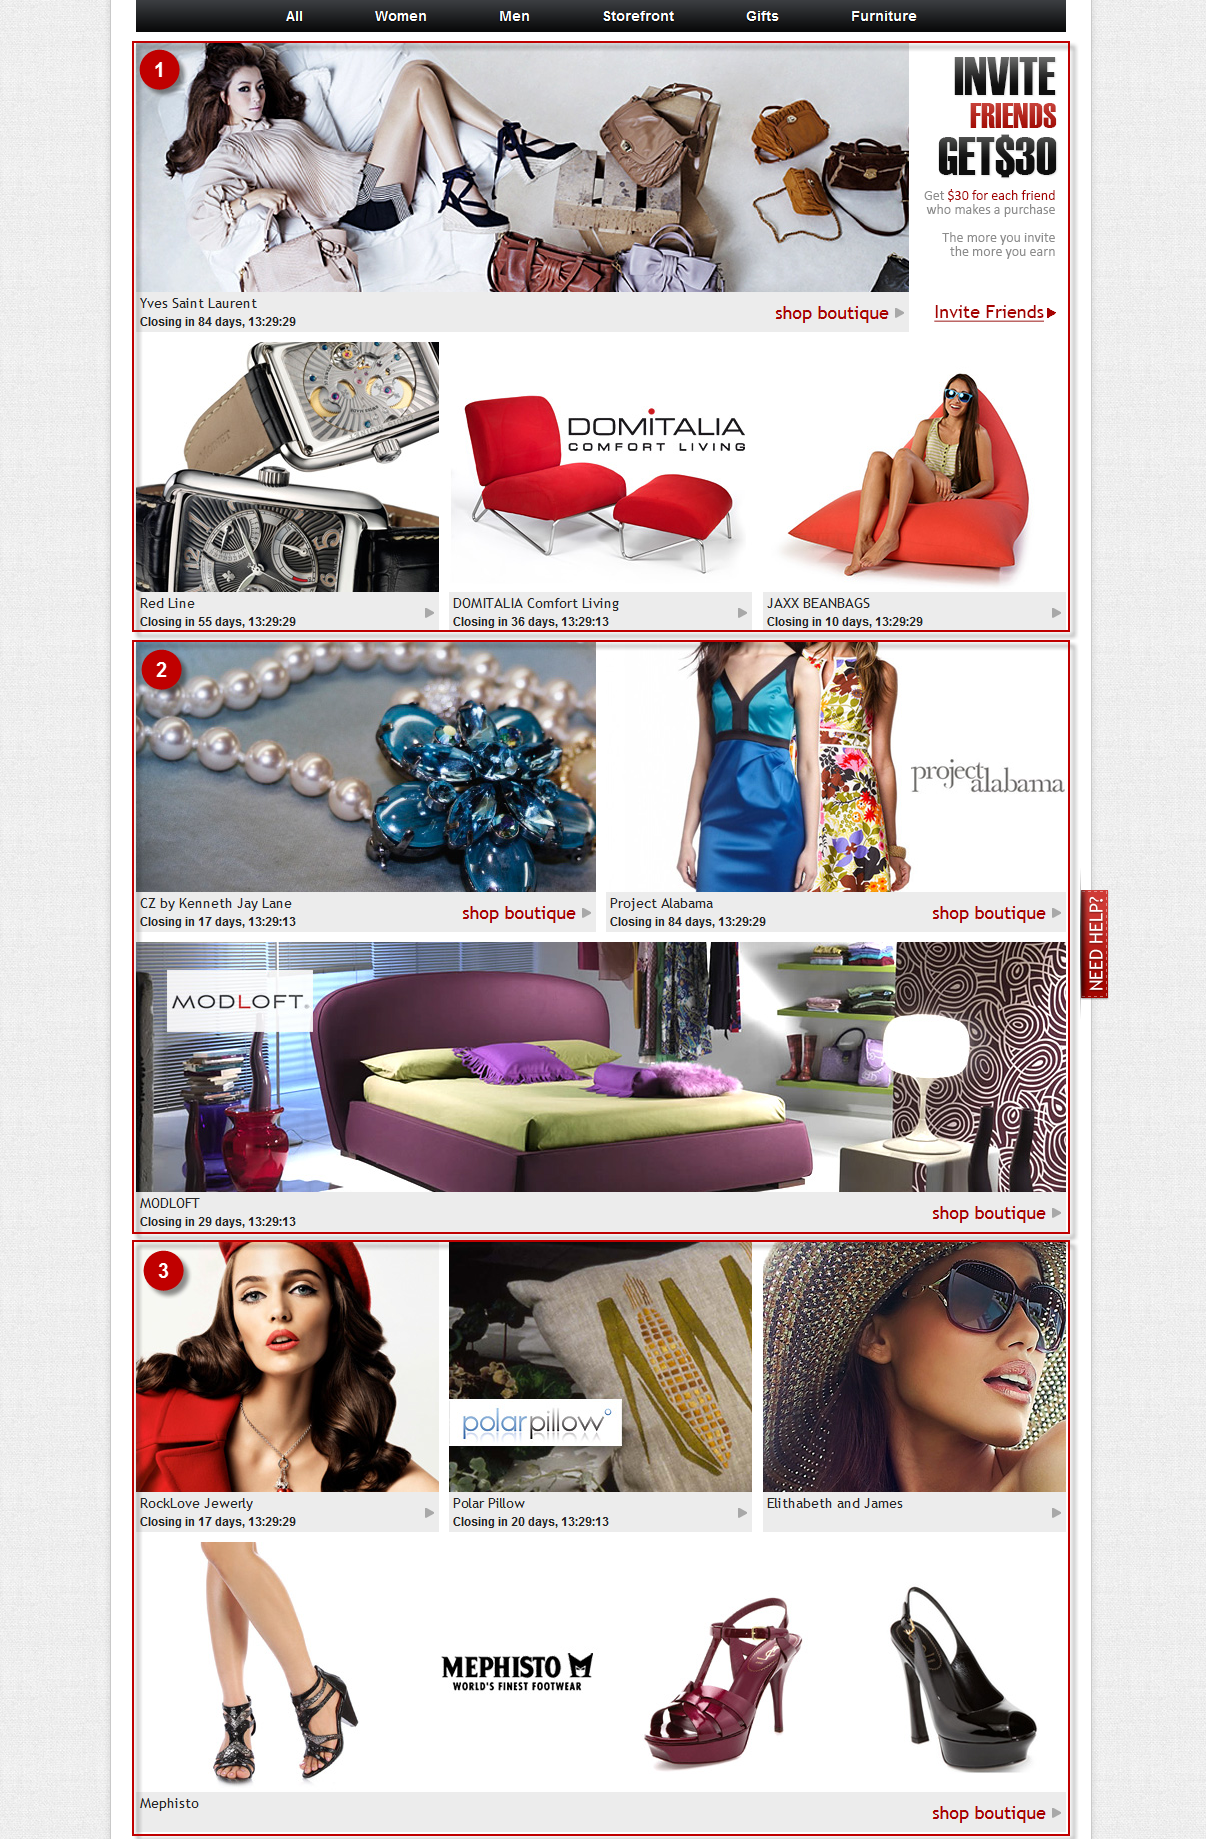
This image represents the front-end Home Page, that is based on the layout you could see on the previous screenshot.
Detailed description:
- TOP BLOCK
- MIDDLE BLOCK
- BOTTOM BLOCK
Ending Soon Section
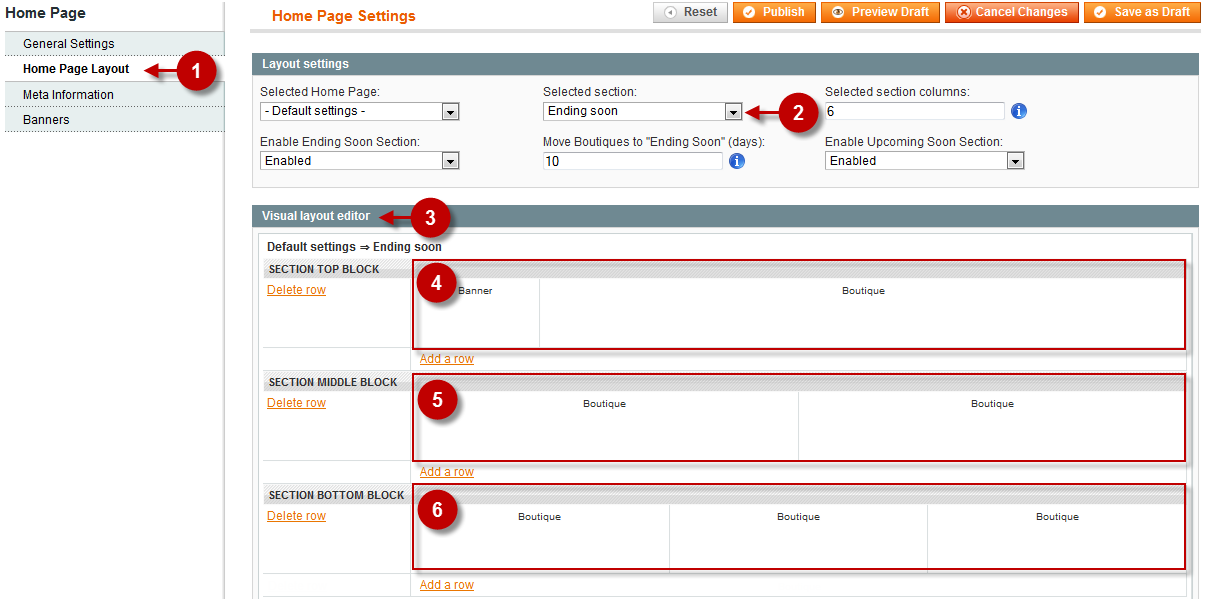
In order to create the Ending Soon section layout, follow the instructions above, since the same blocks and elements are used to configure it. The screenshots below will convince you of it.
Detailed description:
- Click on the Home Page Layout to access the tab settings.
- Select ENDING SOON section, to open the required page to build and edit the layout
- Visual Layout Editor:
- TOP BLOCK: The boutiques and banners form this block are always located in the top of the page. The layout will totally correspond to the structure set in this tab (the number or rows and boutiques should be set here in this tab).
- MIDDLE BLOCK: This block, unlike the other ones, is characterized by cyclic display on the page. You have to set the layout (the number of rows with boutiques or banners) that will be cyclically displayed in the middle of the page. Note, this option works only if there are enough active boutiques belonging to a particular Home Page.
- BOTTOM BLOCK: This block is very similar to the “TOP BLOCK”. But the boutiques and banners from this block are always located in the bottom of the page. The layout will totally correspond to the structure set in this tab (the number or rows and boutiques should be set here in this tab).
You should keep in mind the priority of page layout setting. The boutiques should be set in such an order:
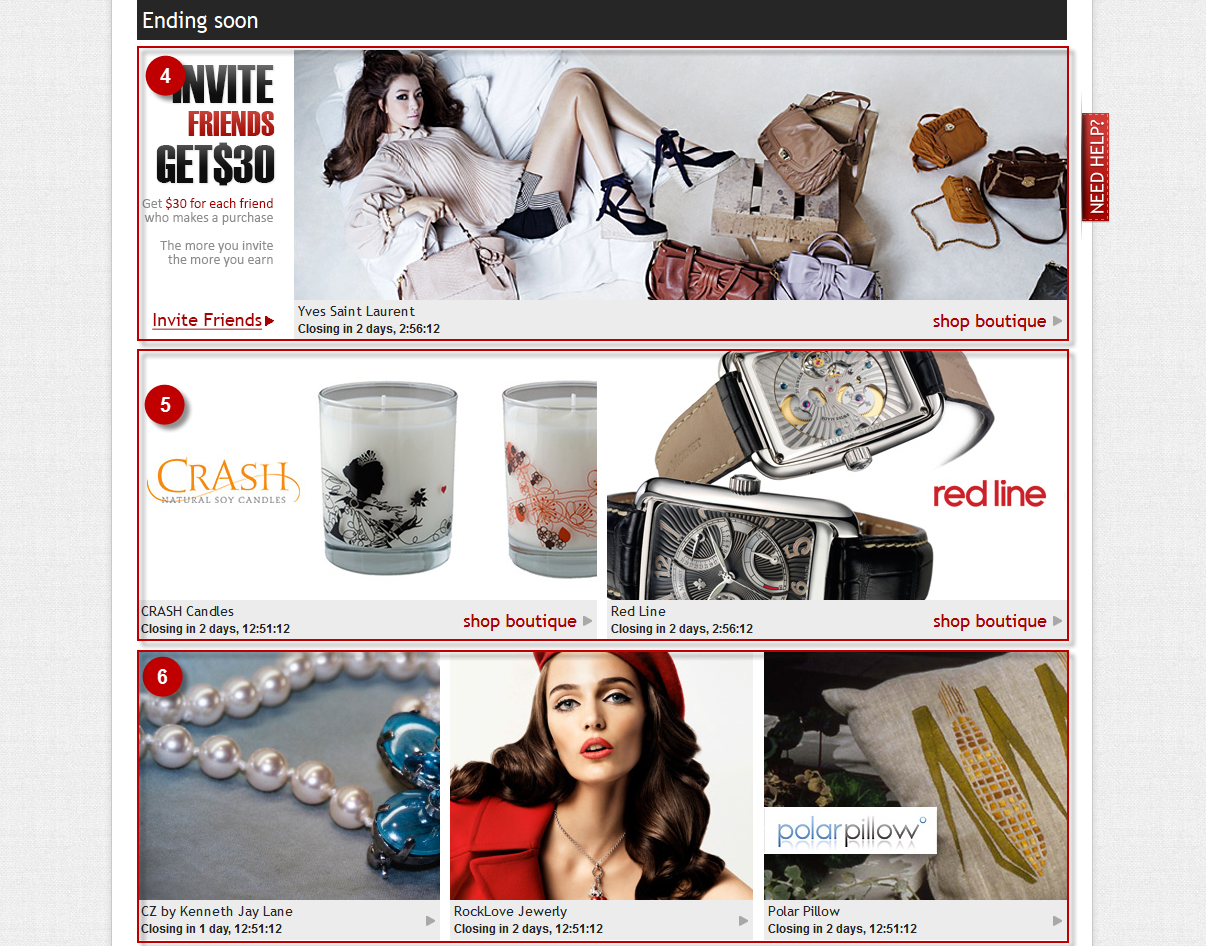
This image represents the front-end section, that is based on the layout you could see on the previous screenshot.
Detailed description:
- TOP BLOCK
- MIDDLE BLOCK
- BOTTOM BLOCK
Website Frontend
Coming Soon Section
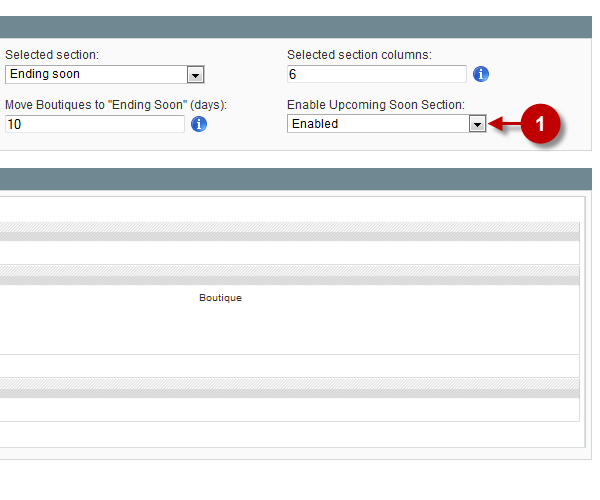
Enable this section for it to appear in the bottom of the Home Page.You will have the opportunity to show the boutiques that will be soon launched on your website.
The screenshots below show how to enable or disable this section.
Step-by-Step action:
- Select “ENABLED” to enable the section. When saved this section will appear on the Home Page. To disable this section, select the ‘DISABLED’
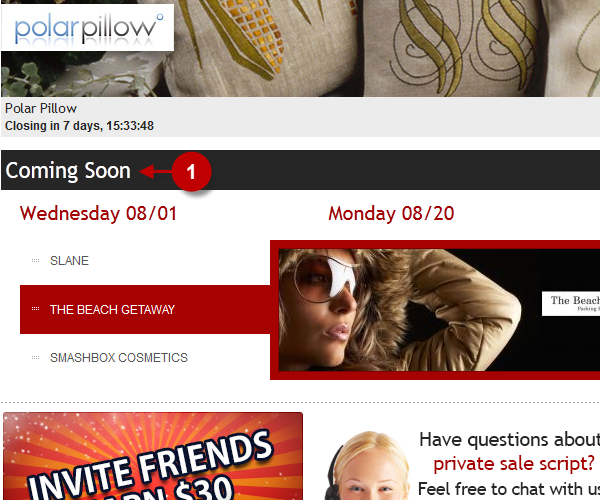
Magento Admin Panel
Website Frontend
META INFORMATION
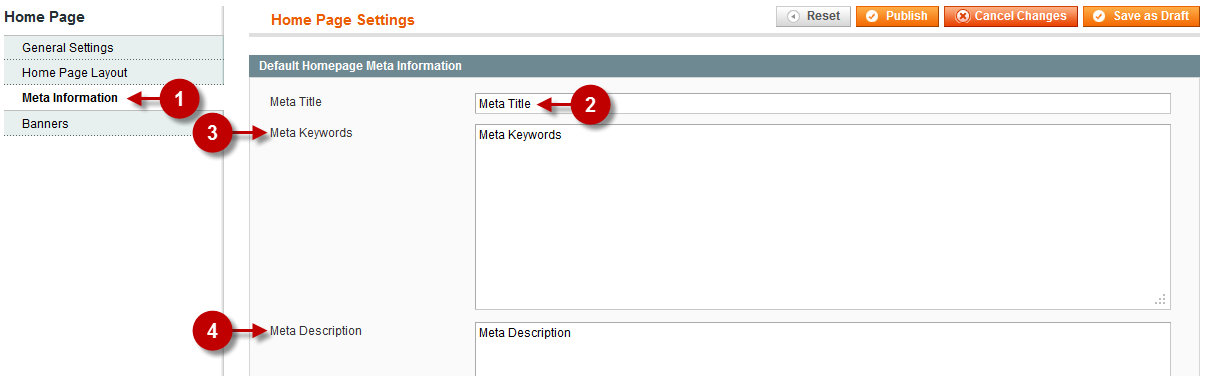
The “META INFORMATION” tab allows the administrator to manage META-tags of the website Default Homepage, which is a page containing products from all the homepages.
Detailed description:
- Click on the “META INFORMATION” tab to access the tab settings.
- Option “Meta Title”: enter the page title in this field.
- Option “Meta Keywords”: enter the page keywords in this field.
- Option “Meta Description”: enter a short page description in this field.
BANNERS
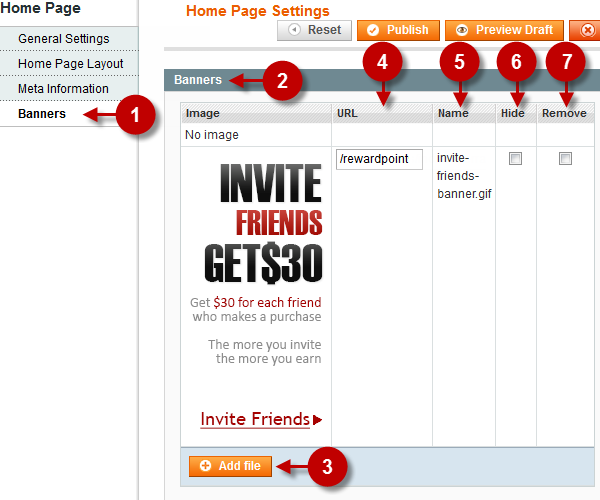
The “BANNERS” tab allows the administrator to manage the Home Page banners. The screenshots below show the tab options and settings in details.
Detailed description:
- Click on the “BANNERS” tab to access the tab settings.
- Block “BANNERS”: shows the uploaded banners and their parameters.
- Option “ADD FILE”: launches the interface for uploading new banners.
- Option “URL”: shows the banner URL.
- Option “Name”: shows the banner name.
- Option “Hide”: hides the banner.
- Option “Remove”: removes the banner URL.
Magento Admin Panel
Website Frontend