Video Tutorial: Access to restricted pages
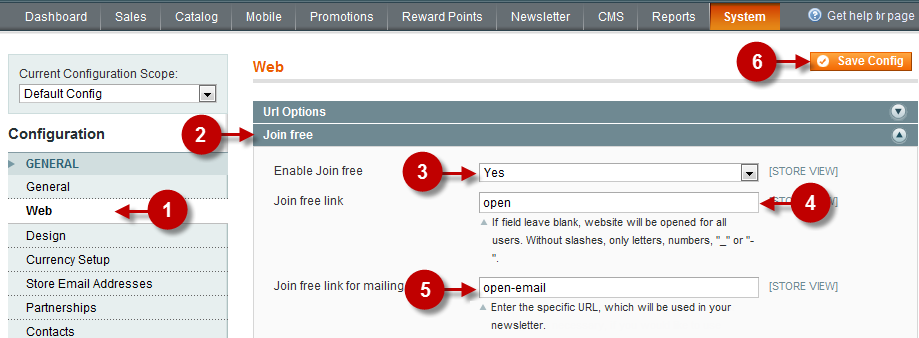
“JOIN FREE” option configuration:
Step-by-Step action:
- Click on the “SYSTEM” tab in main menu
- Choose “CONFIGURATION”

Step-by-Step action:
- Choose “WEB” tab in the left side menu
- Select the “JOIN FREE” option
- Field “Enable Join free”: enables the ability of free (open) access to the website for non-registered users. If you want to disable this ability, just select “NO”.
- Field “Join free link”: URL address, which allows non-registered users to visit the website. If you leave this field blank, your website will be open to all users – so, the website will be visible to all visitors without a special URL.
- Field “Join free link for mailing”: It is the URL address, which you must specify in mailing. It’s only used for mailing (in our case, it is the link to our website that comes with the newsletter). Your website will remember where the user came from, but when the user comes to the website his link will change to (“Join free link”) URL.
For example: if you enter “open-email” here and “open” in filed above, then if the user clicks on link “open-email” (“www.membership-site.plumrocket.net/open-email”) in the newsletter, the website system will remember where this user has come from, and change the URL to “open” (” www.membership-site.plumrocket.net/open”).

Was this article helpful?
