Video Tutorial: How To Edit Banners
Manage Static Blocks Page
First, open the Static Blocks Management page as shown below
Step-by-Step action:
- Click on the “?MS” tab in main menu
- Select “STATIC BLOCKS”

Types of Banners in Admin Area
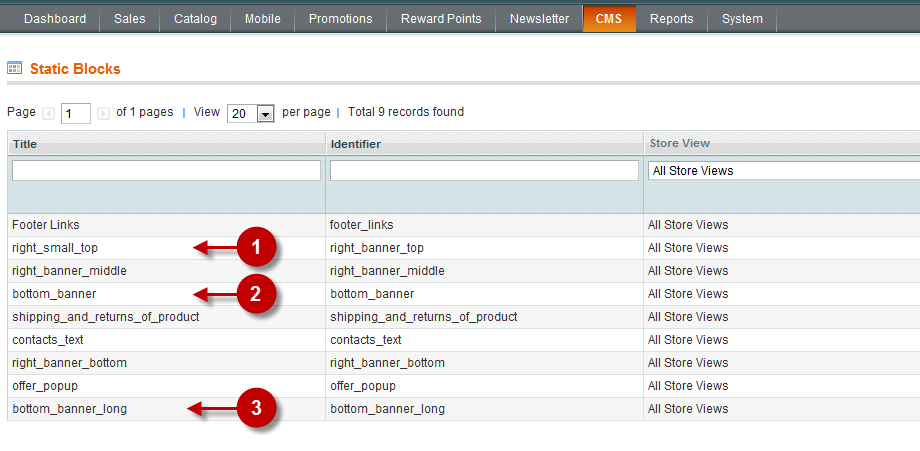
In the list of static blocks, available on the website, you will see the blocks which determine the location of banners on the website. There can be several blocks (depending on the website design), as shown on the screenshot below.
Step-by-Step action:
- Right small top banner
- Bottom banner
- Bottom long banner

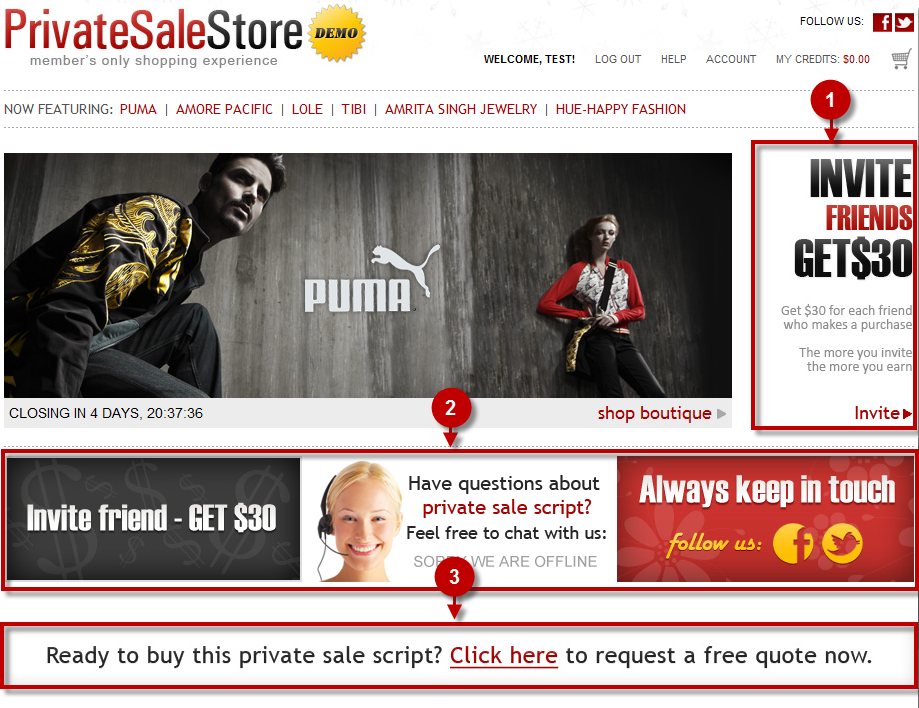
Types of Banners on Front Page
Step-by-Step action:
- Right small top banner
- Bottom small banners
- Bottom long banner

Editing Banners
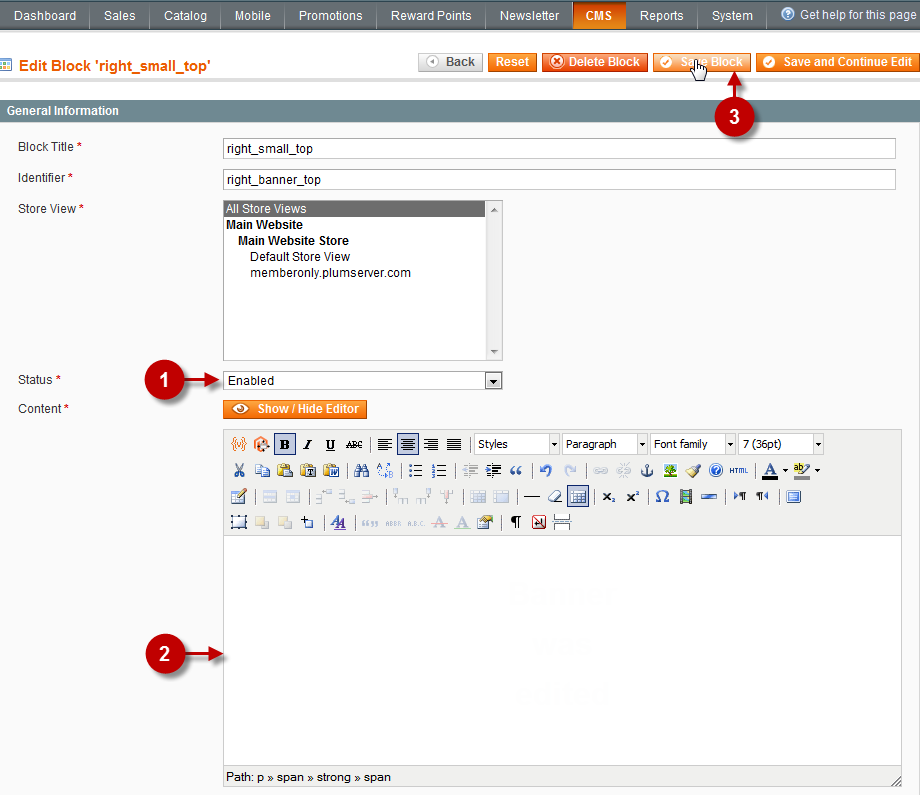
Choose the block where you want to edit banner. To show you how it works we will take right top banner. Follow these steps to edit the banner:
Step-by-Step action:
- Field “Status”: Set “Enabled”
- Insert an image or message that is expected to appear in the block . For more details watch the video above.
- Press the “SAVE BLOCK” button

Successful Editing
If there are no mistakes, you will see the appropriate notification

Result on the main page
If you followed all the instructions shown in the video, you will see the changes in the block on the main page. In our case, a new banner appeared on the page.

