Registering with Google to send AMP Emails in Production Mode
- Follow the Testing AMP Emails using Gmail Development Mode article to prepare your store and send a test AMP email with the Magento 2 AMP Email extension.
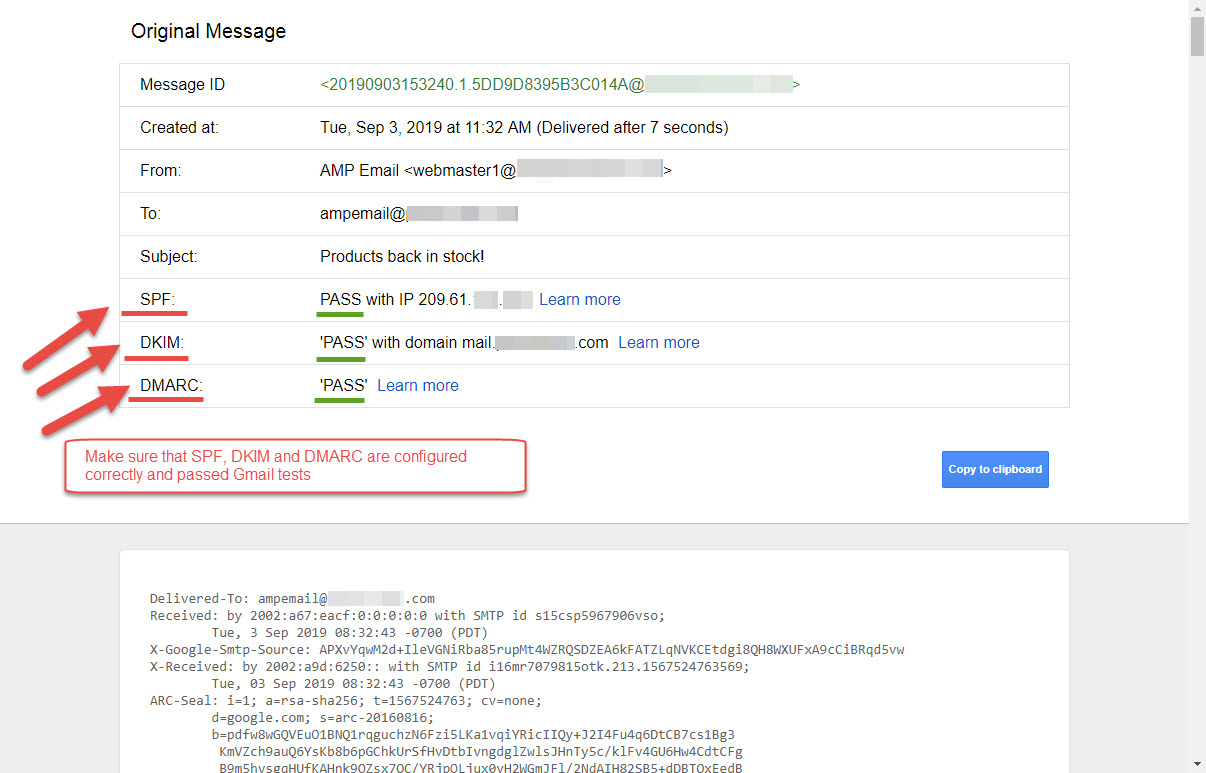
- Make sure that your SPF/DKIM/DMARC/From:/Return-Path: headers are configured correctly as described in Google Requirements. You can find out this by opening any of your test AMP Emails in Gmail, then click on “3 dots” > Show Original:

- On this page, you can check if your DNS records configured correctly.

- Your “sender email address” must be “warmed up” with Gmail. In other words your email (e.g. sender@yourdomain.com) must have a history of at least a couple of hundred emails sent to Gmail users a day.
- You should have a low rate of spam complaints from Gmail users.
- Send test email from your Magento 2 store once again, following our giode on Testing AMP Emails using Gmail Development Mode, but this time send AMP email to the following address: ampforemail.whitelisting@gmail.com
- Fill out Google AMP Registration form for your sender email.
- If you use different email addresses in your Magento 2 (Admin > Stores > Settings > Configuration > General > Store Email Addresses) for General Contacts, Sales, Support, etc, you must repeat steps 1-7 for each email sender. So for example, you use 3 different emails at your Magento Store: support@yourdomain.com, sales@yourdomain.com and info@yourdomain.com. In that case you must go through steps 1-7 of this guide for each of these 3 emails.
- You should hear from Google in 1-2 weeks.
- After your Google application is approved, you can enable all AMP Emails in your store. Just go to “Magento Admin > Marketing > Communications > Email Templates” and enable AMP version of each template separately.
- Congrats! You can now send AMP Emails to your clients!
Was this article helpful?
