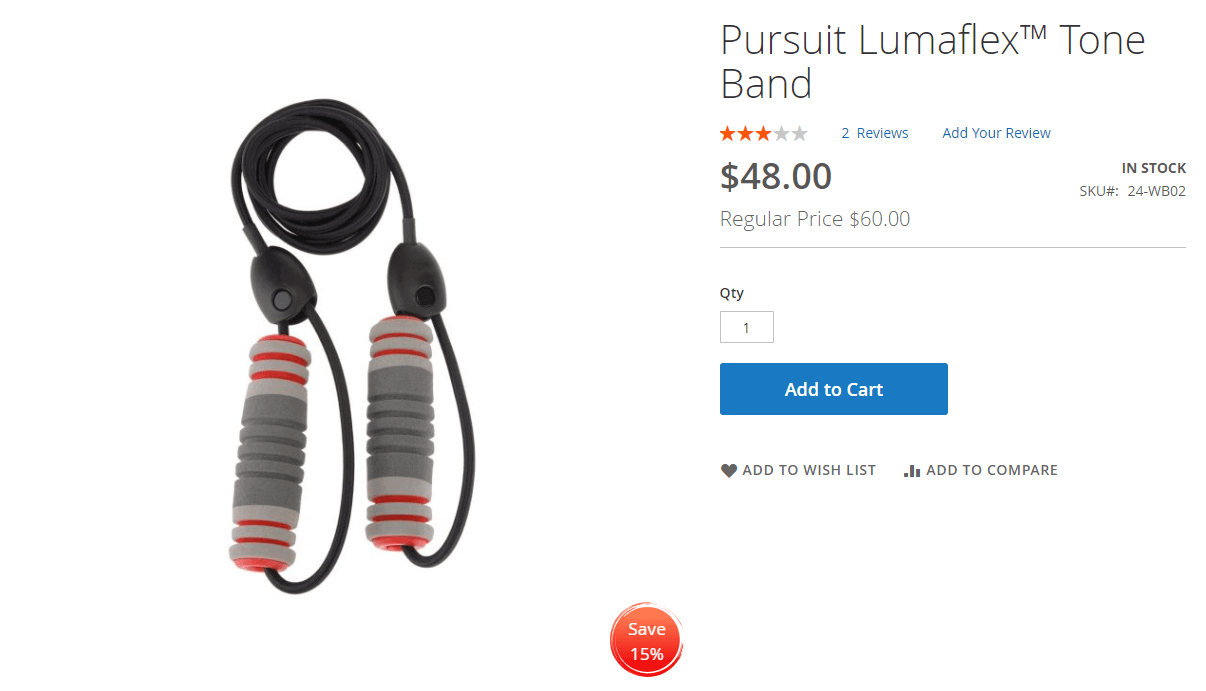
The main task of each store (whether online or offline) is to attract and retain the possible customer’s attention. The store owners spend tons of hours and money to find the best way to reach this goal. However, it is not a secret that the best way to keep the customer’s attention is a discount. Once the user notices the lower price of the wanted product, he becomes your potential customer.
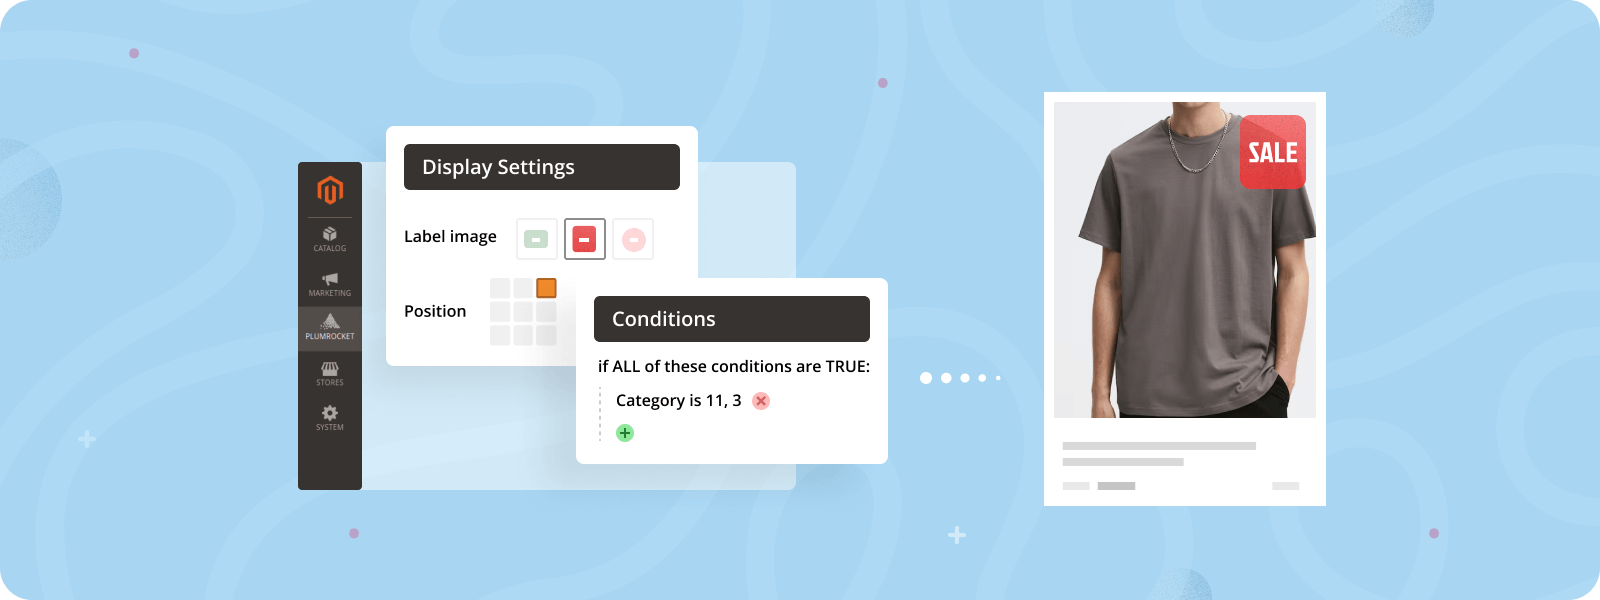
But how can you ensure the user notices your sale offer? In this article, we will tell you more about Sale Labels in Magento 2 that could be implemented with our Product Labels extension and will teach you how to use them based on catalog price rules.
How to Display Magento 2 Sale Label
1. Create and Configure Catalog Price Rule
First of all, you need to create a Magento 2 Catalog Price rule(s) to apply discounts on your products. If you have already created them, skip this step and proceed to creating a Sale label.
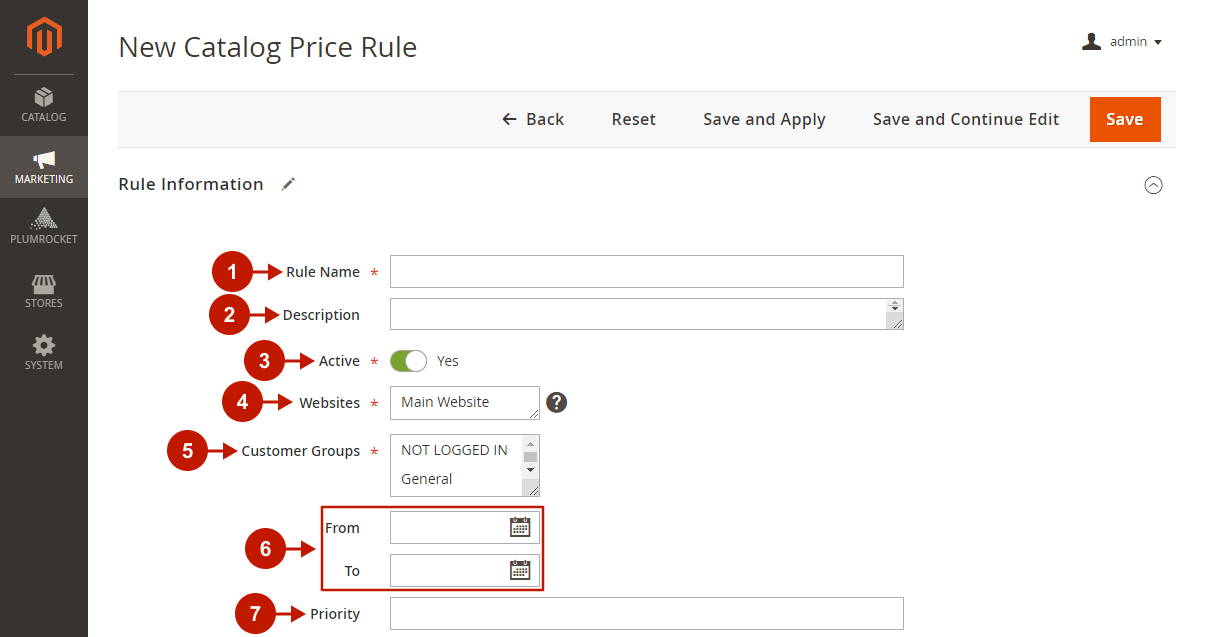
Magento 2 catalog price rules are the list of conditions that could be used to set discounts in your store based on the product’s attributes. To create a new catalog price rule, you should go to Marketing -> Promotions -> Catalog Price Rule and press the Add New Rule button. Here, you should fulfill the following:
Rule Information
Step-by-step guide:
- Enter the Rule name.
- Input a rule’s Description (optional).
- Set the Active configuration to Yes.
- Choose the Website where you would like to apply this rule.
- Choose which customer groups should apply the rule.
- Provide the From and To Dates to set the period when this rule should be active (optional).
- Set the rule’s Priority (optional).
Please note: If the same product is subject to multiple rules, Magento 2 will apply the rule with the highest priority for that product.
Conditions
In this section, you can set the parameters that define which product should be subject to this rule. You can also leave this section blank to apply the rule to all the products in your store.
Conditions could be created based on your product attributes. You can set multiple conditions and condition combinations to define a specific group of products. Here you can find an example of prepared conditions:
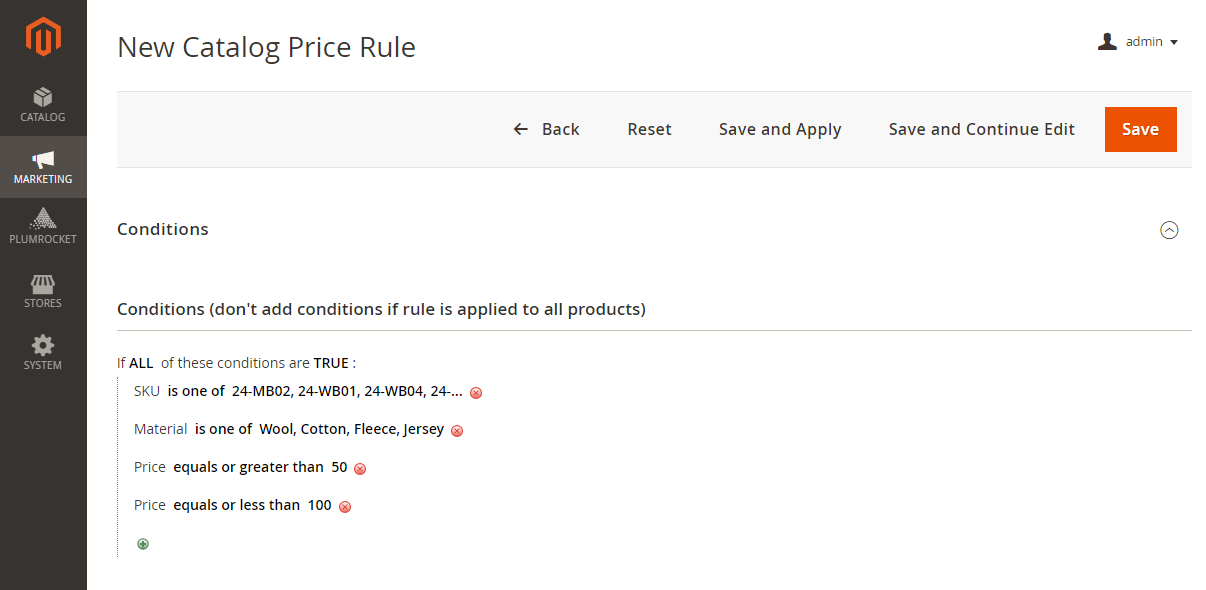
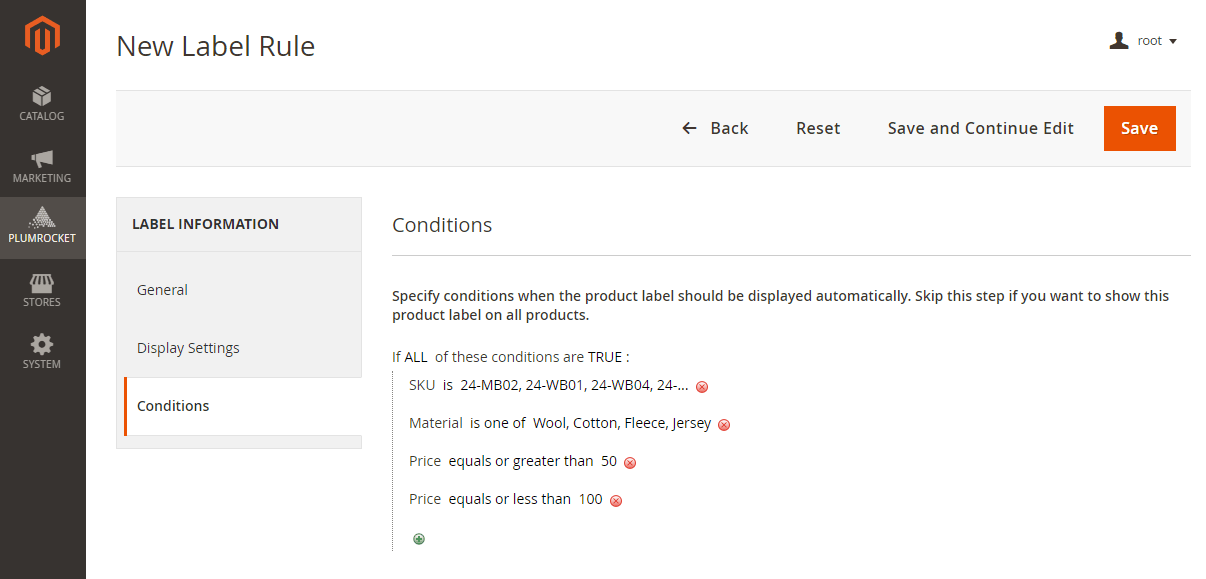
In this case, a rule will be applied to the product if its SKU is one of the mentioned, its Material is Wool, Cotton, Fleece, or Jersey, and its Price is between 50 and 100.
Important Information:
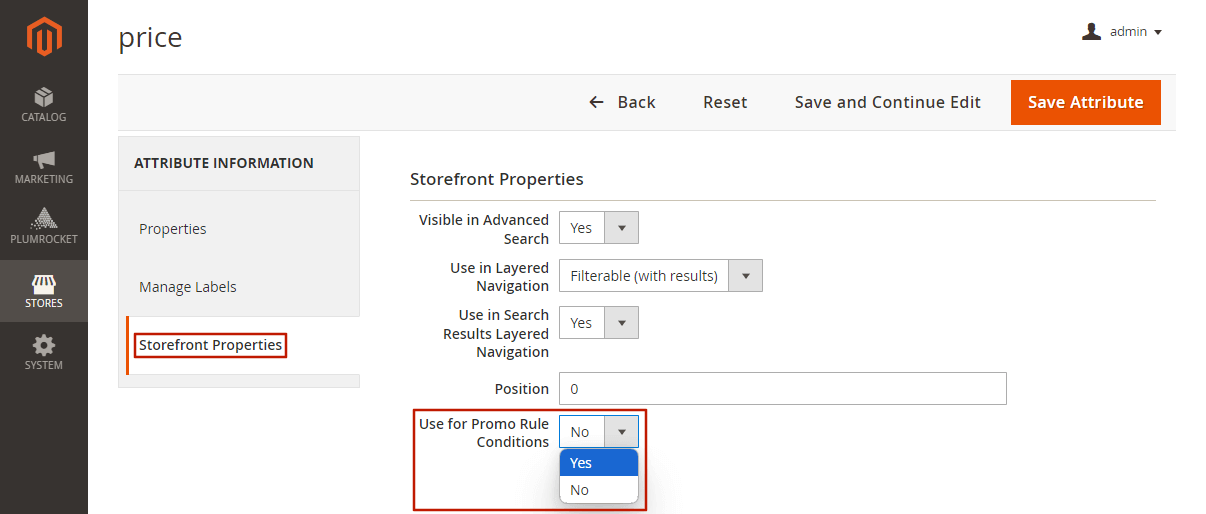
You may face an issue when some product attributes are missing in the Conditions list. In this case, you should check if the missing attribute is added to the catalog price rule. To do so, go to Stores -> Attributes -> Product, and click on the needed attribute in the table.
In the attributes configurations, go to the Storefront Properties tab, find the Use for Promo Rule Conditions setting, and set it to Yes.
Actions
The last section you should fulfill to make your new rule work is Actions. Here, you can find the following configurations:
- “Apply”: Choose the type of discount you would like to implement.
- “Discount Amount”: You can set the amount of the discount for this rule.
- “Discard Subsequent Rules”: This configuration defines whether any other rules can be applied to the product if this rule already works for it.
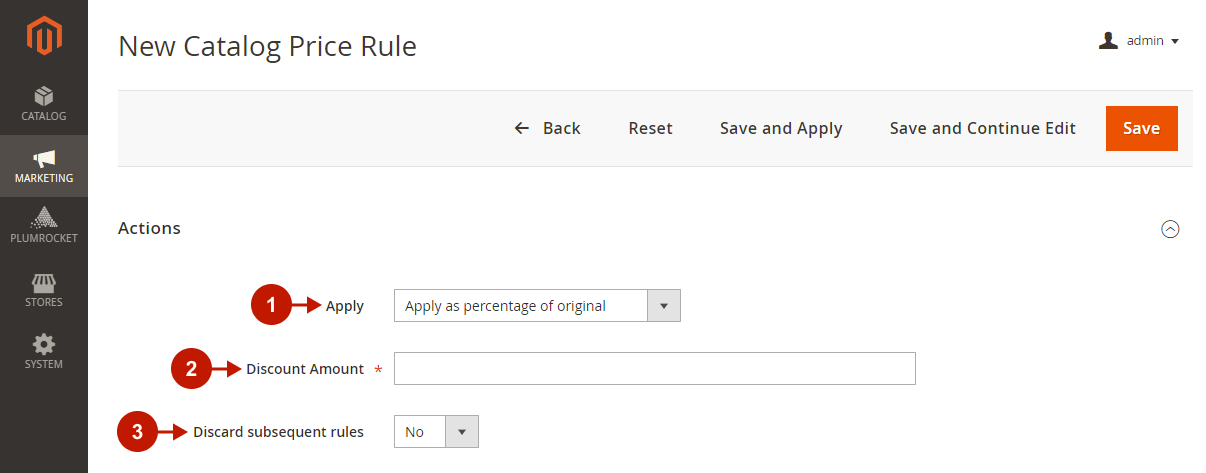
After completing all the configuration steps described above, press Save and Apply button to make a new rule active.
2. Create a Magento 2 Sale Label
After you created and configured your Catalog Price Rule, you can use our Magento 2 Product Labels extension to display the Sale label.
After installing it, go to Plumrocket -> Product Labels -> Managel Labels and press the Add Label button.
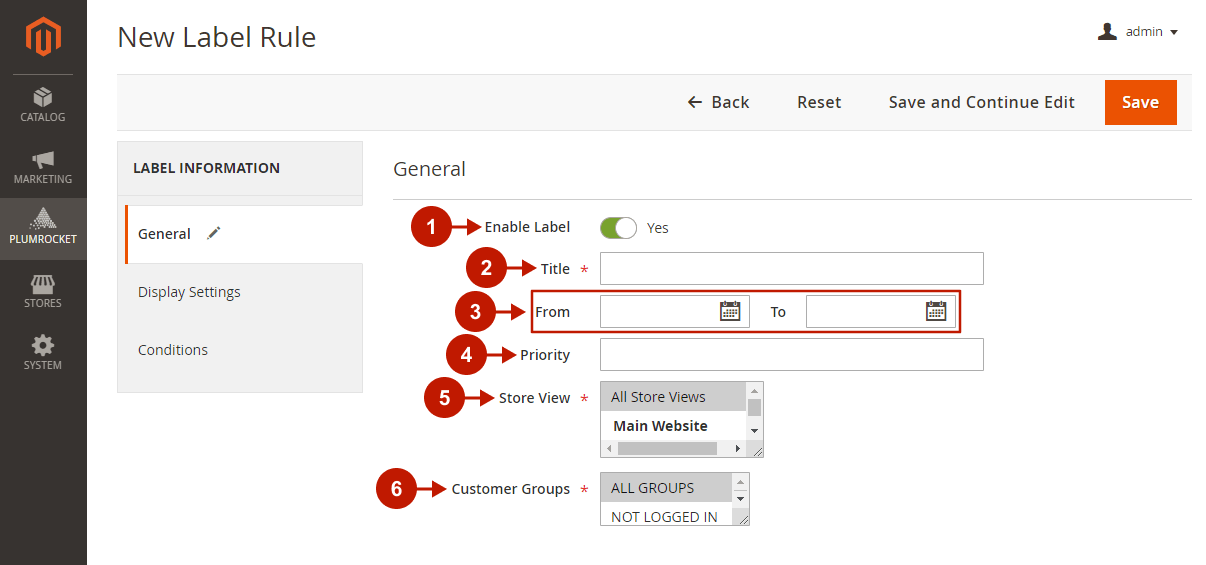
In General configurations of the product label, you should fulfill the following:
Step-by-step guide:
- Set the Enable Label configuration to Yes.
- Type the sale label name in the Title configuration.
- Set the From and To Dates to set the period when this label should be active (optional).
- Set the label’s Priority (optional).
- Choose the Store View in which the label should be applied.
- Choose the Customer Groups for which the label should be visible.
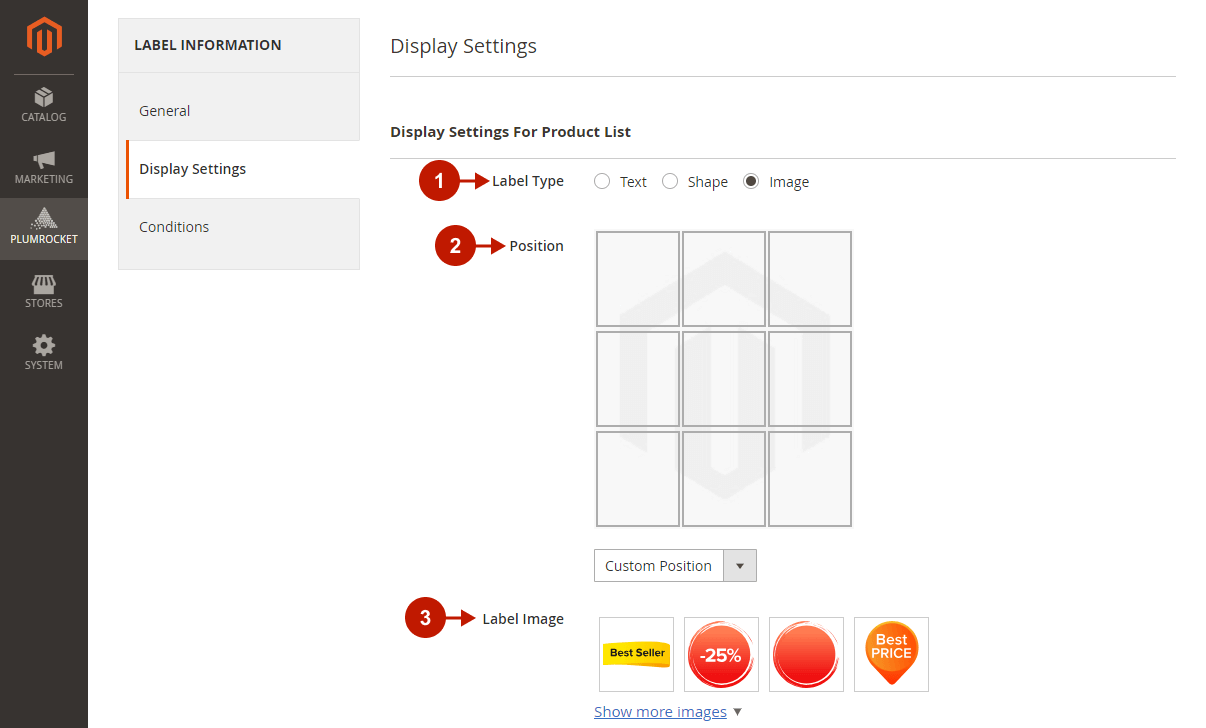
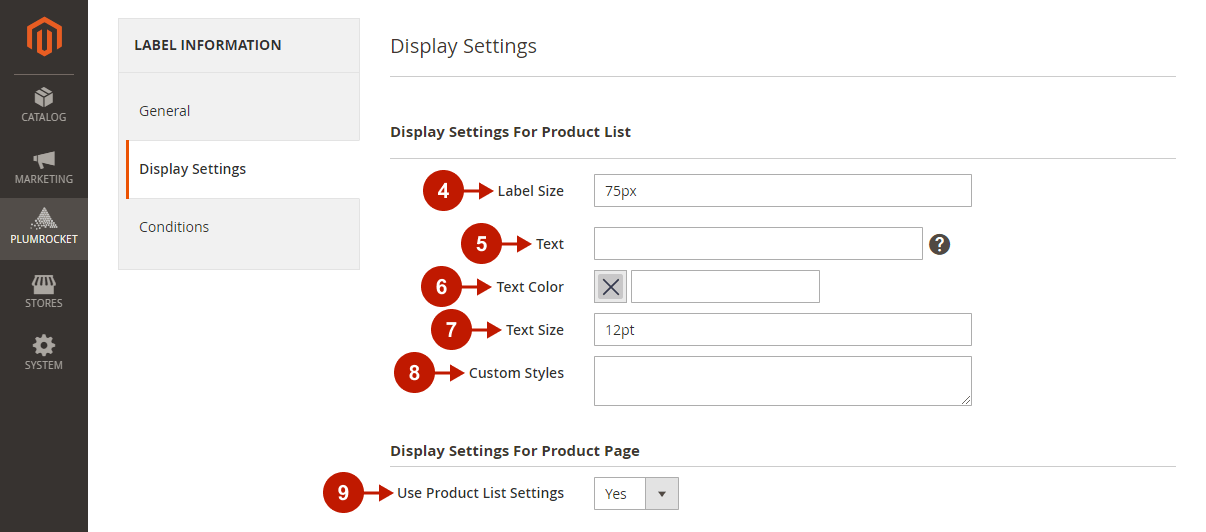
In the Display Settings tab, you should configure the visual of the sale label.
Step-by-step guide:
- Choose the Label Type.
- Choose the Position of the label.
- Choose the Label Image from the list or upload your custom one.
- Provide the Label Size.
- Type the Text of the label:
- You can type static text.
- You can use variables provided by our extension. In case of Sale label, we believe the most suitable ones are
{{discount_amount}}and{{discount_percent}}that could display the sale information. - HTML tags are also allowed here. The list of the tags:
b,i,cite,code,em,dfn,ins,mark,q,pre,s,span,small,strong,sub,sup,u,br.
- Select or type the Text Color.
- Enter the Text Size.
- Define Custom Styles (CSS) if needed.
- If you want to use the fulfilled settings on the Product Page, set the Use Product List Settings configuration to Yes.
3. Configure Magento 2 Sale Label Conditions
At this step, you have configured the product label, but it will be displayed for all the products. You must configure the label conditions to display the label only for some specific products.
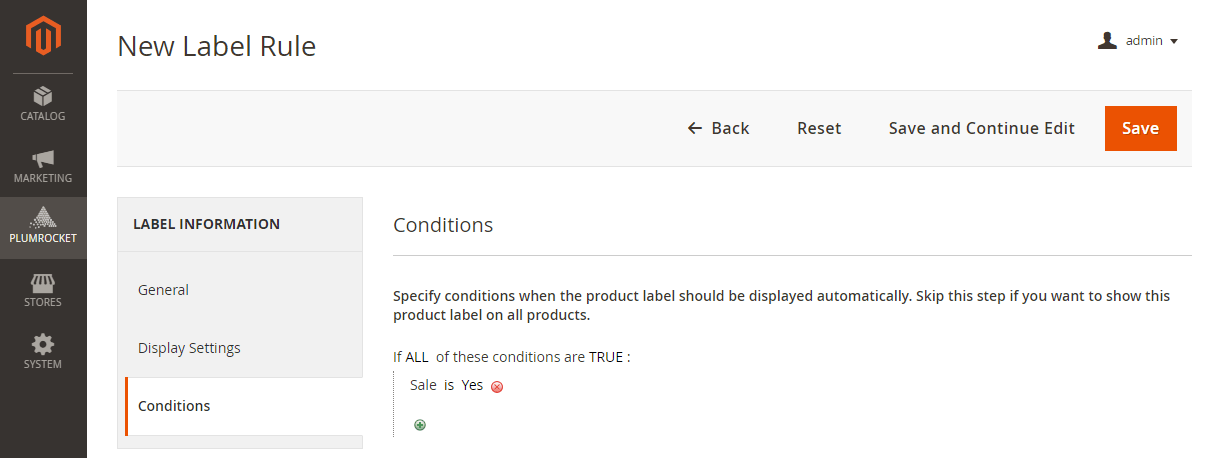
If you want the Sale label to be displayed for the products that are on Sale at the moment, you should select the Sale attribute and set it to Yes.
If you have a few active sales and would like to display labels for a specific one, you should duplicate the Catalog Price Rule’s conditions for the required sale. Taking into account the rule we described in this article, the Magento 2 Sale Label conditions would be as follows:
As a result, the Sale label would be displayed on the products that are currently on sale:
